Chapter 1
More Lost Ruins Revenge on Atlantis
This is our full walkthrough for chapter 1 of Lost Ruins Revenge on Atlantis. A new Adventure Escape mystery game from Haiku.
The game begins with some opening scenes to introduce the team of Professor Burns, Xochi and Peter. You travel to the recently uncovered lost city of Zerzura.
When you arrive there are mercenaries searching for treasure. You need to get rid of them.
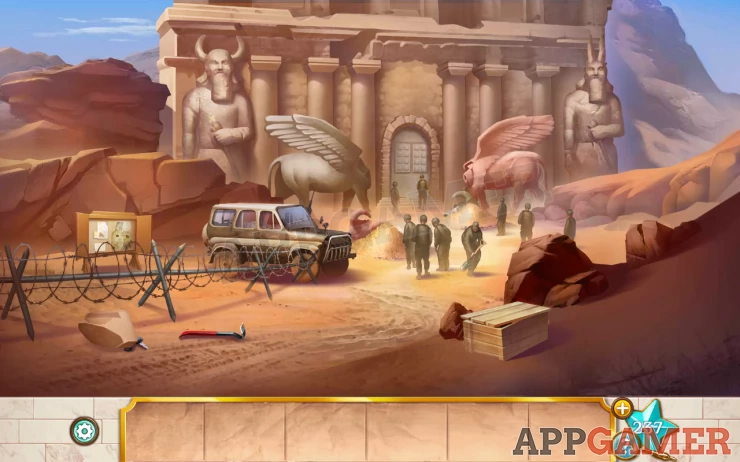
Star: on the statue on the left.
First, collect the crowbar from the ground.
You can then use this on the rock to the left to collect some car keys and then also on the crate on the right to find some wire cutters.
Next, use the wire cutters on the barbed wire fence on the left. This makes a hole.
Tap to view the notice board on the left.
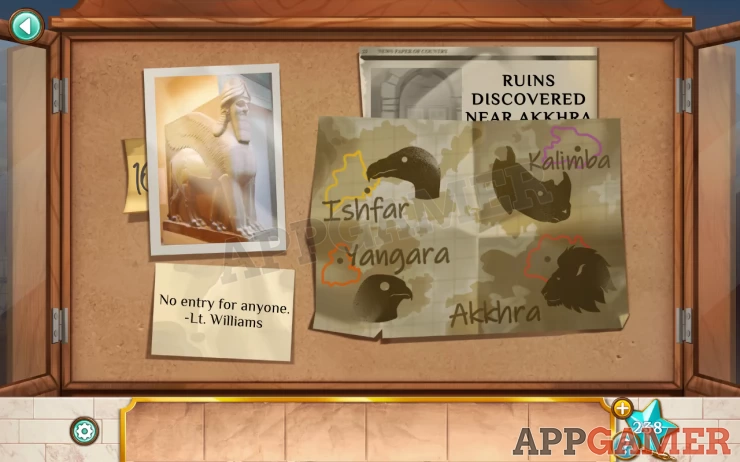
Drag the papers around to find a clue,and take note of the other items on the board.
Show
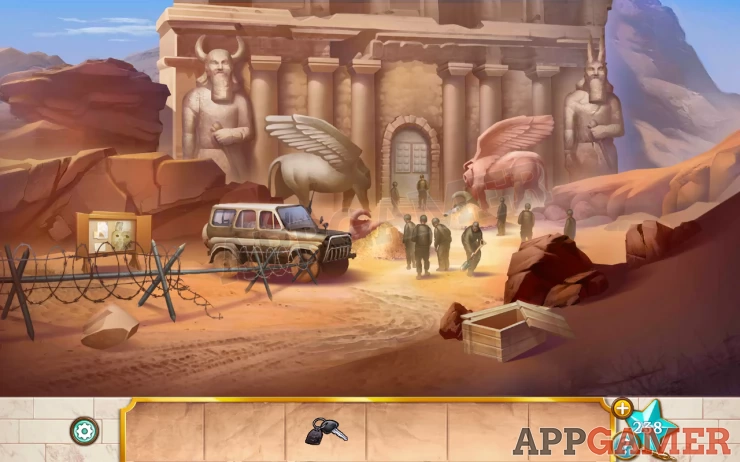
Now use the car keys to unlock the car and go inside.
Tap to move the lion toy and collect a small key. Then use this to open the glove compartment and look at the note inside.
Show
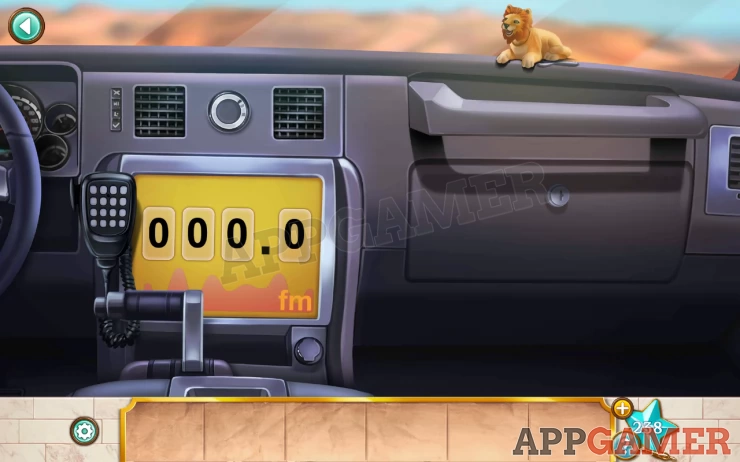
Now to call the soldiers.
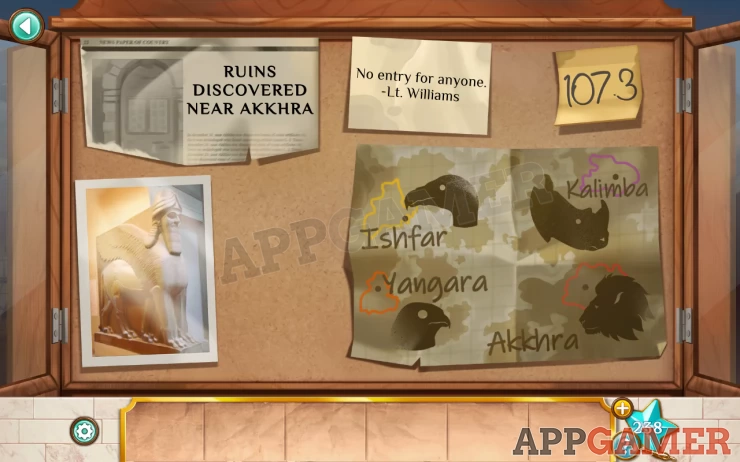
Change the radio frequency to the one in the clue. 107.3Show
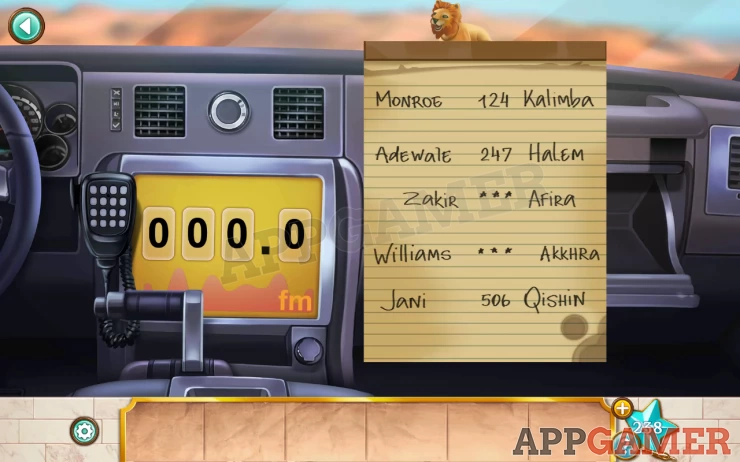
You now need to correctly answer questions. Use the clues found so far.
Solutions:
Who's Calling? Williams (Lt. Williams from the board)Show
I need verification: What’s your rank? Lieutenant (as above)Show
And what's out group's call sign? Lion (On the note Williams is assigned to Akkhra. On the map the symbol for Akkhra is a lion head).Show
What's our group's ID number? You need to work out the fourth number on the note that is not shown. You can get this from the others. 124 > 247 > ? > ? > 506. the first didit increases by 1 each time, the second by 2 and the third by 3. This gives us 483Show
Once done you will ask the soldiers to evacuate immediately.
Now they are gone you can explore the area.
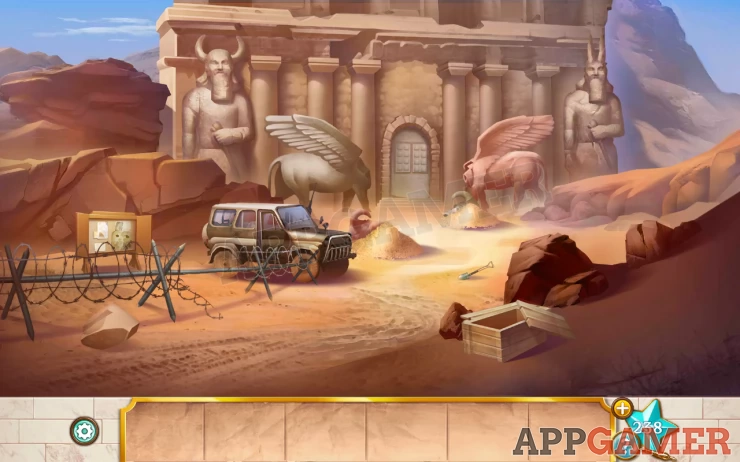
First collect the shovel. Then use it to dig up the 2 mounds of sand in front of the entrance. You find 2 stone heads.
Now tap the entrance door to see a lock puzzle.
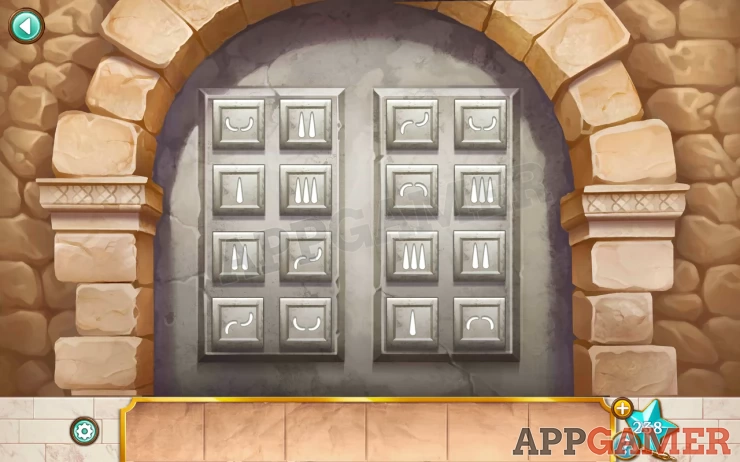
Hint: the stone heads ar the clue.
Solution: look at the shape of the horns on the stone heads and realise the positions they would be in if they were in their correct original places on the statue bodies. Now use the shapes of the 4 sets of horns (all 4 statues) and set these on the lock.Show
Code: on the 4 columns set the 1st, 3rd, 2nd, 3rdShow
Go inside to head to the heart of the city.
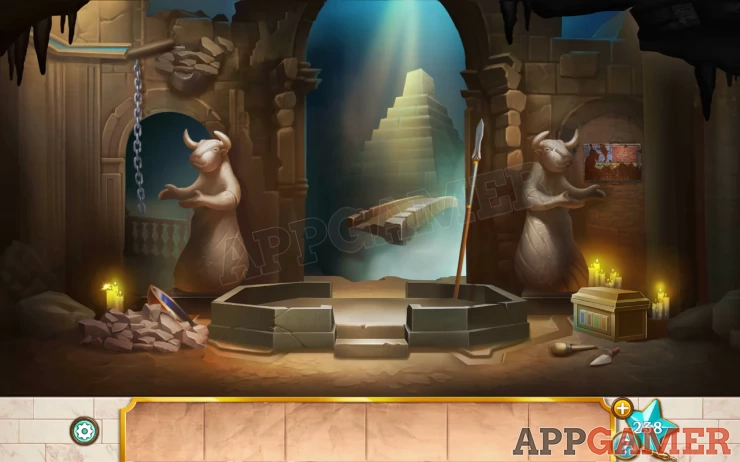
Star: On the candle bottom left.
From the lower right collect a Trowel and a brush. Then also take the spear near the center.
Use the brush on the small colored mosaic on the right to clean it, then you can view it for a clue.
Show

Now view the box on the floor at the foot of the right statue.
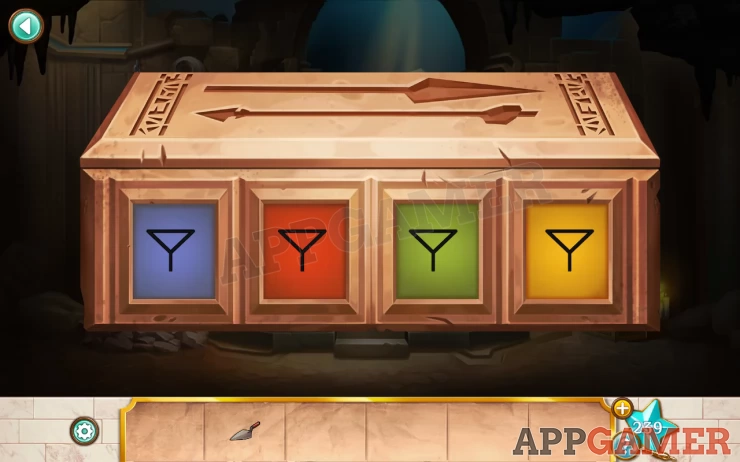
Hint: Use the mosaic cue to open it.
Solution: Count the arrows and spears on each colored section of the mosaic. 4 Blue, 3 Red, 1 Green, 3 Yellow.Show
Code: The box has symbols instead of numbers, the first is 1 so tap as needed to see the code: 4313Show
Collect a bowl.
Now use the trowel on the rubble below the left statue. You collect a second bowl.
Use the spear on the loose rocks above the left statue.
Add 1 bowl to the hands of the status on the left. Then tap the chain to pull it. The bowl will fill with water.
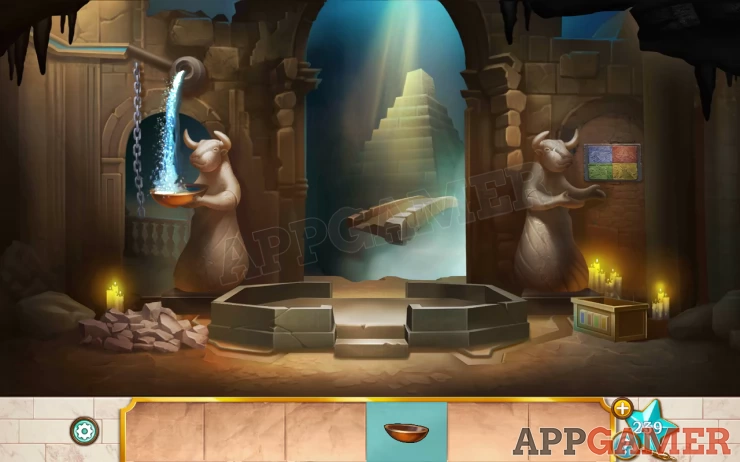
Collect this bowl and place it on the hand of the right statue.
Then put the empty bowl on the left and fill it again to activate both statues.
This activates a new puzzle with 4 tablets in the center.
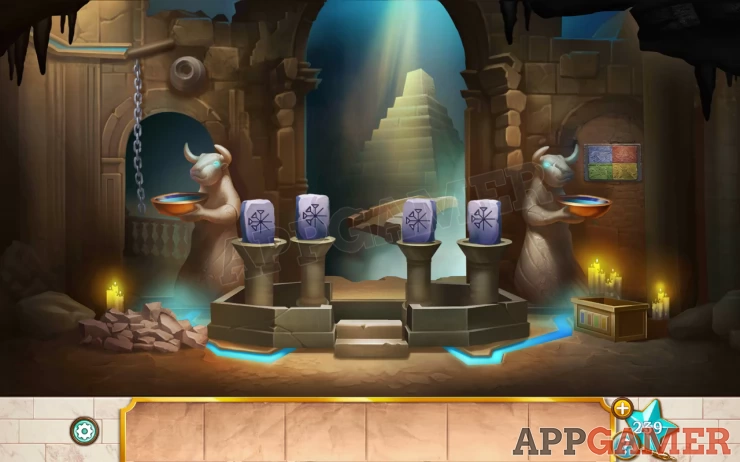
Above the right status is a block that slightly sticks out. Tap this button to view a sequence of symbols that appear in at the top of the central pyramid structure.
Hint: count these for the clue.
Solution: 4 symbols will be shown and each will flash a number of times. Count these to see that the first symbol flashes 3 times, the second symbol flashes 2 times, the third flashes 1 time and the fourth symbol flashes 4 times. Then tap the tablets to set the symbols in the order 1, 2, 3 4 from left to right.Show
Code: Show

You now need to solve a bridge network puzzle to cross over.
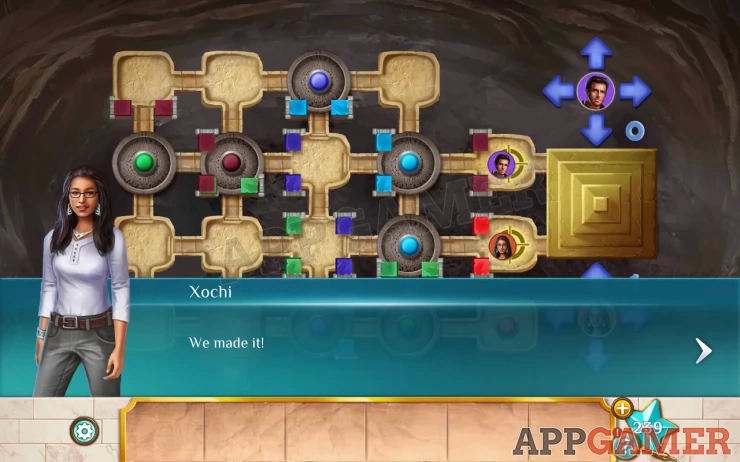
Hint: you need to move 2 characters using the arrows on the right. They each have 9 moves only and they cannot move to the same platform as each other. You need to reach colored buttons to open the matching colored gates.
You reach the sacred room, with another bottomless pit.
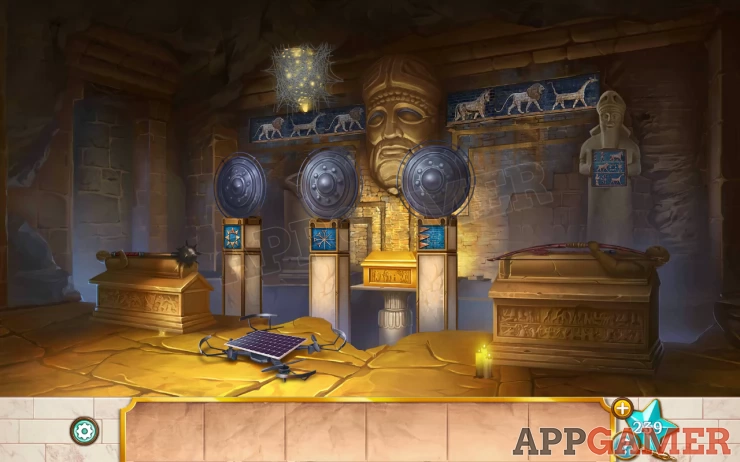
Star: by the stone bottom left.
Collect a bow and arrow from the right and a Mace from the left.
Use the bow and arrow on the candles on the lower right to light the arrow. Bow with flaming arrow.
Then use this on the cobwebs covering the light on the top left.
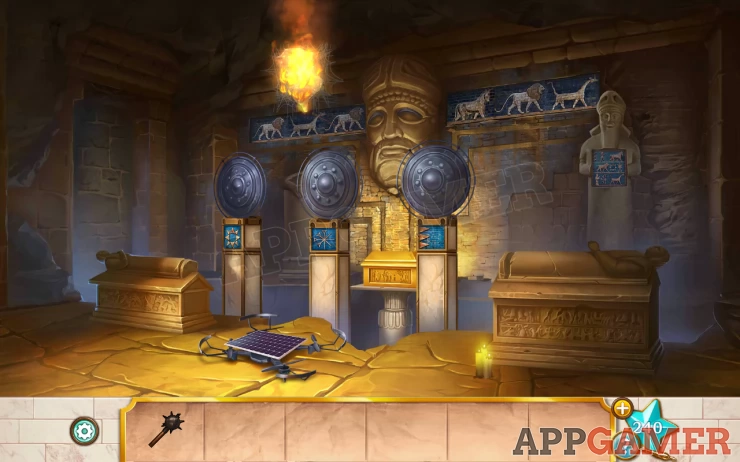
This lets in the sunlight and will charge the drone. Collect it.
There are 3 round gongs on the plinths that can be hit with the mace. Each has a symbol below it.
Hint: on the right is a statue. Tap to view the mosaic on it for a clue. Then on the wall above see the line of animals.
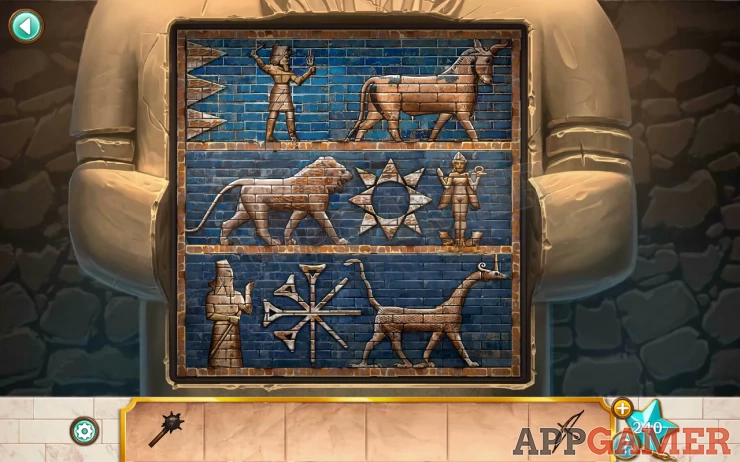
Solution: the statue mosiac associates the 3 symbols with 3 animals. Follow the line of 6 animals on the wall and convert these to the symbols using the statue, then ring the matching gongs in that order.Show
Code: Use the mace to tap on gongs: 2, 1, 3, 1, 2, 1Show
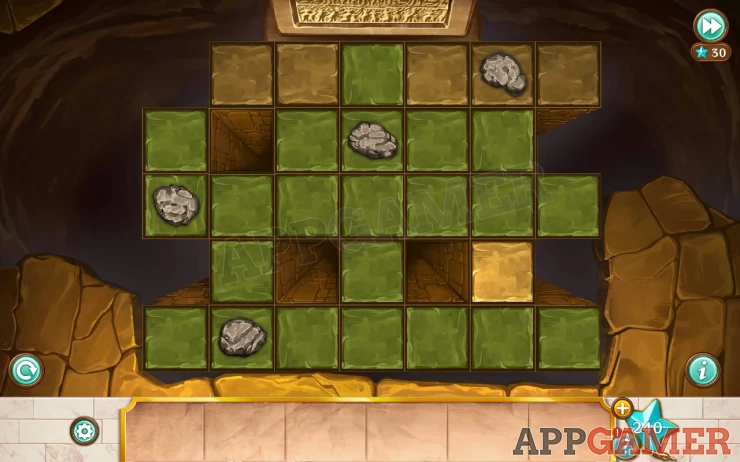
Next we have a trap floor to deal with. Use the drone on the floor to start the puzzle.
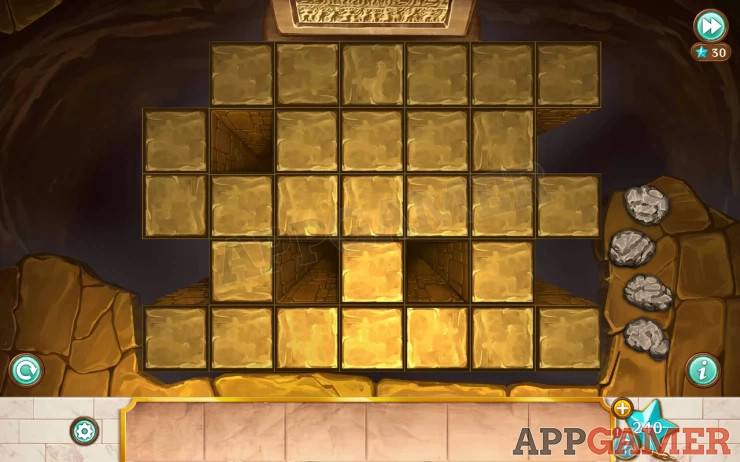
Hint: Place the rocks on the tiles so that all the tiles turn green. placing a rock will turn the row and column green, You have 4 rocks.
Solution: Show
You can now cross over to the sarcophagus, but the soldiers return.
Xochi and Peter are thrown into the pit and force the professor to open the sarcophagus.

This completes Chapter 1, move on to Chapter 2
We have questions and answers related to this topic which may also help you: Show all