Strange Case 2 - Chapter 2 Walkthrough
More Strange Case 2: Asylum Escape
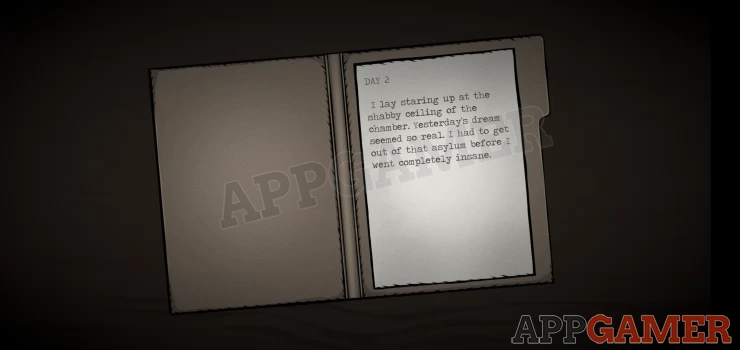
Welcome to our Strange Case 2: Asylum Escape Chapter 2 walkthrough.
In Chapter 1 you found a way out of your room and met with the Doctor, who gave you the key to the nightstand. Now after an unusual experience in the night you are back in your room under guard again.
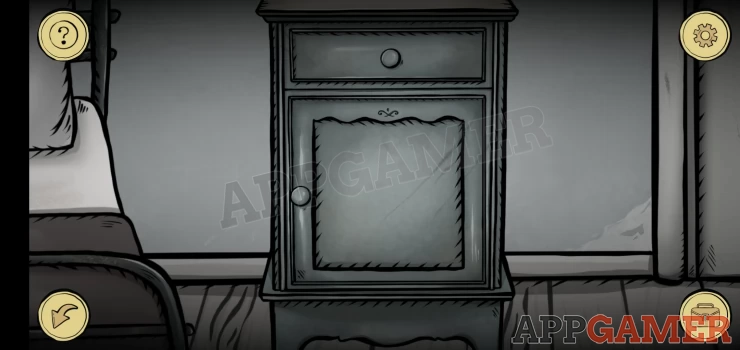
Select the key in your inventory and then use it on the night stand, you can then look in the top drawer. Collect the Coin and the Comb.
Next tap on the bed to view the end of it.
Select the coin in your inventory and then tap on the one of the screws at the end of the bar across the bed. This will unscrew it. You can then repeat this at the other end, but you will need to re-select the coin in your inventory again to do this.
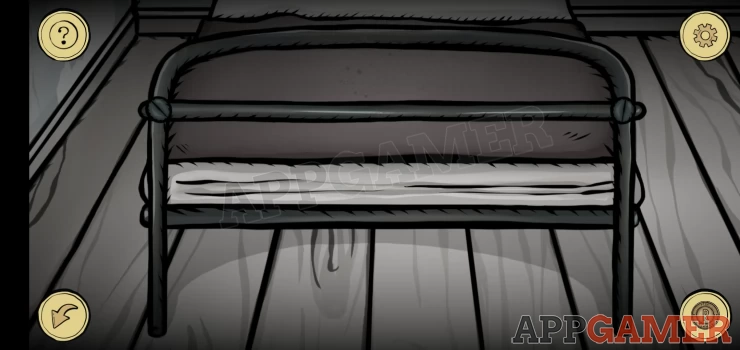
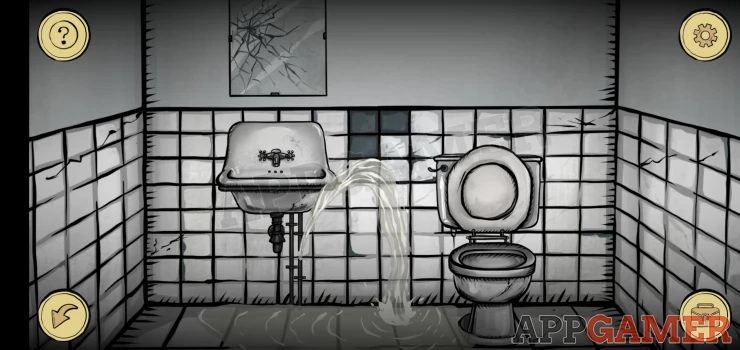
Once done you can collect the Pipe. Now turn and enter the bathroom. Then tap on the sink on the left to view the pipes below it.
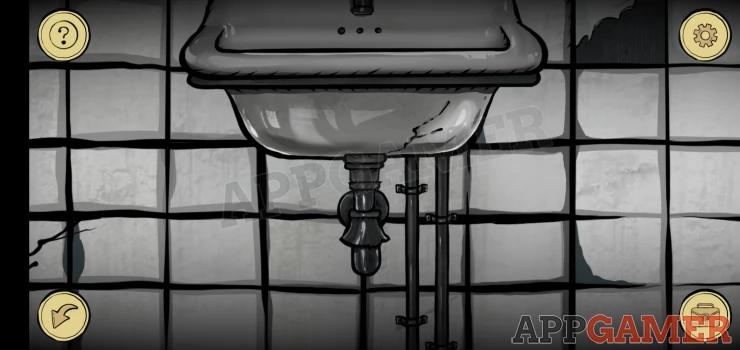
Select the pipe in your inventory and then tap on the 2 pipes on the lower right. This will let you break one of the pipes which will flood the bathroom.
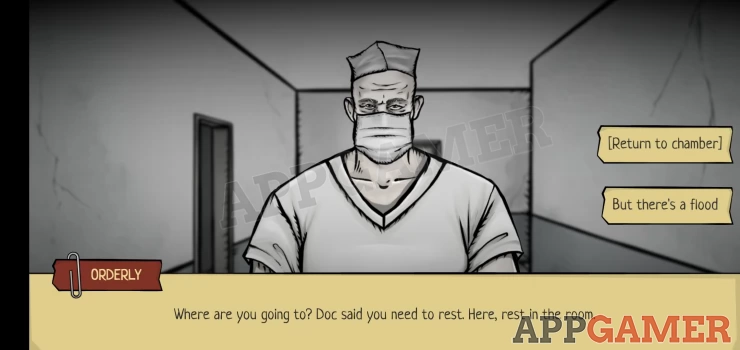
Head back to the main room and tap on the door to exit. When the Orderly stops you you will have a dialog option to tell them your room is flooded.
When he leaves you are free to explore the corridor again.
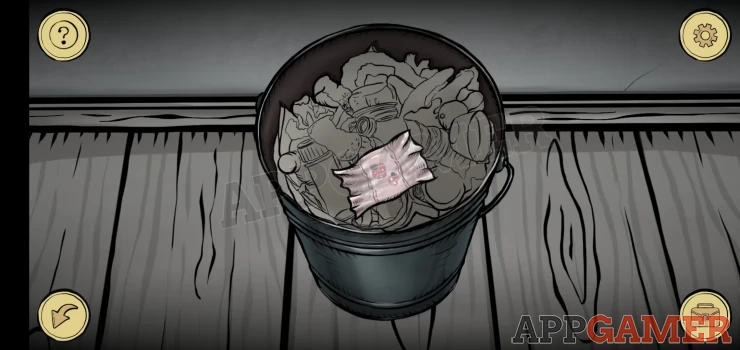
Tap on the waste bin by your door to look inside of it. you can then collect a Candy Wrap.
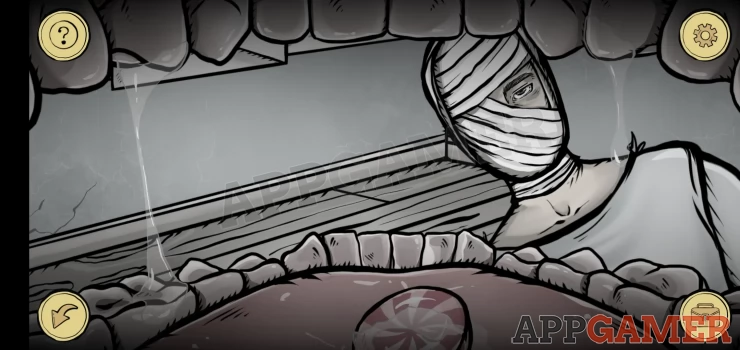
Now move to the right to see the Doctors door again. And the 'hidden' patient.
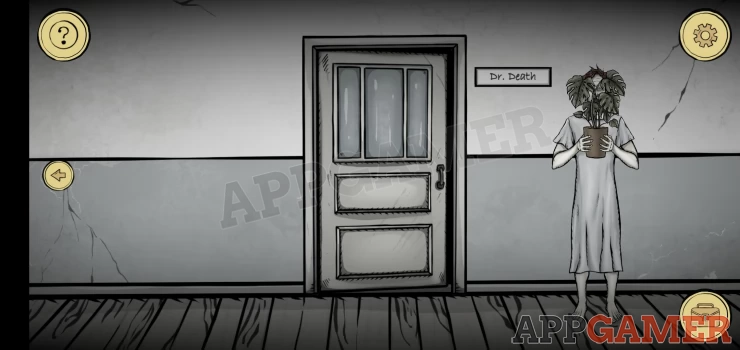
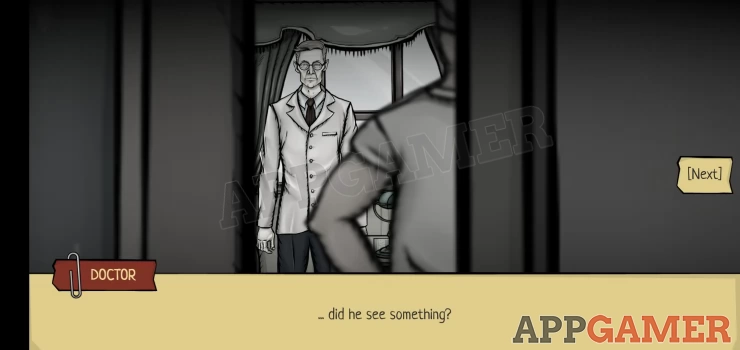
Tap on the door to spy on the conversation between the doctor and an orderly. Then after the door closes tap on the patient, who will scuttle off to the right.
Now move back to the left and then left again to the other end of the corridor, the patient is here now. Tap on him again and will move away.
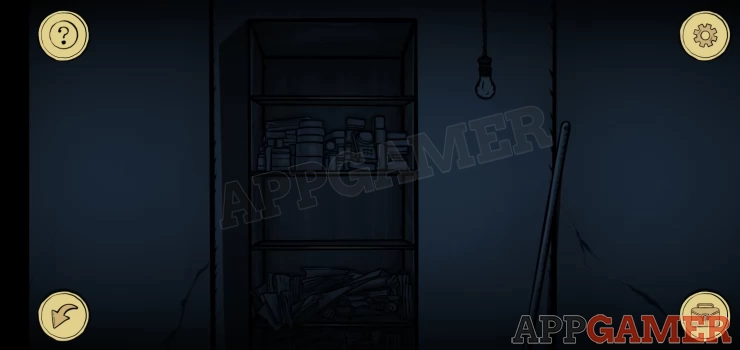
Tap the door on the left and you can enter a closet.
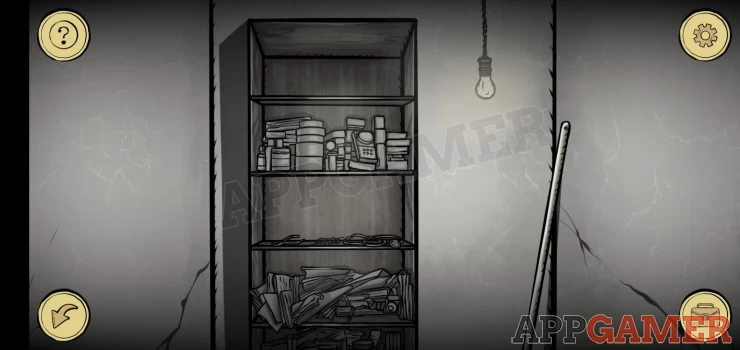
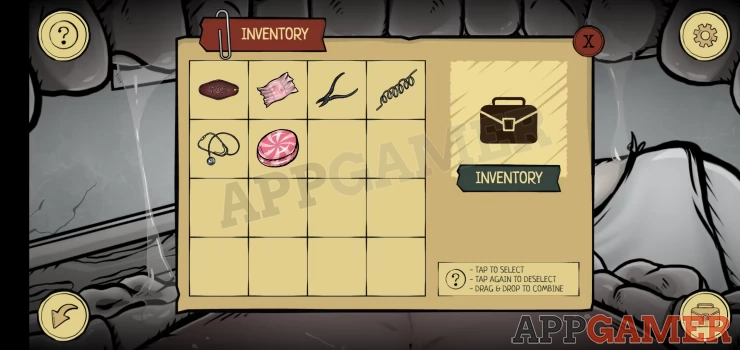
Tap on the shelves to view them closely and you can collect 'Pliers', a 'Spiral Tube' and a 'Stethoscope'.

Now back out of the room and move back to the right to the 2 room doors (rooms 1 and 2) and now tap on the door 2 to enter another patients room. This poor guy is in a wheelchair and has no hair.
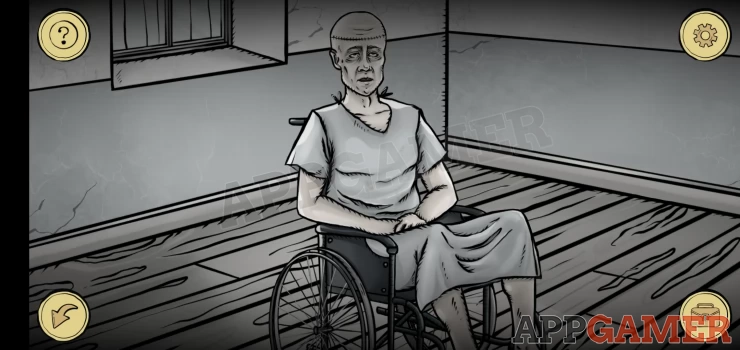
Tap to view him and then select the comb in your inventory and give it to him. He will begin combing his head and open his mouth.
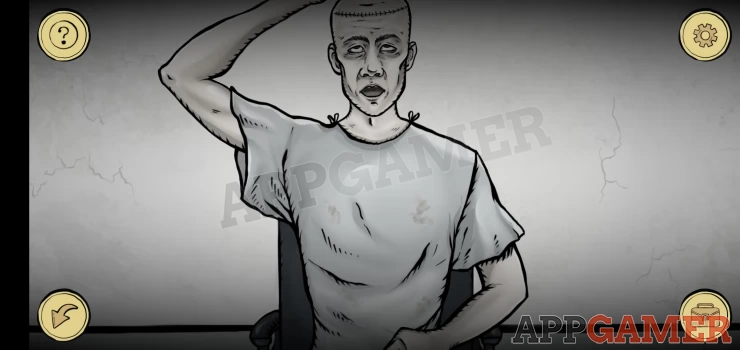
Tap on the face to look inside the mouth, there is a candy inside, you can tap to collect this.
Noe open your inventory and drag the candy item to the wrapper, this will combine the 2 items and you will have a Strawberry Candy.
Leave the room and move again to the right to the Doctors office door. Our hidden friend is here again, tap on him and this time you can talk to him.
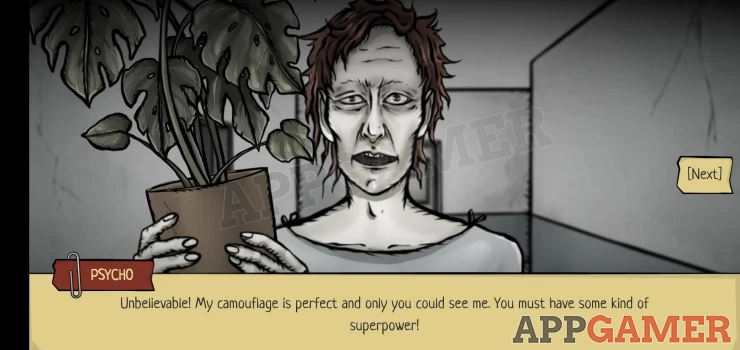
When he asks for help, make sure to answers with 'How can I help you?'. He will ask you for strawberries with cream, and then offer you a key to open all of the doors.
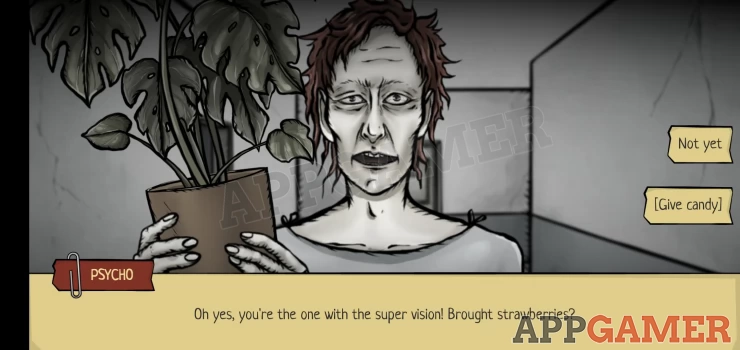
After this conversation, tap on him again, when he asks again for the strawberries you will have the option to [Give Candy]. Select this and you will get a Paper clip in return.
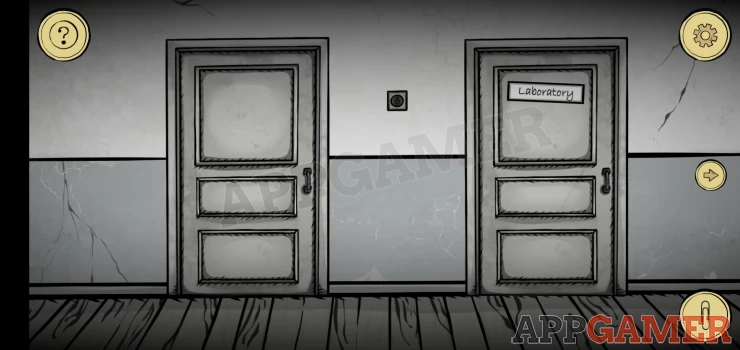
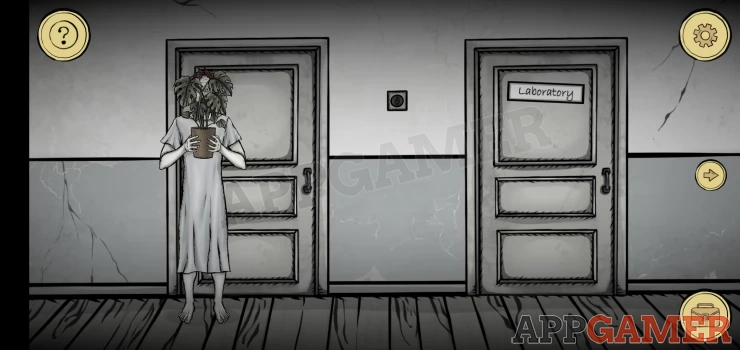
Move back to the left end of the corridor to see the door marked 'Laboratory'. You can now use the clip on this door to unlock it and go in.
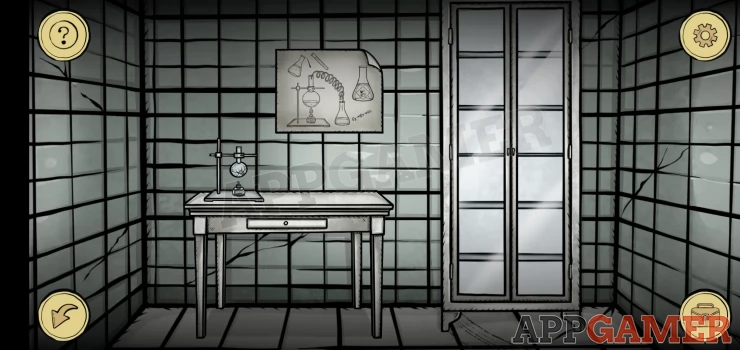
First tap on the desk drawer to open this and collect some matches from inside.
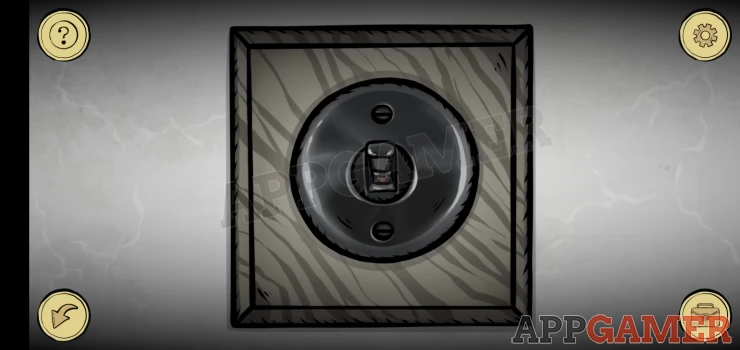
Now back out into the corridor, then tap on the switch that is between the laboratory door and the cupboard door to view it and then again to turn the switch off.
Now go into the closet room again. The light is now off.
You need to collect the light bulb.To do this first use the matches on the lamp to light one and light up the room, then quickly select the pliers in your inventory and use these on the light bulb as well, you will collect the Lamp.

Now return to the Laboratory room. Tap on the tall cupboard on the right to look inside.
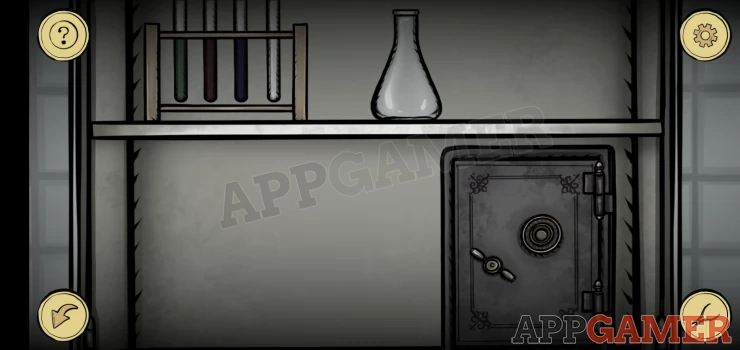
Collect the flask from the top shelf and then tap on the rack of tubes to start a puzzle game.
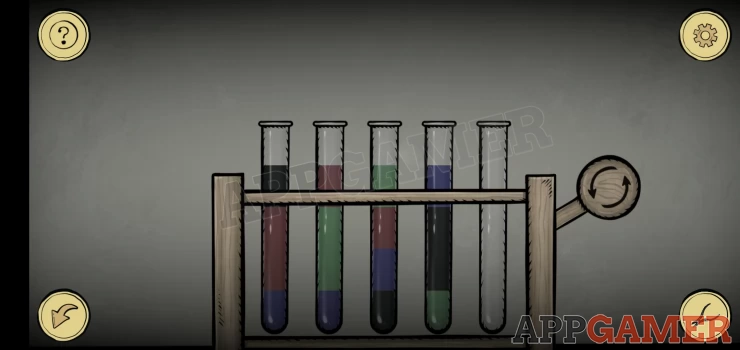
Tube Color Sort Puzzle
- This is a simple color sorting puzzle.
- Tap a tube to select it and then another to pour into, this will move the top color of the first tube over to the second one.
- You need to sort the colored liquid from all of the tubes so that you have 4 tubes with a single color in each.
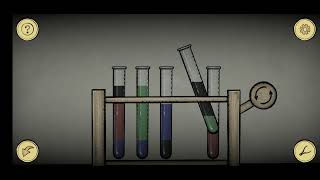
- You can watch the video below for help.
Once completed you can collect the tube of yellow Reagent.
Now view the safe on the right. Then use the stethoscope on it. You will see a line at the top that will register sound.
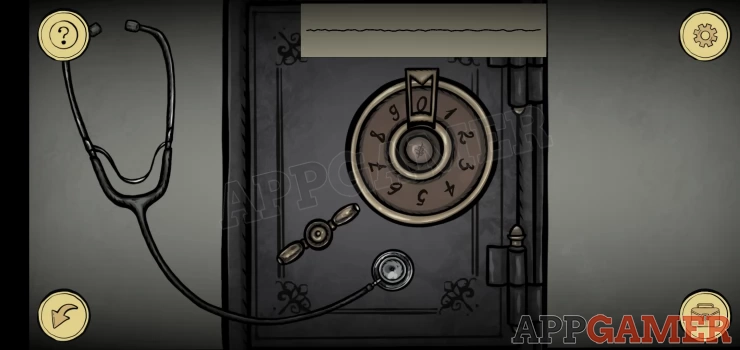
Unlock the Safe
- Turn the dial until you see the line jump to indicate that you have found the right number.
- After finding a number reverse the direction and then look for the next.
- After entering a 4 digit code you can tap the handle on the lower left to open the door.
Code: 3862Show
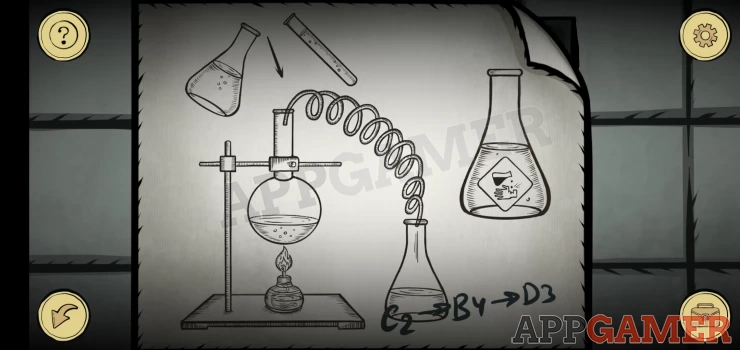
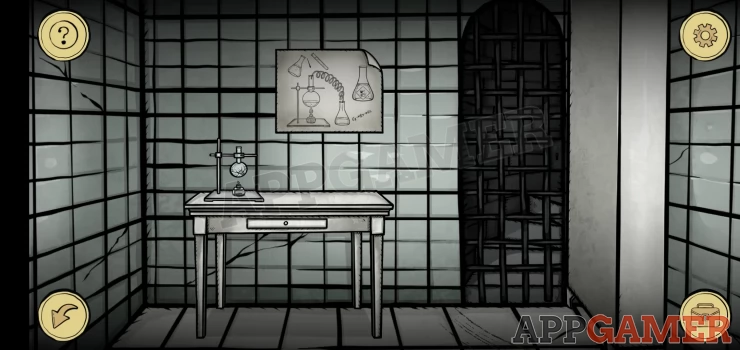
Collect a flask of purple Reagent from inside the safe. Now back out of the cabinet and view the poster above the table to see a clue. This is a diagram of some equipment to make Acid and also pay attention to the writing below.
Now view the equipment that is on the table.
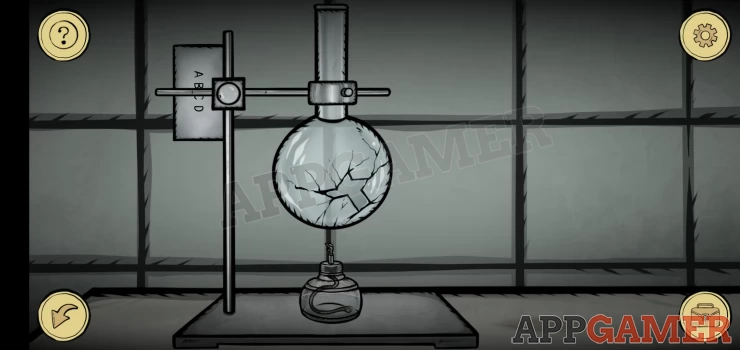
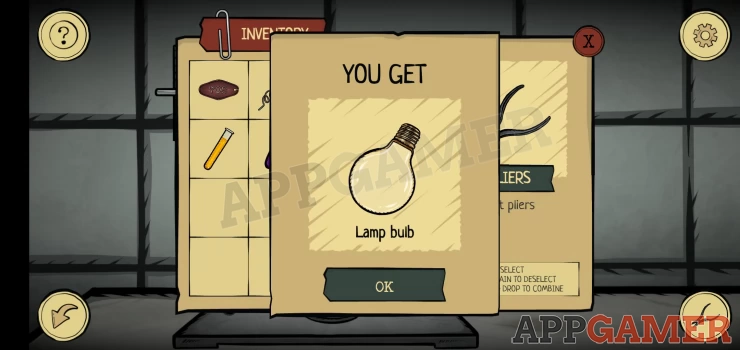
Tap the broken round bottomed flask to remove it, and then open your inventory and drag the Pliers to the Lamp to combine them. You will get a Lamp Bulb.
Select the lamp bulb and use it on the equipment stand to place it. Then also add the Flask and the spiral tube to complete the set up.
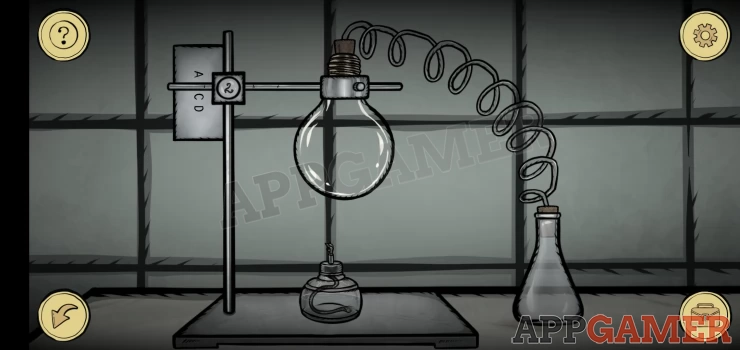
Next add the 2 reagent liquids to the bulb and then use the matches to light the burner.

Now you can notice that on the stand on the top left is a scale of letters: A B C D. You can also drag the arm left and right to positions that range from 1 to 4. This is a puzzle.
Solution: Follow the instructions on the poster above to place the flask in positions C2, then B4 and finally D3.Show
Once done you will be able to collect the flask with green Acid. Next view the poster again and tap on the top right corner to look behind it and find a puzzle.
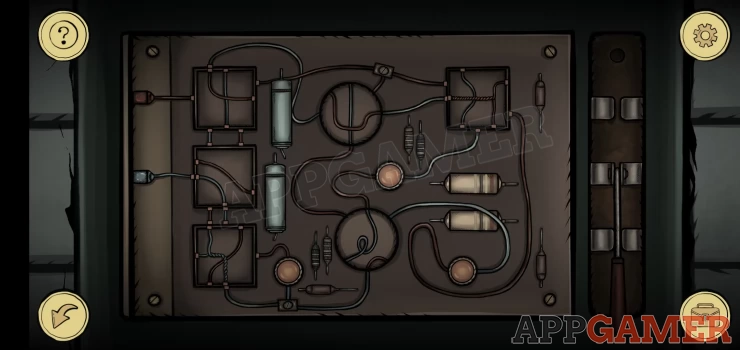
Electric Circuit Puzzle
- For this puzzle you need to move blocks around or rotate them to complete the circuit.
- The square blocks can be swapped with each other.
- The round blocks can be rotated to line up the wires.
- Then you have 3 green lights on the board you can tap the switch on the right
- Check the solution below
Solution: Show

After tapping the switch on the right, back out of the puzzle to see that a gate has been revealed on the right.
Tap to view the lock, you do not have a key but you can use the acid that you have made on the lock to open the gate. Go through to a secret room.
Secret Room
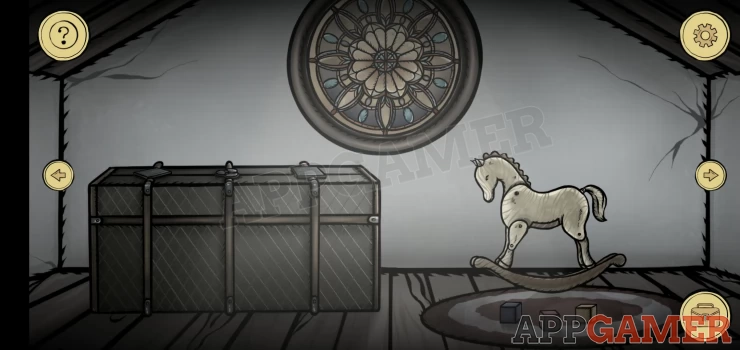
First tap on the blocks on the floor below the rocking horse. This is a puzzle.
Toy soldier blocks Puzzle
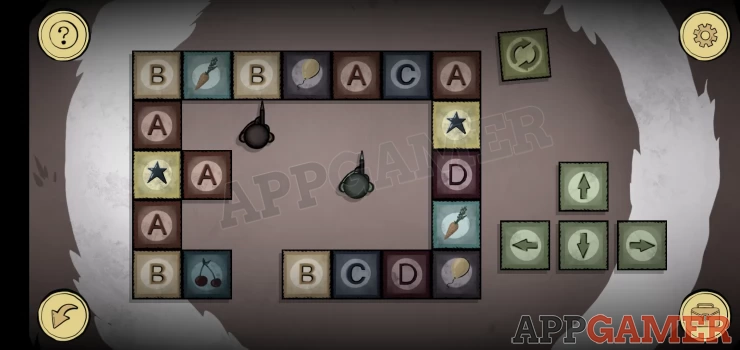
- There are 2 toy soldiers on the board, a dark one and a green one.
- Use the arrow buttons to move them around the board.
- They will both move together, and will move as far as they can in the direction chosen.
- The aim is to move the green soldier to the exit gap. The dark soldier cannot exit.
- When you complete the first level there are 2 more to do.
- Watch the video below for help.

Once complete you can collect a Toy Soldier.
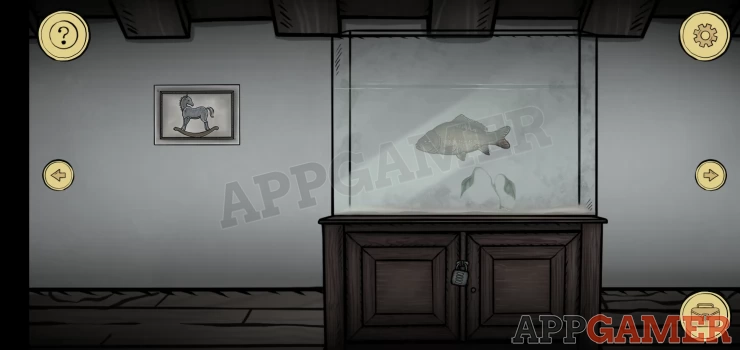
Turn to the right to see a fish in a tank, Note the picture of the rocking horse on the wall. View the picture and notice the yellow tail.
Now turn right again and you will see another rocking horse picture, this one has a yellow leg.
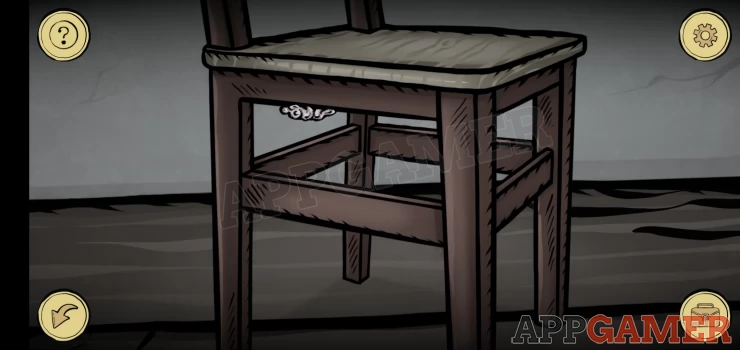
Turn right once more to see a desk and chair.
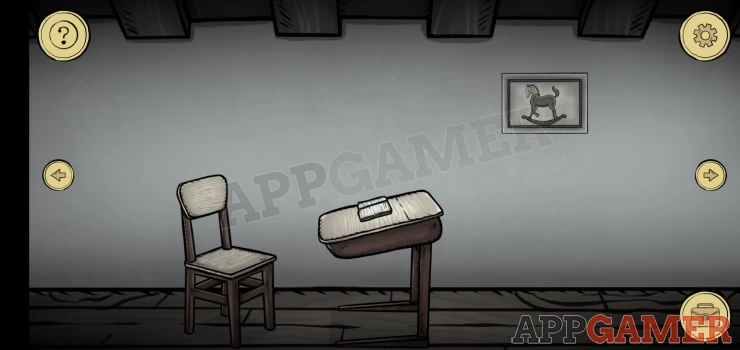
First tap on the chair and you will be able to collect from under it a 'Sticky muck'.
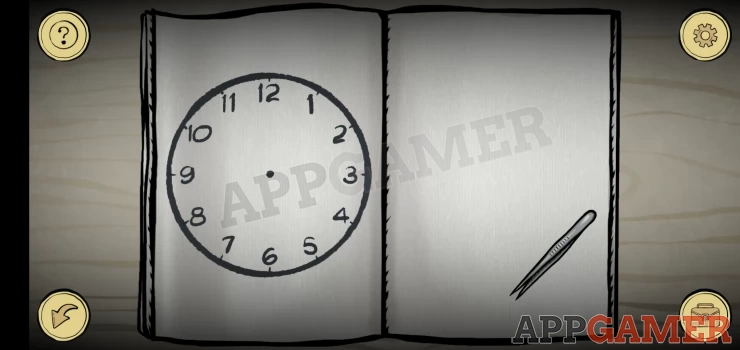
Next view the desk to see a book with a clock face and some tweezers, collect the Tweezers and then place the toy soldier on the clock face drawing. The hands on the soldier will mark out a time.
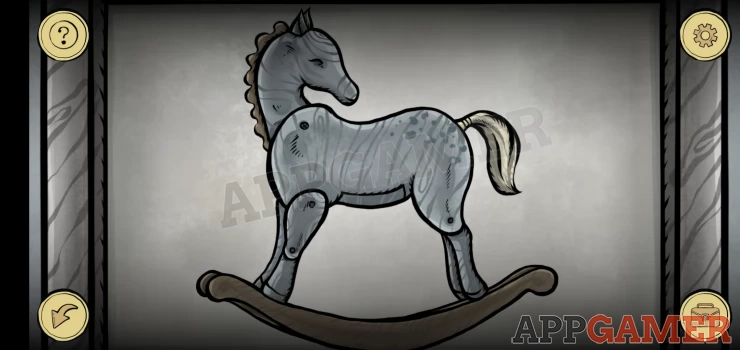
Now look at the third picture of the rocking horse in the wall. This one has a yellow head. Turn right again back to the initial view and now tap on the rocking horse to view it.
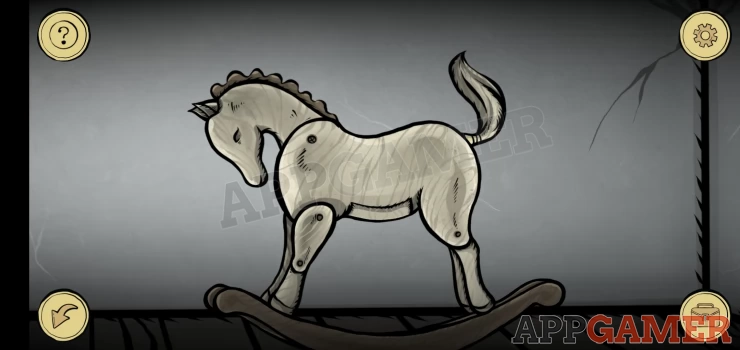
Rocking Horse Puzzle
- The head, tail and front leg can be moved by tapping on it.
- Set the positions to match the 3 yellow parts seen in the pictures.
- Check the solution below
Solution: Show
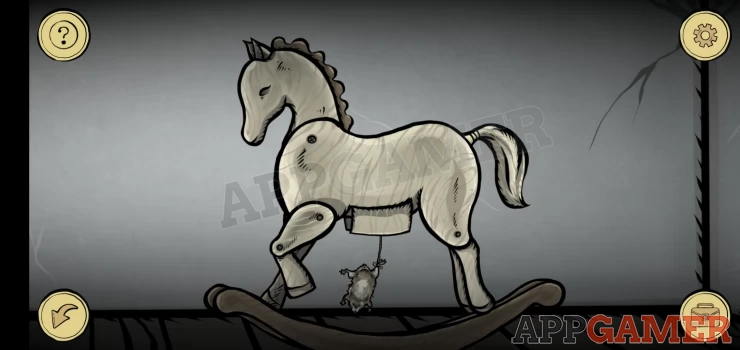
Collect the Dead Hamster that drops from the horse.
Now view the round window on the wall to see that there are some flies on it. First add the Sticky muck to the window and the flies will move to it.
When they fly away again one will be stuck. Tap the sticky mess to collect the fly.
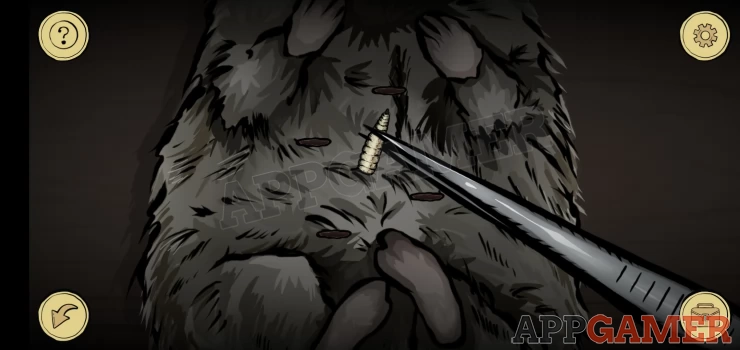
Next add the dead hamster to the window and again the flies will go to it. You can then tap the hamster to view the larvae growing in it. Use the tweezers on the dead hamster to make them appear.
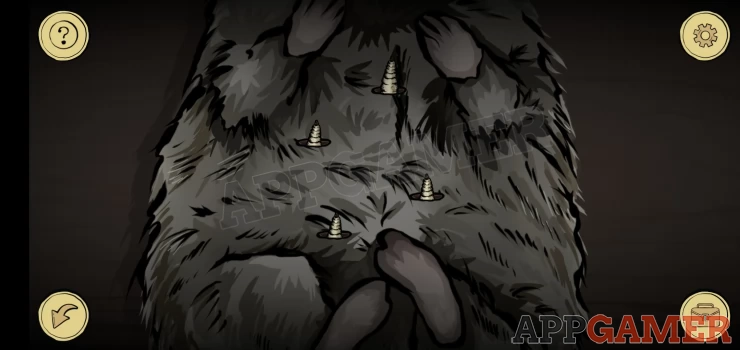
You can now tap on the various larvae to try to collect one.
Larvae Puzzle
You need to tap them in the correct order to pull them up, and eventually collect one. Follow the sequence below
Solution: Top right, top left, bottom left, bottom left, bottom right, top left.Show
Now you have a larva. Back up and turn to the right to see the fish again. First view the locked cabinet under the tank. You need to enter the code for the padlock.
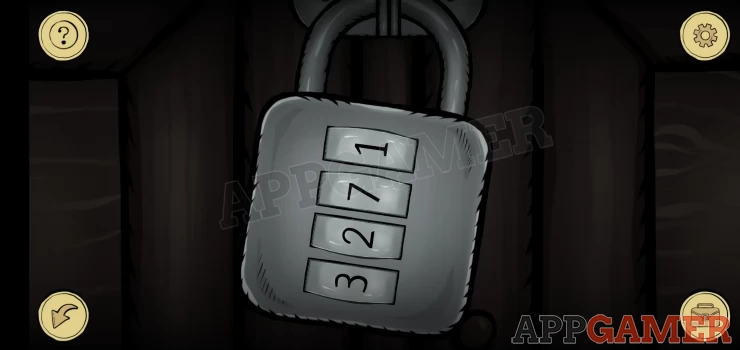
Hint: the code for this is found on the desk.
Solution: The time on the clock face shown by the toy soldier. This is an exact time to the minute.Show
Code: 1017Show
When the door is open collect a pot of fish food from the cabinet. Then view the fish above.
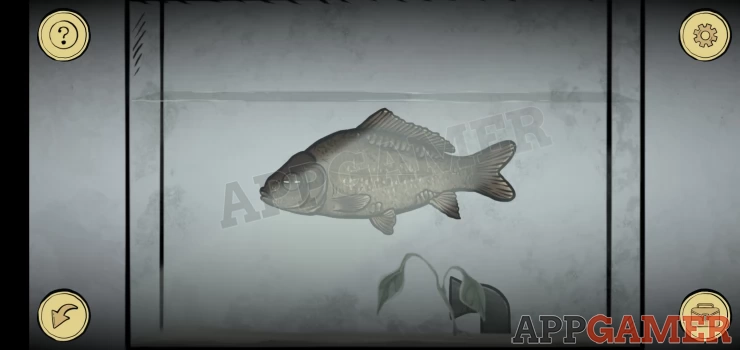
First add the fish food to the tank for the fish to eat. It will **** out a ball that will go down the tube at the bottom.
Next add the fly to the tank and the fish will also eat this and repeat the same results. Then repeat again one more time with the Larva.
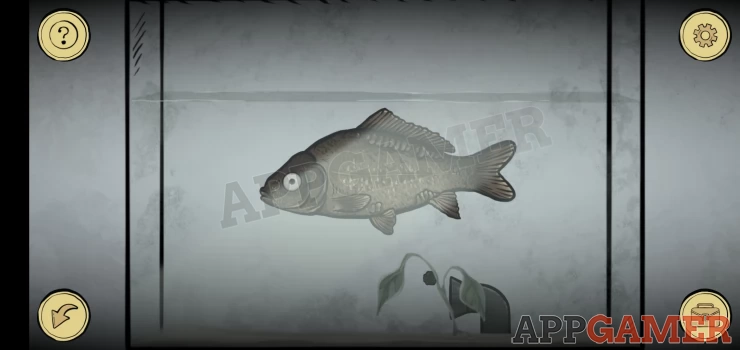
Once the fish has pooped 3 times you can now look again in the cabinet under the tank. There is a device on the right with a puzzle to complete.
Fish tank puzzle
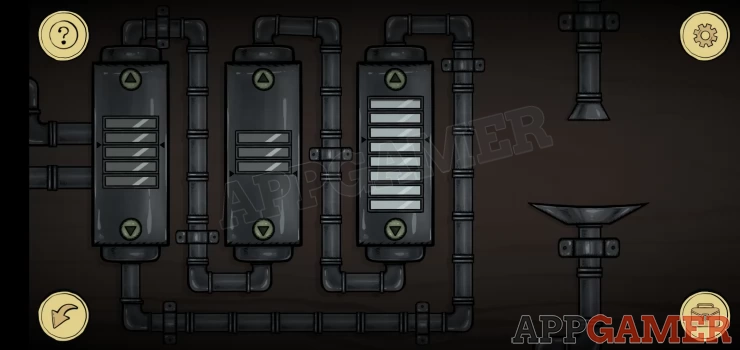
- For this puzzle there are 3 chambers on the left with different sizes.
- You have a stack of 8 lights that you can move around from one chamber to another.
- You can use the arrow buttons at the top and bottom of each tank to move what is there to another chamber up to the space available.
- On each chamber you will see arrows that specify the amount of light sections you need to place in each tank.
- When you complete the first challenge you will receive a key.
- There are 3 levels to complete. with 3 keys to earn.
- Watch the video below for help

Now you have 3 shaped keys. Back out and turn to the first view of the room with a large chest to the left of the rocking horse. Then view the top of the chest.
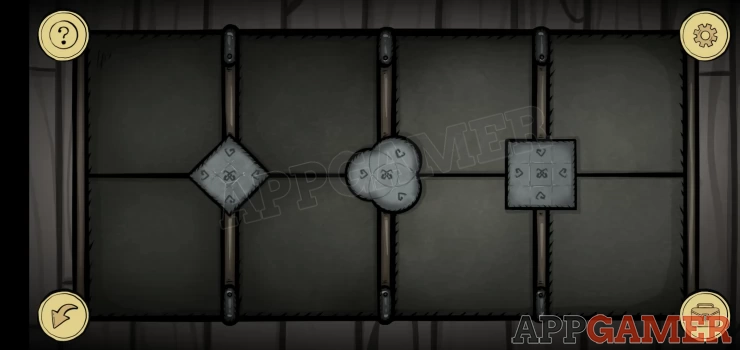
This has 3 shapes locks for the 3 keys but you need to solve a puzzle for each one before you can use them.
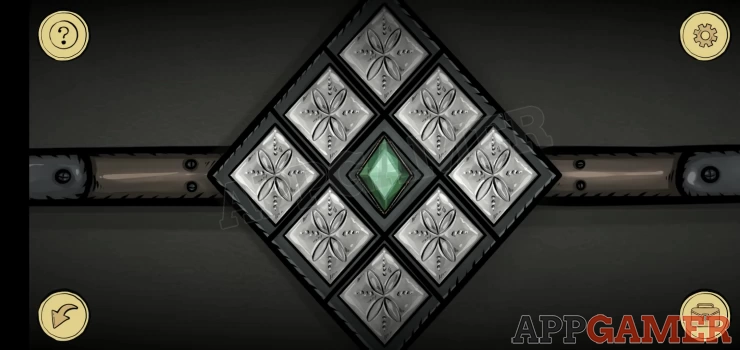
Rhombus Puzzle
- For this you need to activate the lock in the center.
- Tap any slot to toggle it on or off. It will also toggle the ones next to it as well.
- When you have all 9 set it will activate the lock and you can add the rhombus key to it.
- Watch the video below for help.

Once done place the rhombus key in the center.
Circles Lock Puzzle
- This puzzle has 3 circles that can be rotated with the arrows.
- There are silver or gold coins on the circles, you need to arrange them to that they fit on the correct colored segments.
- Once done you can add the circles key.
- Watch the video for help.

Squares Lock Puzzle

For this puzzle you need to slide the shapes around the grid.
Arrange them so that the 4 matching shapes are in the correct corners of the grid.
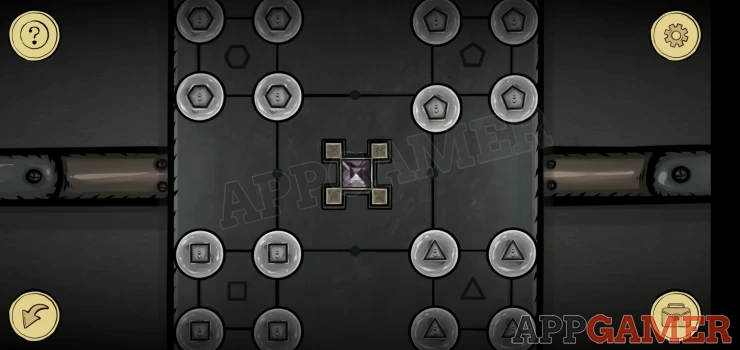
Once done you can add the final key to the center. Then back up and you will see that the chest is open. There is the body of a boy inside.
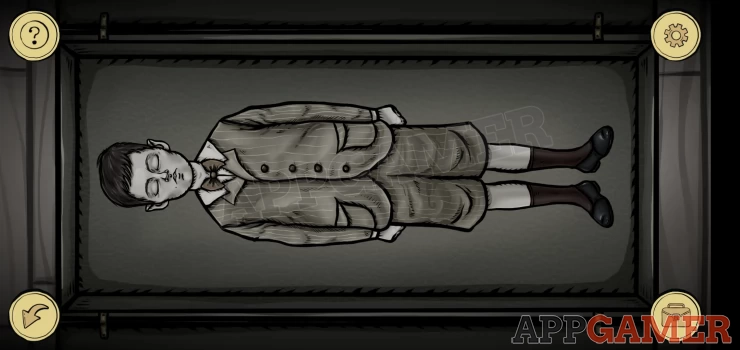
Tap the body and he will wake up. Then rush out of the chest to stand in the room.

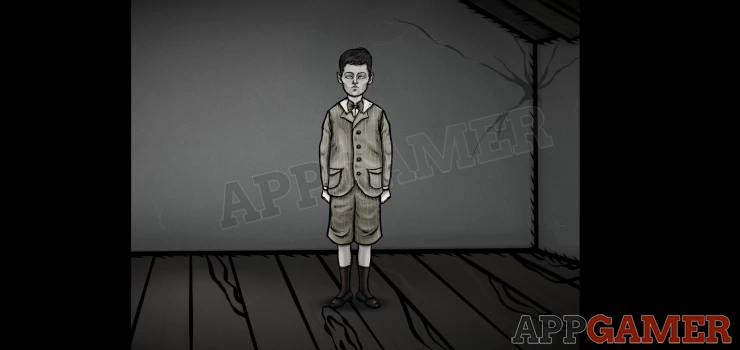
Tap him again and he will disappear.
This completes our Strange Case 2 Chapter 2 / day 2 walkthrough. Move on to Chapter 3
We have questions and answers related to this topic which may also help you: Show all
 With 20 years of experience in creating video game content for the internet and over 30 years as a gamer, Mark is now a passionate mobile App Gamer. Loving a challenge, he is always ready to get stuck in to both survival builders and puzzle solving games. He has been providing content for AppGamer since 2014.