Chapter 4
More Legend of the Time Stones
Welcome to our walkthrough for Chapter 4 of Legend of the Time Stones, a new Adventure Escape Mysteries game.
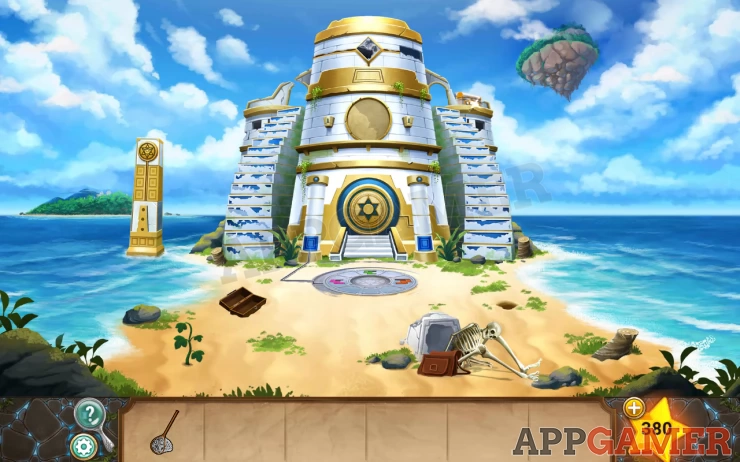
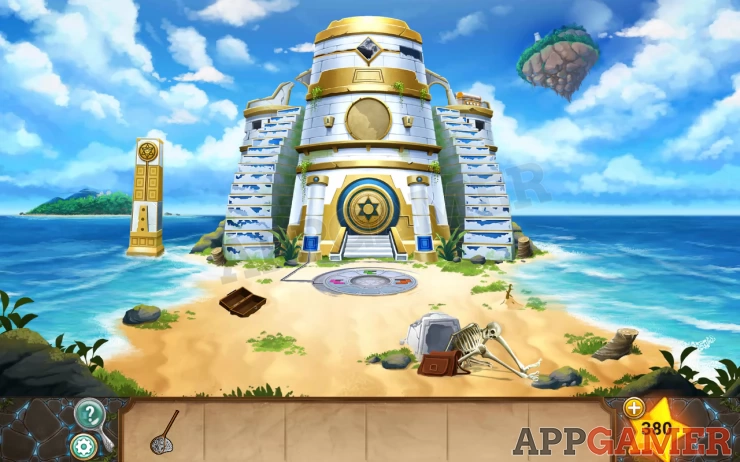
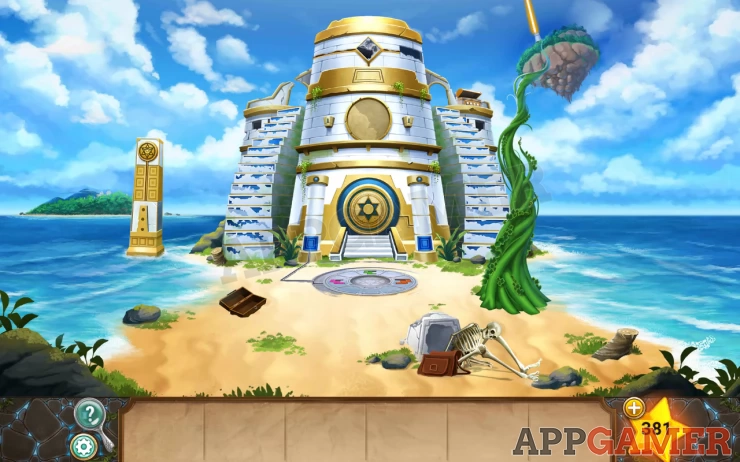
After battling the God of Stars in Chapter 3 you have now return ed to the Island of Time with the 'Past Stone' to help you return to your present.
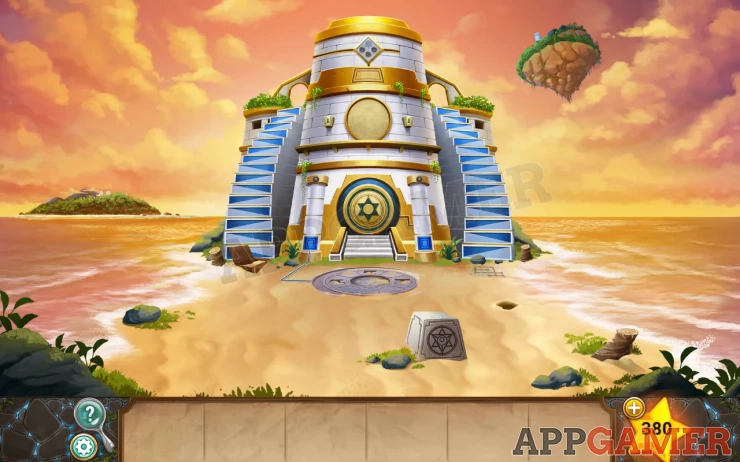
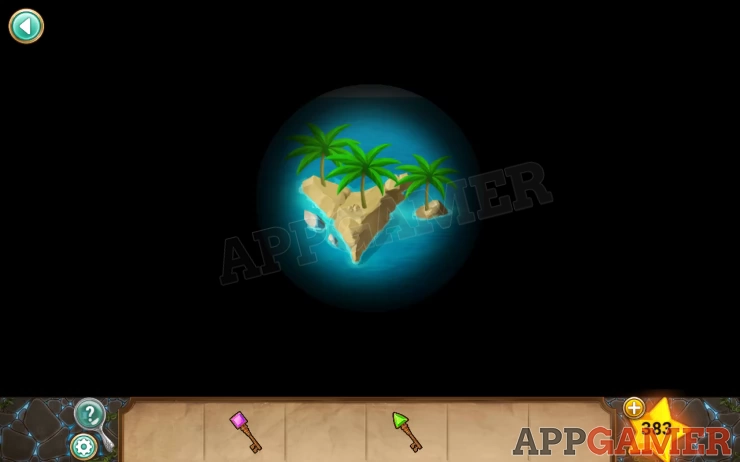
Tap the star symbol on the block on the ground to activate the locket and then tap the Green 'Present' Stone to open a Rift.
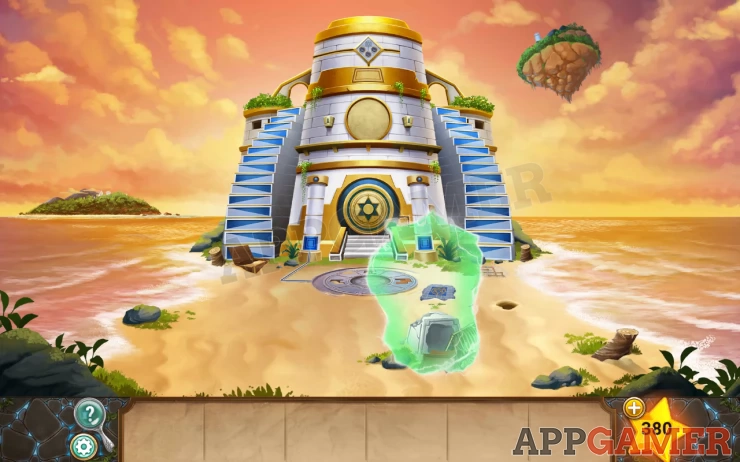
After looking for Ollie collect a Stone Carving from the rift.
View this in your inventory
Now tap to view the top center of the Temple. You will see another symbol.
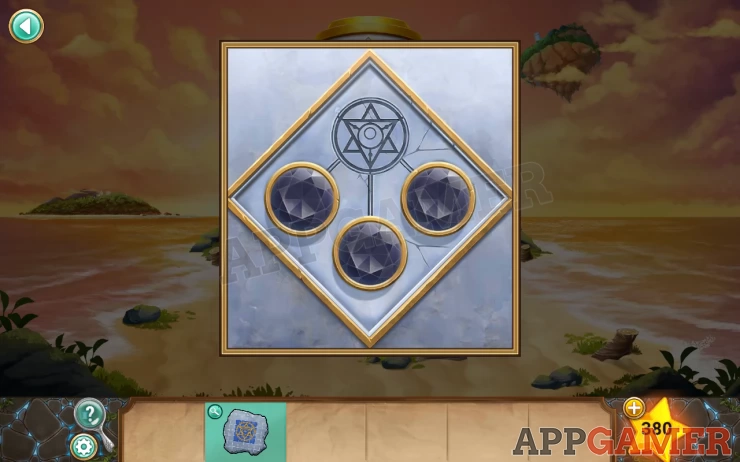
Tap this to use the locket again. First use the Green Present stone to open a panel on the right so you can collect a Net. Then also use the past pink Past Stone in the same place to reveal a hidden puzzle in the water to the left.
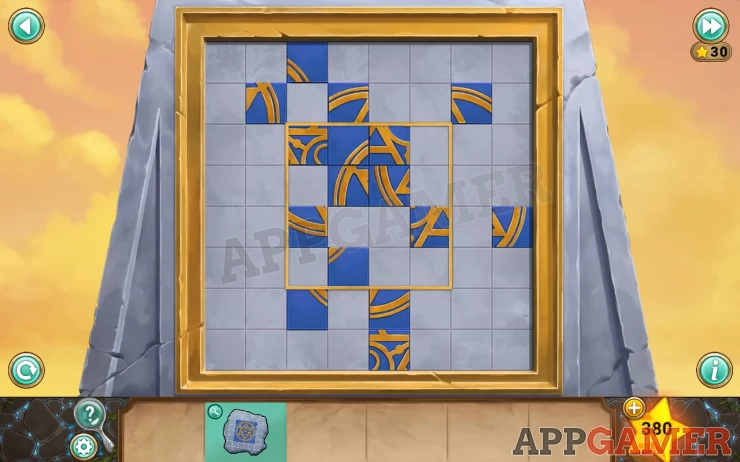
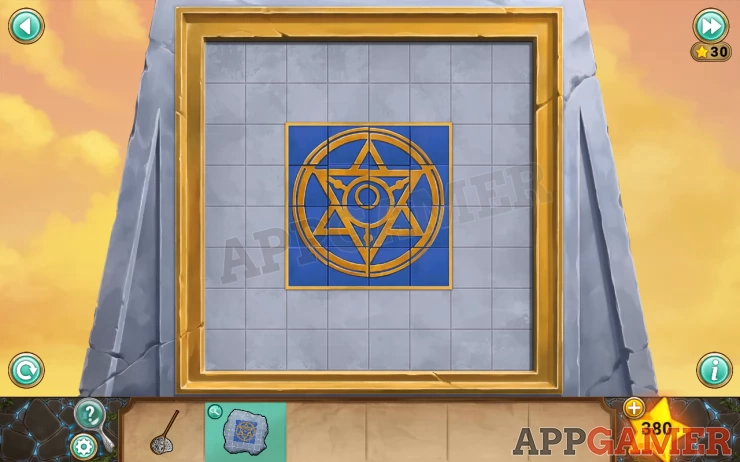
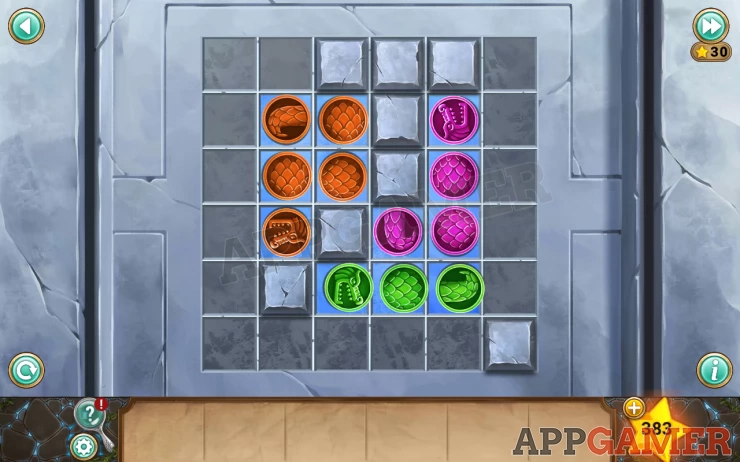
View the puzzle.
Slide each row or column arrange the pieces in the correct way to form the symbol.
Solution: Show
Once done the tower rises to its full height and you can now use the star symbol on top to activate the locket again.
Use the Green stone to move back to your present time. Ollie is nowhere to be seen though.
On the ground to the left is a small seedling growing. Collect this.
On the top right tower is a chest, you cannot unlock it yet but check it for a clue to the combination.
Now use the symbol on the tower on the far left again and the Pink stone to travel back to the past.
Notice the hole on the far right of the ground. Place the seedling here.
Next take a look at the stairs, there is a pattern on each. These resemble the symbols on the chest in the present.
Use the Green stone to move back to the present.
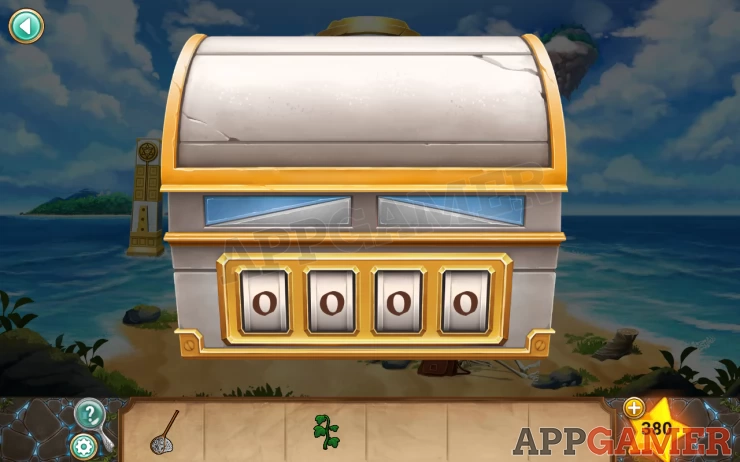
In the present the seedling has died. But you can now open the chest.
Solution: In the past you can count the number of the 2 patterns on the chest that are found the stairs. This gives 2 numbers. 16 and 13.Show
Code: 1613Show
Star: In the open chest
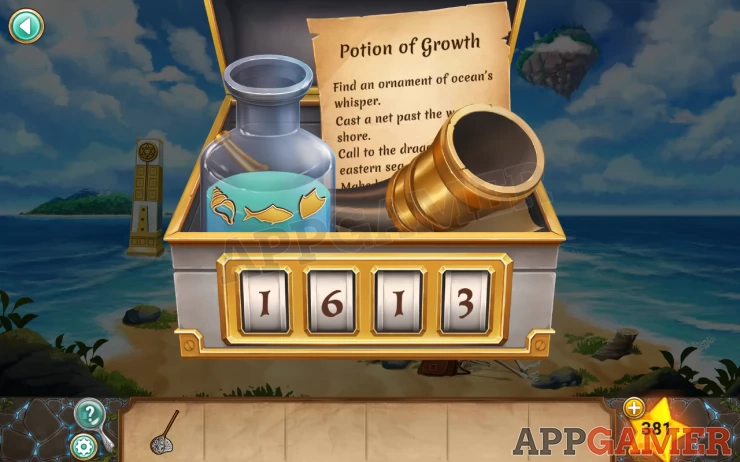
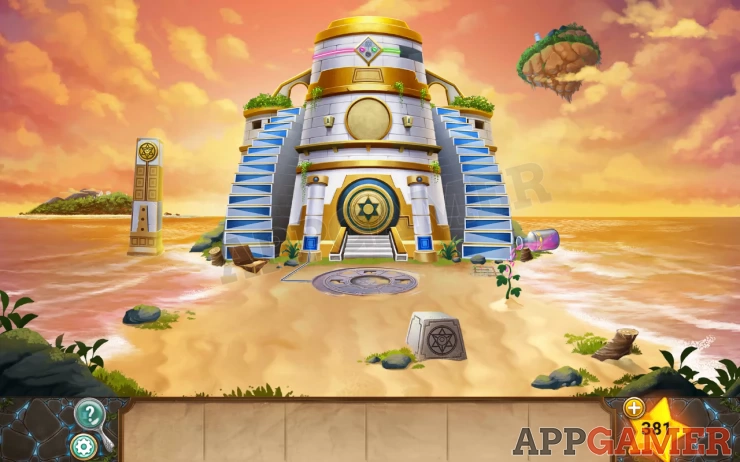
Collect the dragon bugle from inside and read the instructions for making a Potion of Growth.
First use the net on the water on the left of the island. You will catch a fish, Do this a second time so that you have 2 fish.
Now use the Pink stone to go back to the past.
Use the net again in the same place and you will collect a seashell.
Now use the Dragon Bugle on the water on the right side of the island. A water Dragon will appear.
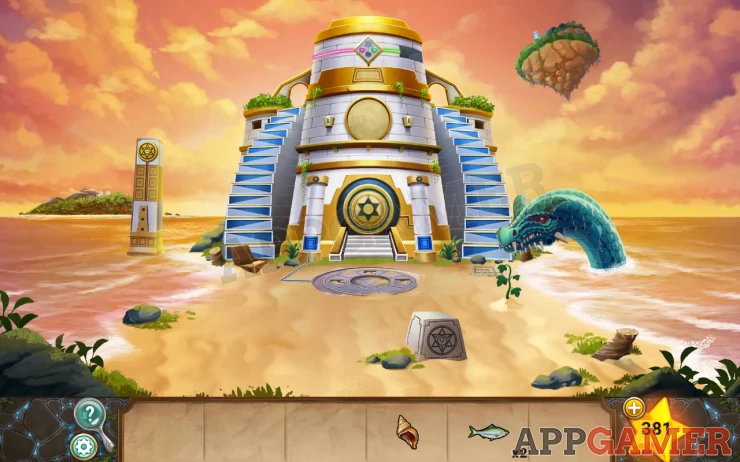
Give a fish to the dragon and it will leave, you can then collect a dragon scale.
Return to the present. (green stone) and view the opened chest again.
Add the fish, seashell and dragon scale to the potion bottle.
You will collect the Grow Potion.
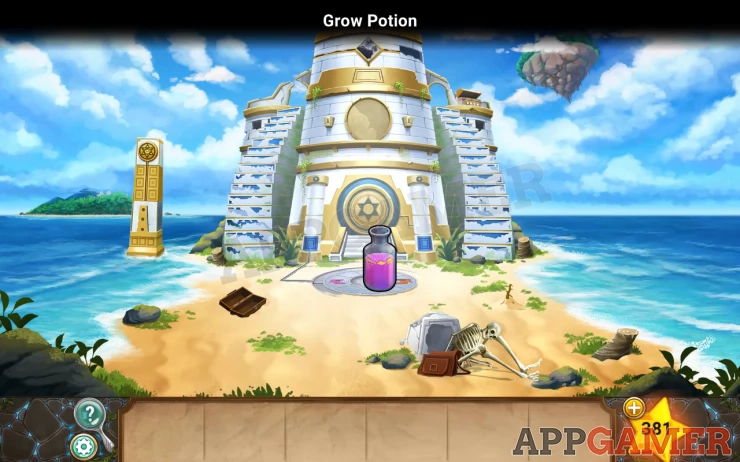
Return to the Past again and use the grow potion on the seedling.
Then Back to the present to see the results of the potion.
Now tap the Island in the sky to travel up the stalk.
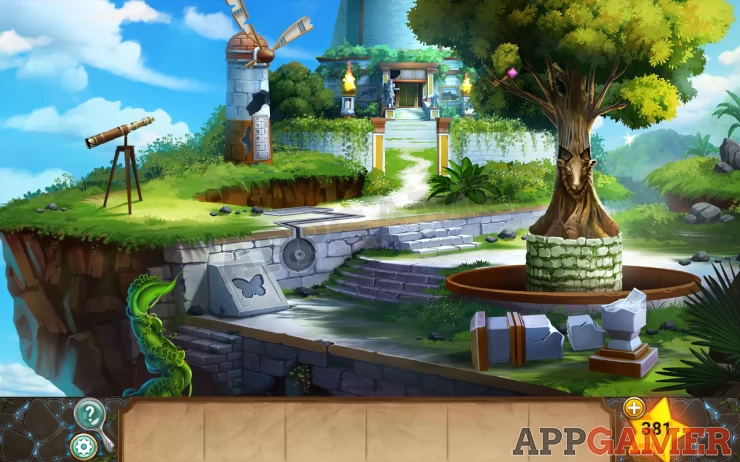
Star: on the hill in the distance on the right, under the tree.
First Tap the base of the broken windmill on the left to see a clue.
Then tap the broken square pillar on the right to move the small piece an find a triangle key to collect.
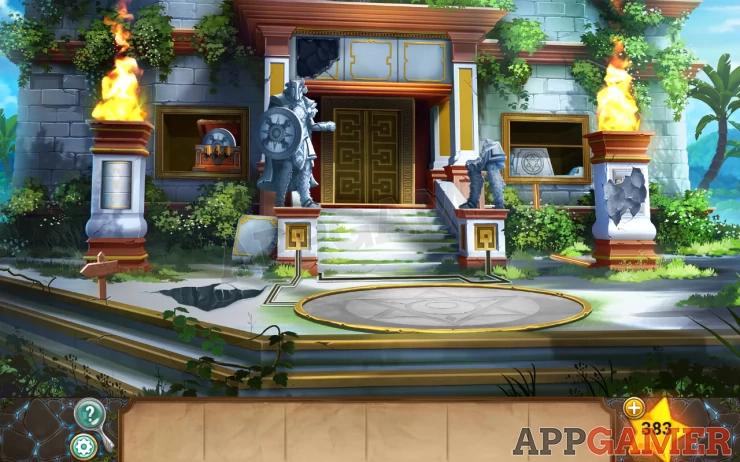
Next tap the path in the center to move forward into the courtyard.
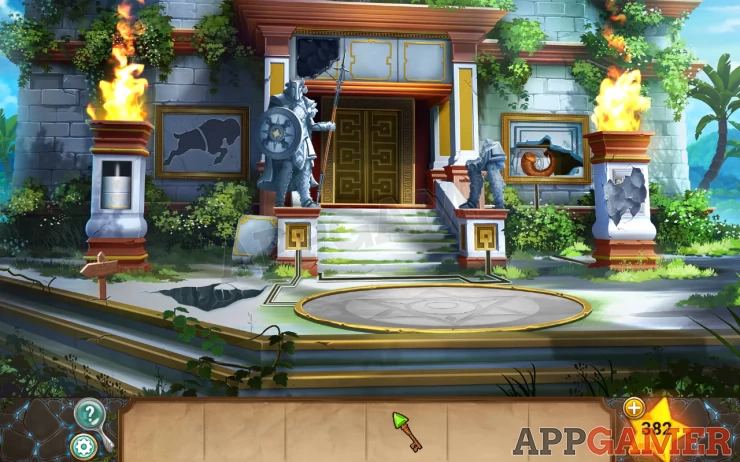
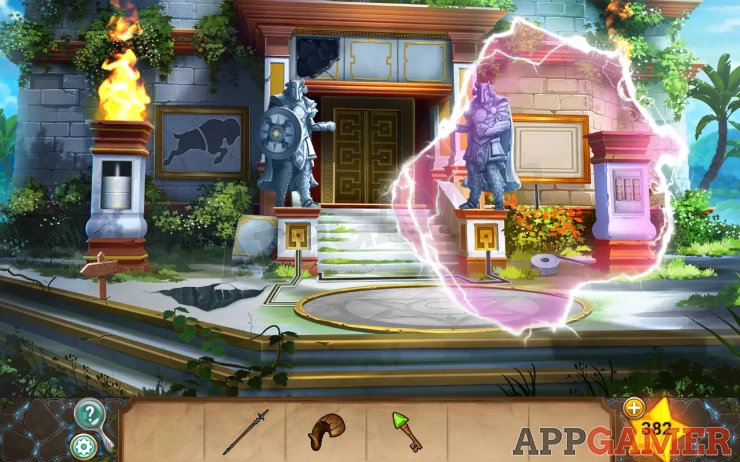
Star: on the shield of the status on the left.
Collect the spear from the statue on the left. Then by the flame on the right is a broken open panel. Collect an Animal Horn.
Inside that open panel you can now see a star symbol block. Tap this to use the locket.
Use the pink 'past' stone.
In the rift you can now collect a stone disc from the ground.
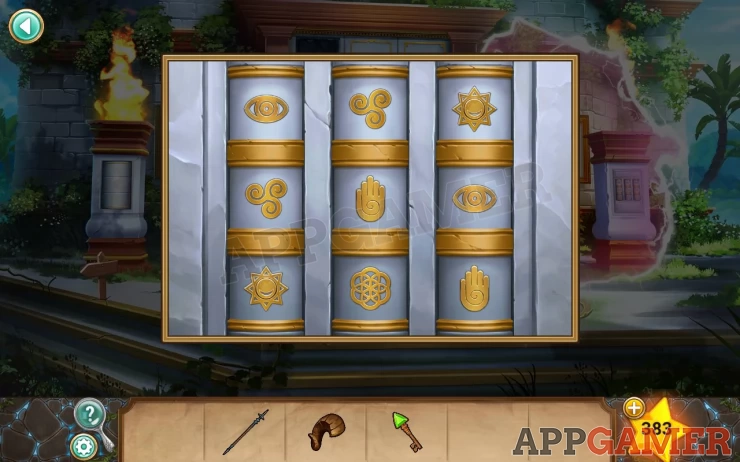
There is a puzzle on the pillar that we need a clue for.
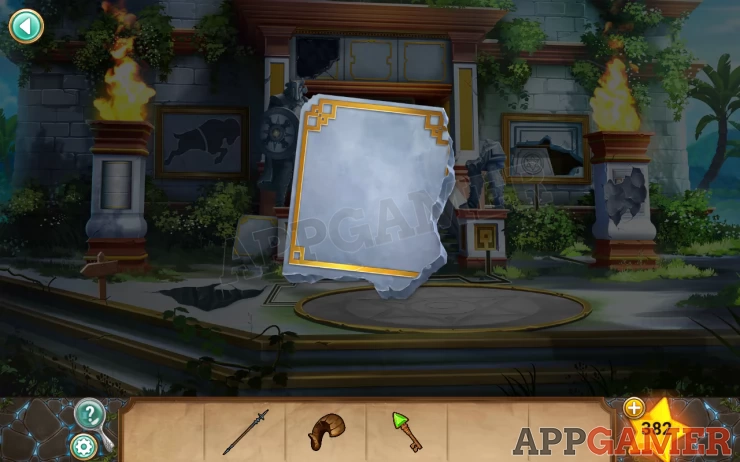
Notice above the center door of the temple are 3 tiles with border patterns. The left one is broken off but you can view it on the ground by the statue.
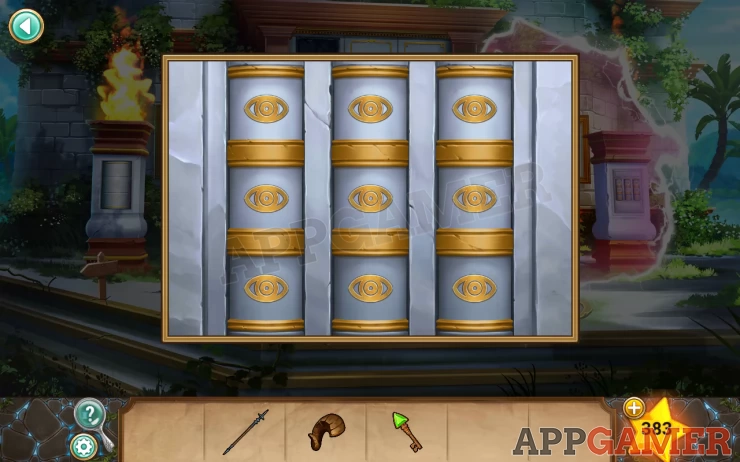
Now on the left of the scene is a square pillar with 2 more stone discs in it. View this and then add the disc you have.
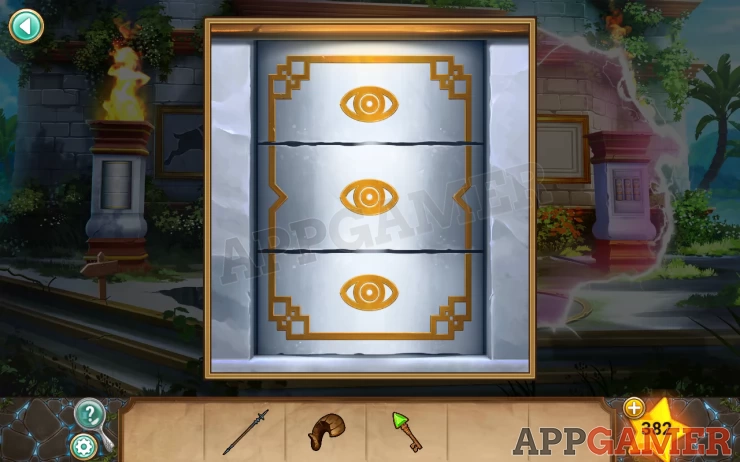
Now you can use this pillar to find clues for the Right pillar in the past.
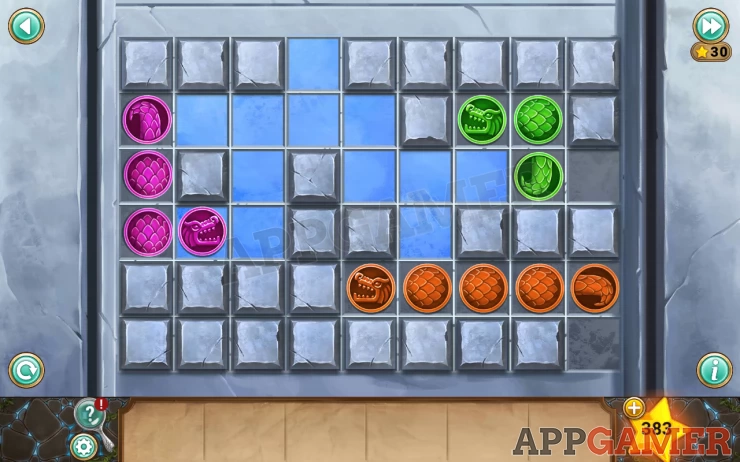
Solution: Check the 3 tiles (including the one on the ground). Change the stone discs to match the border patterns, then make a note of the 3 symbols you see. Do this for each of the 3 tiles to get 9 symbols.Show
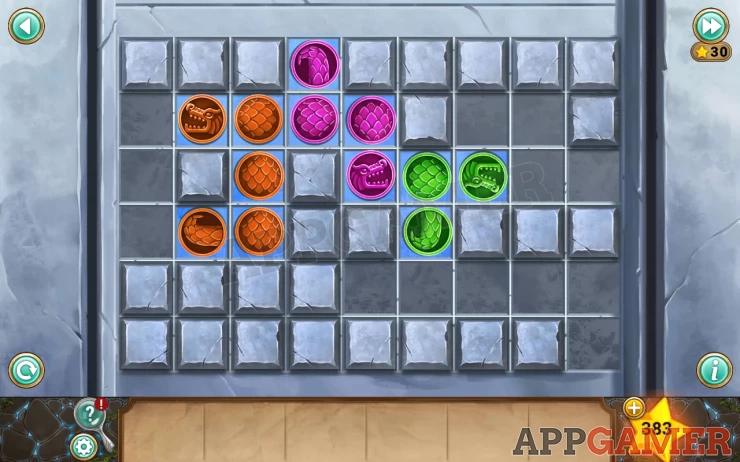
Now open the rift to the past again and set the correct symbols on the Pillar puzzle.
Solution: Show
Once done you can collect another Animal Horn. In the Past Rift.
Then close the rift and you can also now collect an Emblem half from the same location.
Tap the bottom left to return to the previous area.
You can now place the 2 animal horn on the head carved into the tree.
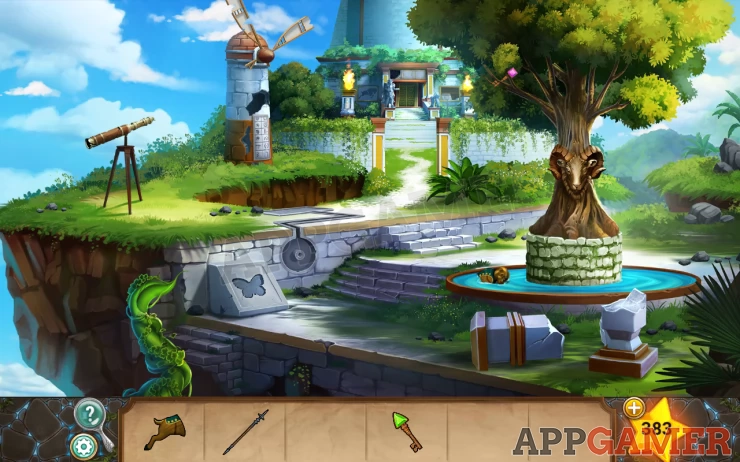
Water will flow and you can collect a second Emblem Half.
Also use the spear to collect a Square Key from the tree.
Go back through to the courtyard. On the left of the statue is a panel with 2 spaces. Place the 2 emblem halves here. It will open.

Collect a Butterfly Pendant and a Telescope.
Back out again and you can now replace the broken telescope with the new one you have collected.
Then look through it.
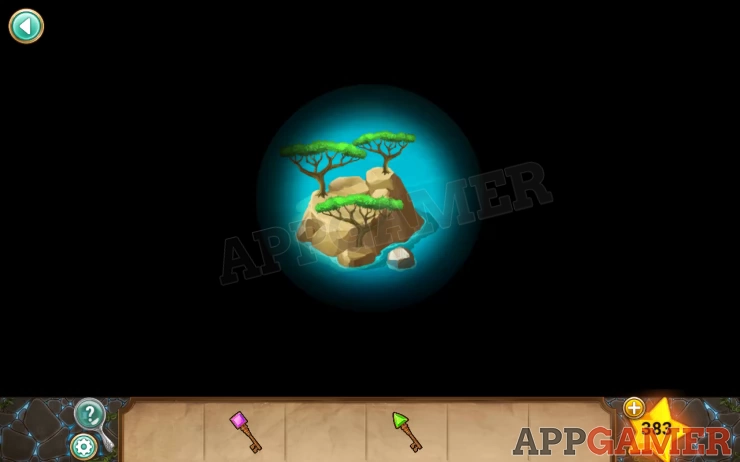
You will be able to see 6 islands, each one has a different shaped bush/tree on it.
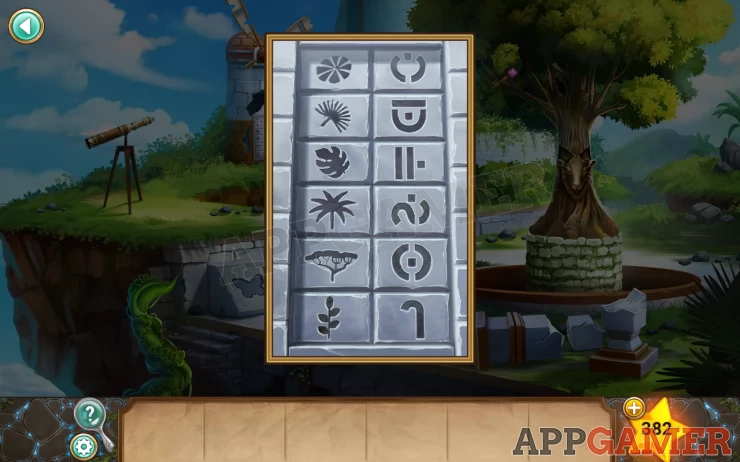
Now look at the stone block with a butterfly shape. Place the pendant here. You will reveal a puzzle.
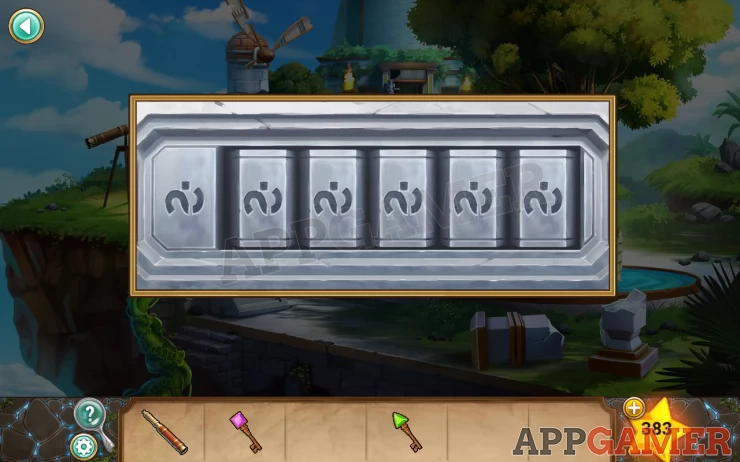
There are 6 symbols, the first is fixed and he others you need to set.
Use the clues found above to solve this.
Hint: there are shapes and symbols on the windmill.
Solution: Find the first fixed symbol from the puzzle on the windmill. This tells us to start with the island with the palm trees. The island is arrow shaped pointing down. Follow this to find the next island and then translate the bush shape here to a symbol on the windmill. Then follow the arrow direction again and repeat until you reach the sixth and final island that is round.Show
Enter the six symbols into the puzzle.
Solution: Show

You can now collect a Cogwheel from a hole that opens.
Just next to the hole is a round socket. place the cogwheel there.
Then turn it to reveal another star symbol block.
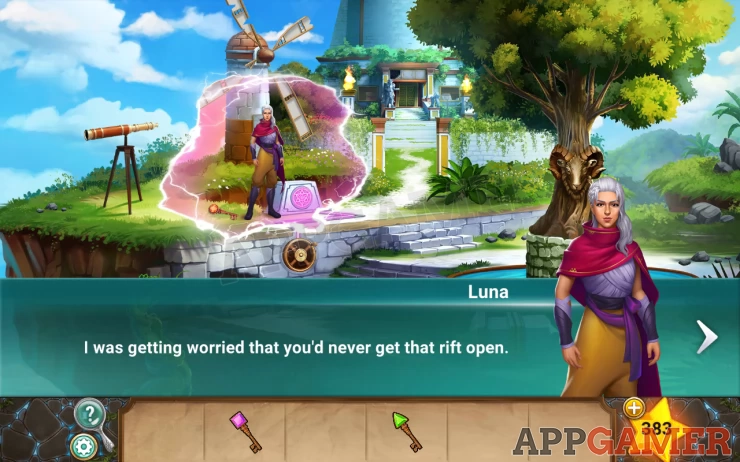
Use the block with the pink time stone to open a rift. You will talk to Luna.
Once done you can collect a Circle key from the rift.
Move through to the courtyard and you can use the 3 keys you have on the chest in the open panel on the left.
Collect a Shield.
Now open a rift to the past (pink stone) using the star symbol on the right.
Place the shield on the past statue.
This activates the circle in the floor.
Close the rift. There is a stone key in the slot on the right. Collect this.
Now you need to duplicate it.
Open the Past Rift and place the stone key.
Close the Rift and collect it.
Open the rift again and collect the past stone that you just placed there.
You can now close the rift and place the 2 stones in the slots in the ground.
Tap the open symbol in the center of the circle and then use both of the time stones to activate it. This will reveal a puzzle on the left.
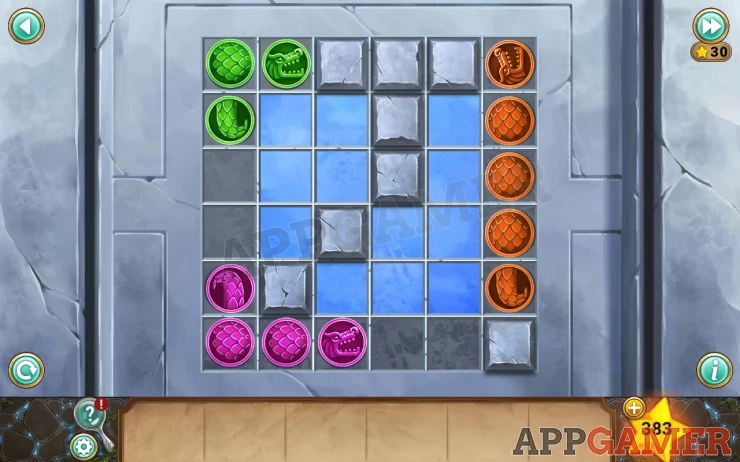
Drag and arrange the 3 dragons to cover the blue spaces.
Solution: Show
Once done you get a second puzzle that is harder.
Solution: Show
Solving this opens the door and you can go inside to complete the Chapter.
Move on to chapter 5.

We have questions and answers related to this topic which may also help you: Show all
 With 20 years of experience in creating video game content for the internet and over 30 years as a gamer, Mark is now a passionate mobile App Gamer. Loving a challenge, he is always ready to get stuck in to both survival builders and puzzle solving games. He has been providing content for AppGamer since 2014.