Soul Street Walkthrough Chapter 6 Underground Blossom
More Underground Blossom
Our guide continues with our Underground Blossom Soul Street walkthrough for Chapter 6 in the game. All puzzles solved and don't forget to complete the achievements too which are listed below and explained in more depth in the guide.
Soul Street Achievements in Chapter 6
Here are the achievements for this chapter.
- Departing Soul Street: Complete Chapter 6.
- Time to Tell: Persuade the thief to talk.
- Nice technique: When you have the paperclip and clothespin pull the nipples of the thief for literally a few minutes!
- Copper Cube: Find the copper cube in Chapter 6.
Soul Street Walkthrough Chapter 6 Underground Blossom
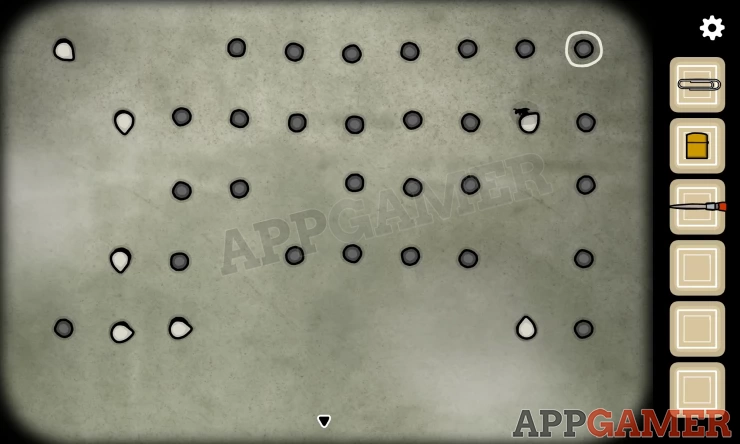
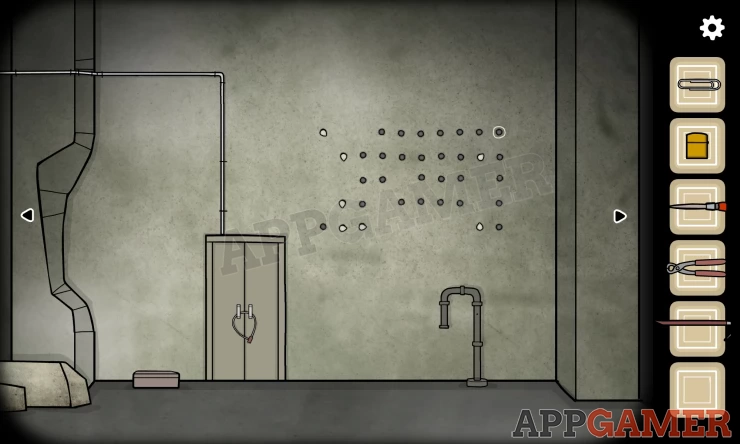
When you arrive at the station, head to the right and find the puzzle on the wall with the black and white dots.
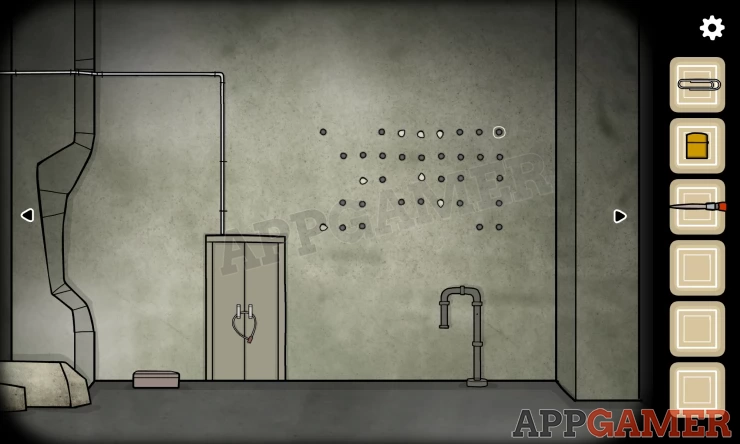
The idea is to move the form one side to the other. You do this by moving the white stones, whenever you see the butterfly, put the a white stone on top of the black hole that it comes out of. If you are stuck, set up the stones like the image below
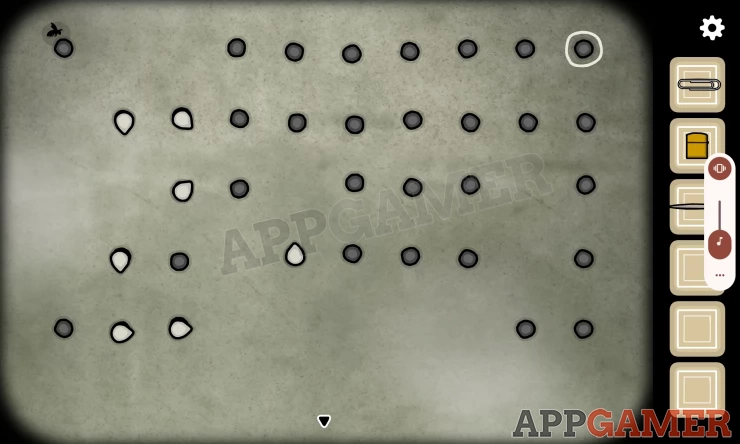
To complete the puzzle, the bee must fly through the hole in the top right of the puzzle. Pay attention to the direction that each of the white stone is facing that will give you an indication of where you will be pushing the fly to when you cover it with the stone.

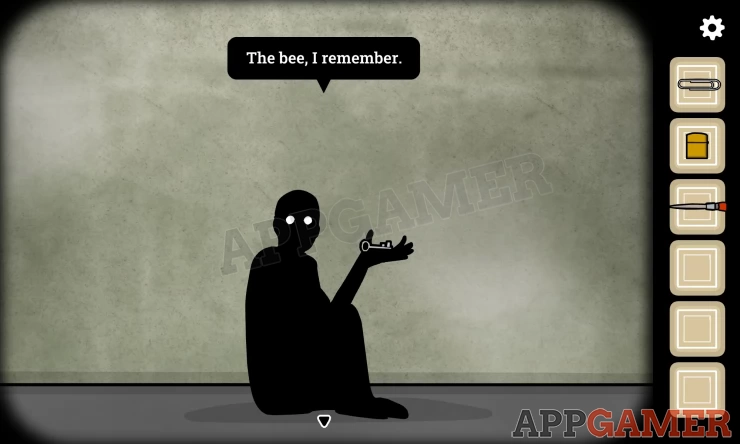
Head back to where you entered this level and you will see a hand reach for the bee.
You'll then be instructed to find the mother's timepiece.
The shadowy figure will give you a locker key to help you on your way.
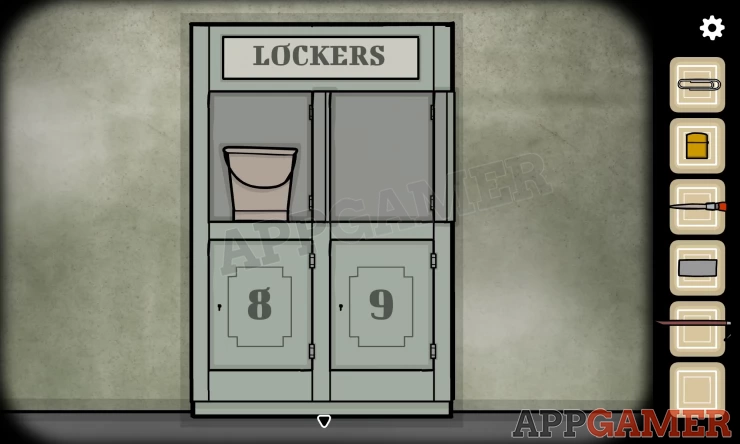
Head to the right and take the crowbar that is next to the lockers. Then use the key to open locker number 7, or whatever locker opens for you and take the pincers.
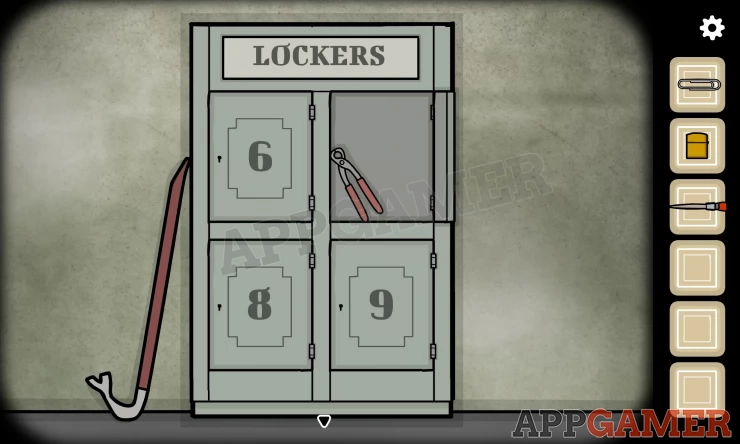
Head back to the room with the black and white dots and you'll see a double door that is locked. Use the pincers to unlock the door and open it.
Finding the Thief
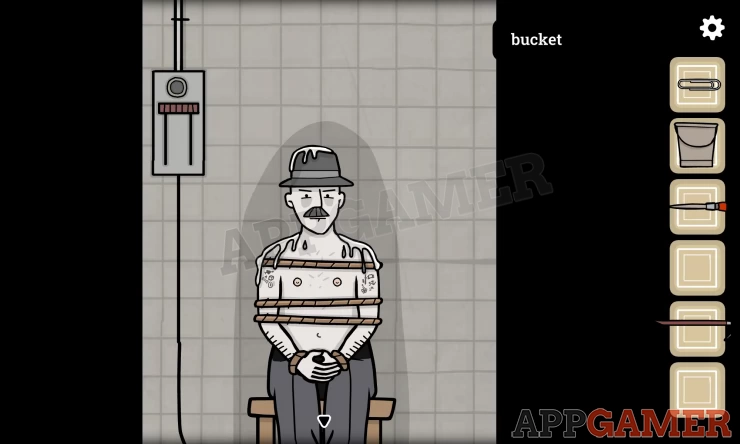
Tap on the figure in the shadows to zoom in. It's the thief.
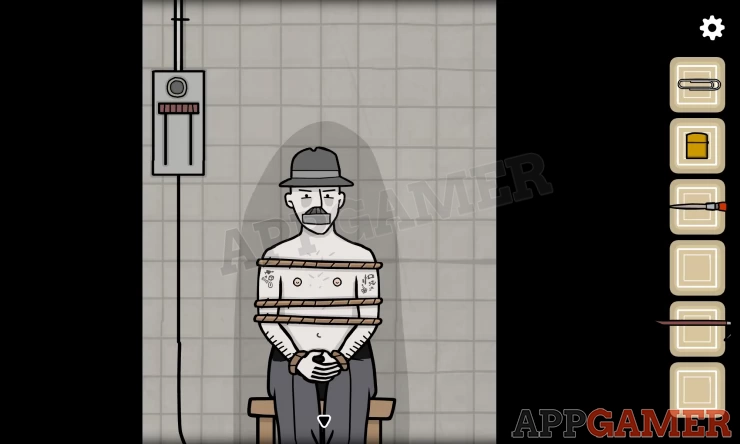
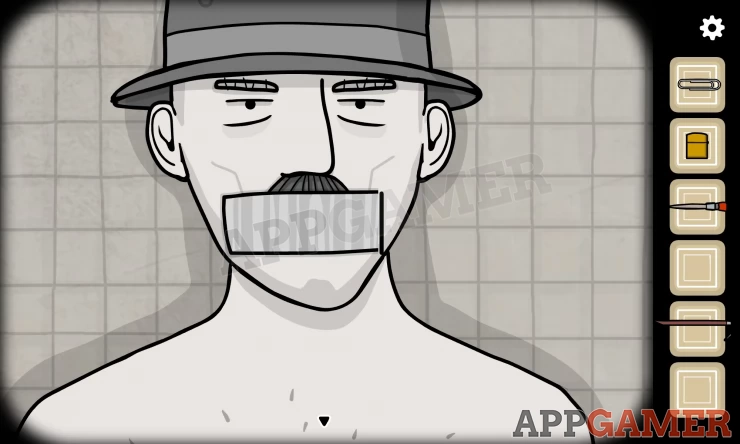
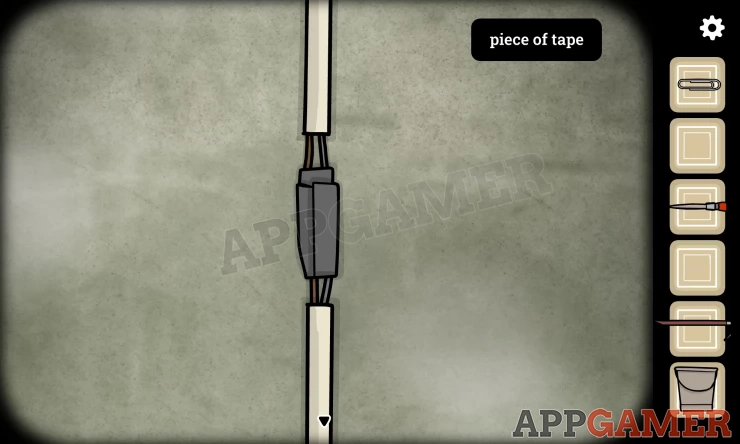
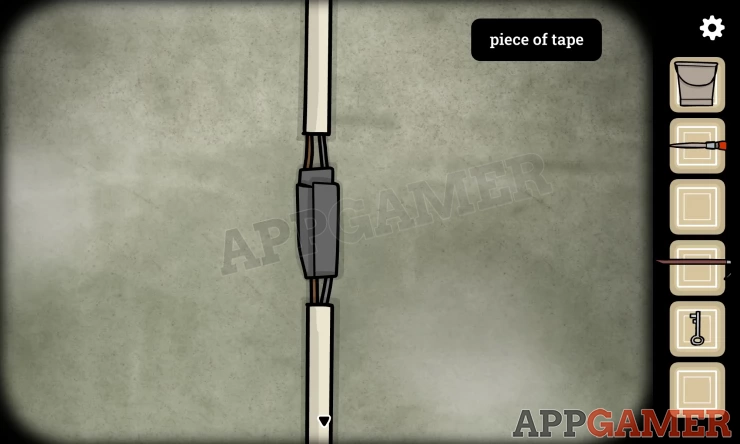
- Tap the tape on his mouth and again to remove it. The piece of tape will now be in your inventory.
- Outside the room is a box, use the crowbar to open it up and take the key to locker 6.
- Go back to the lockers and open locker 6 and take the bucket.
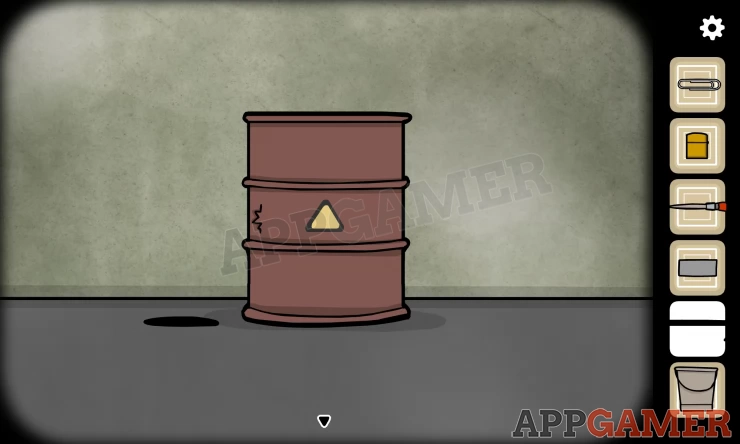
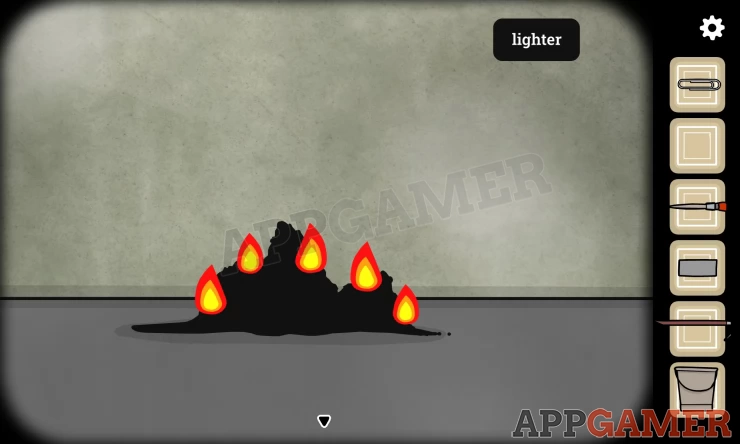
- In the same room is a large orange barrel, use the crowbar on it, when the oil comes out, use the lighter on the oil.
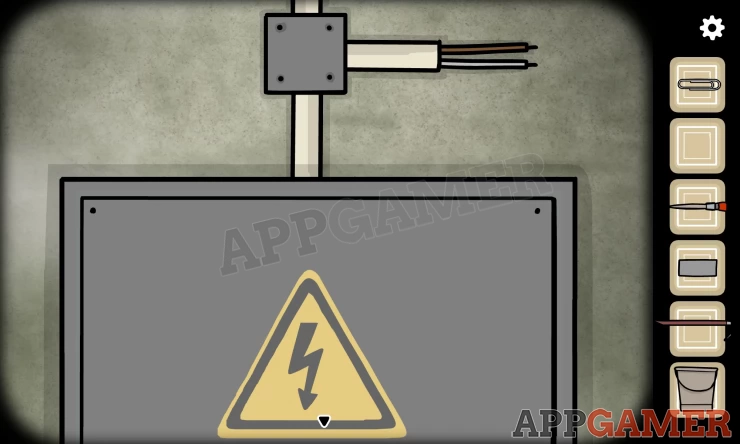
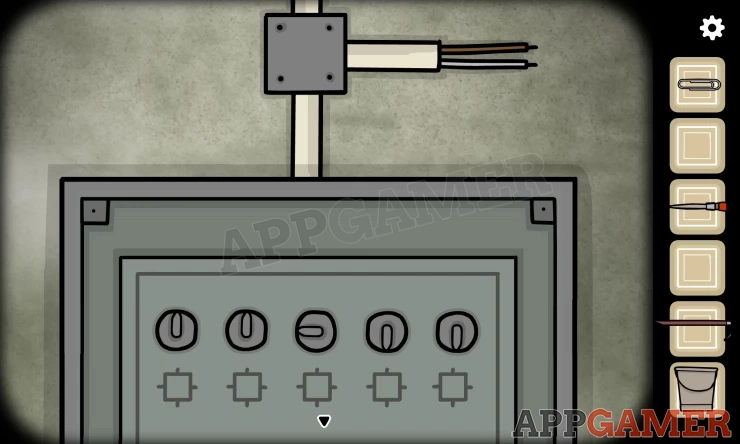
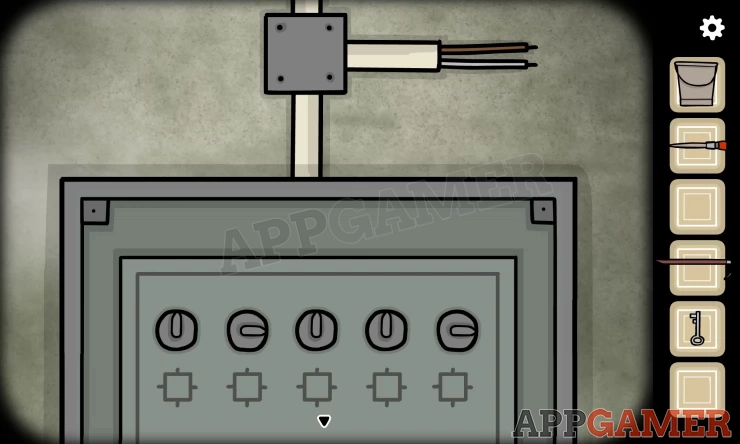
- Go back to where you entered the level, with the shadowy figure and tap on the electrical box at the back of the room, tap it again to remove the front panel.
- Tap the wires leading up from the box and use the tap on the wires to try to fix them together.
- On the box, turn the first two buttons so their switch faces up and the third one so it is facing to the left.
- Head back to the room where you exploded the oil barrel and tap the panel on the back wall, press the button on the top right and the shutters it should raise up and reveal a valve that you can take.

Using the Water
Go back to the room where the thief is being held, and out side there is a pipe, use the valve on the pipe, turn the valve and some water will come out.
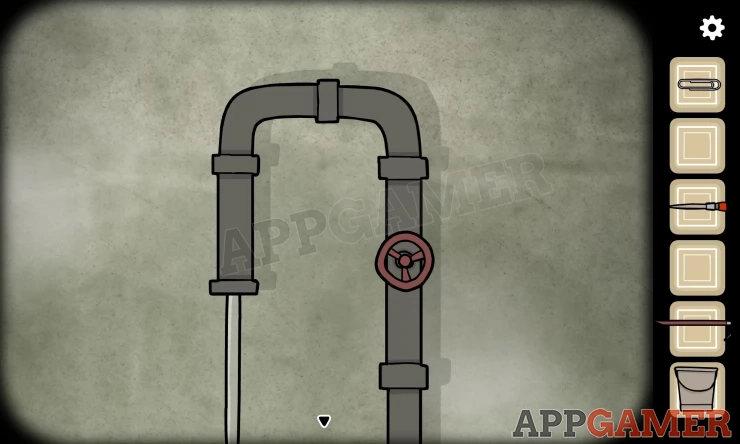
- Use the bucket to collect some water.
- Use the bucket of water on the head of the thief. Get some more water from the puddle on the floor and use it on the fire from the oil barrel.
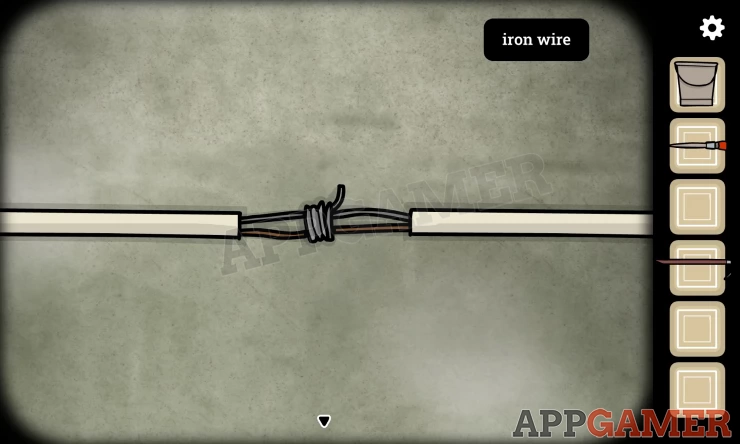
- From the ashes, you can take the iron wire.
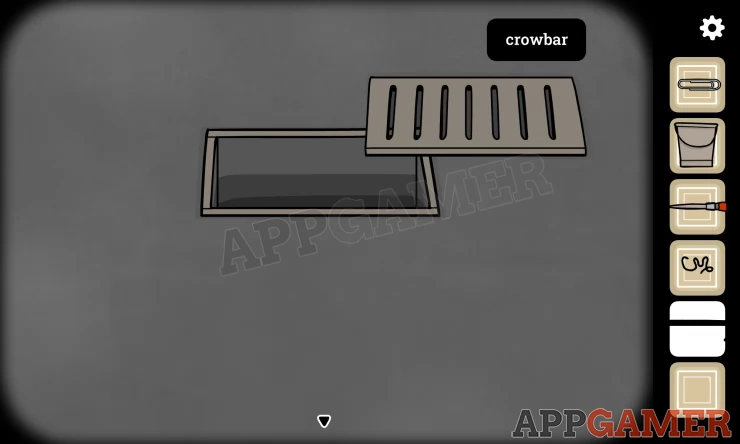
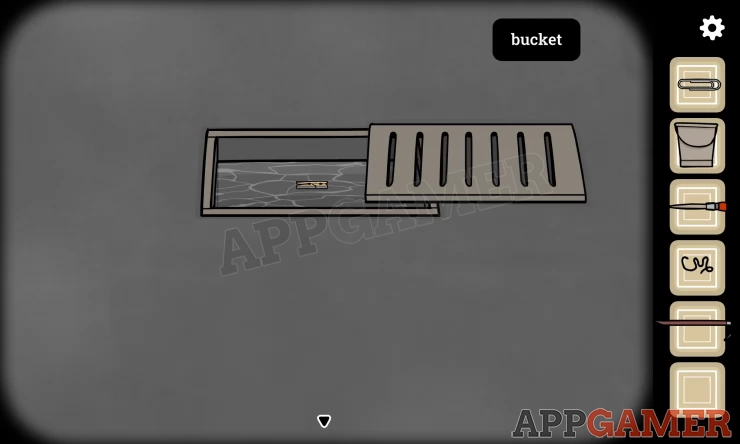
- Get a third bucket of water, head to the right and look for a drain on the floor. Use the crowbar on the drain to open it, and put the water in the drain.
- You'll get a clothespin when it fills with water, take that.
Interacting with the Thief
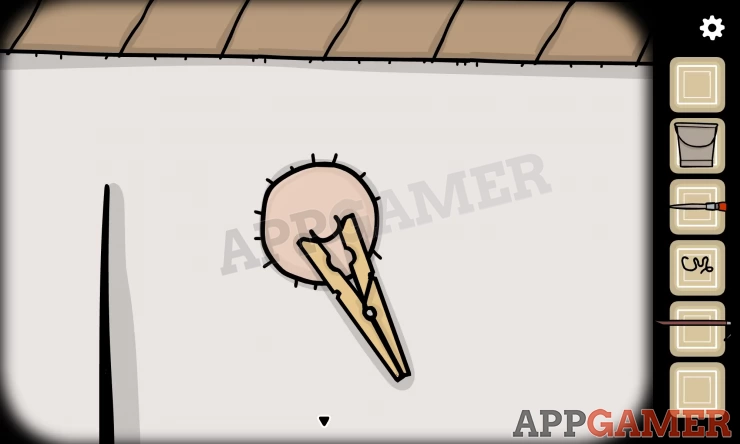
Go back to the thief and put the clothespin on one nipple and the paper clip on the other. If you can, pull each one when you put them on him. Give each one a really good pull and you should complete a the Nice Technique achievement here. You'll probably have to spend a good couple of minutes pulling each of the nipples. Check the achievements regularly to see if you've got it and just missed the notification - like I did!
Head back to the room where you entered this level, inspect the wires again, and you need to use the iron wire on the wires that are heading towards the right. Just a little bit up from the circuit box itself.
Now adjust the dials so they are facing the directions as follows:
- up
- right
- up
- left
- right

Go back to the thief in the room and pull the handle that is above his head to give him an electric shock.
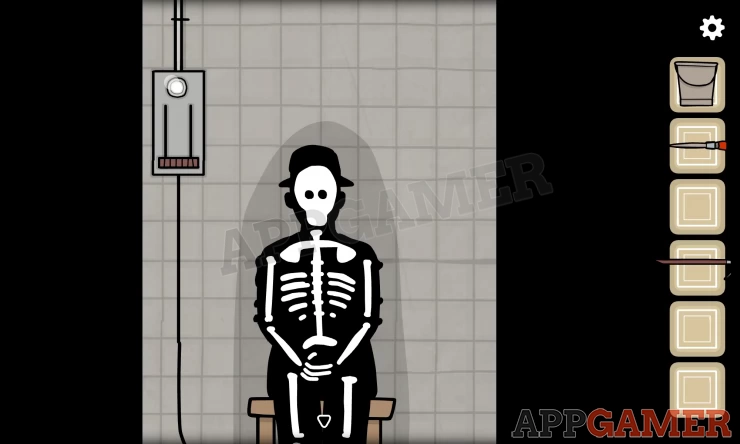
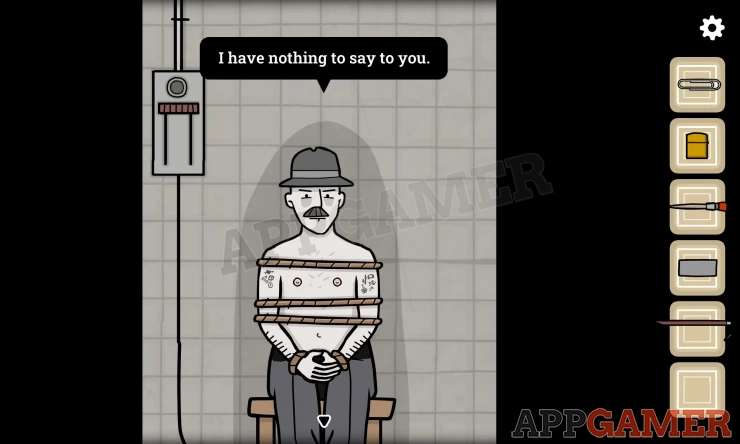
That seems to be enough for him to give you the information that you need. Tap his mouth again to get him to spill the beans
He tells you that the key is behind the hand of the dead woman. Completing this section also wins you the Time to Tell achievement.
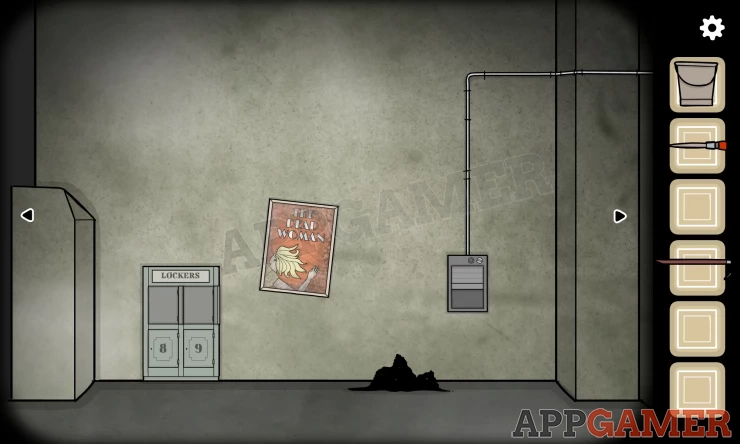
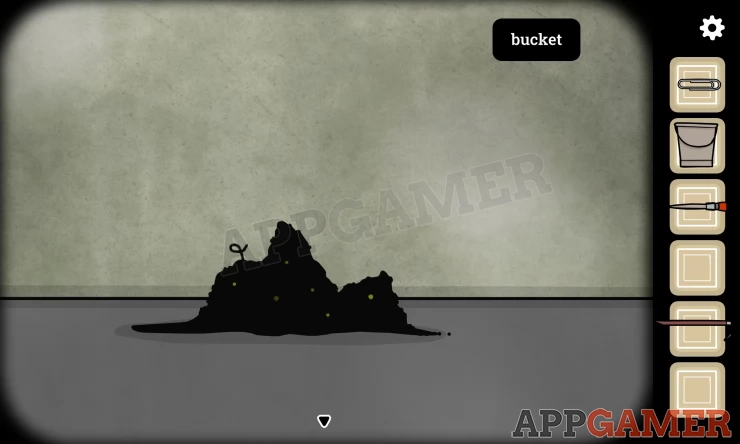
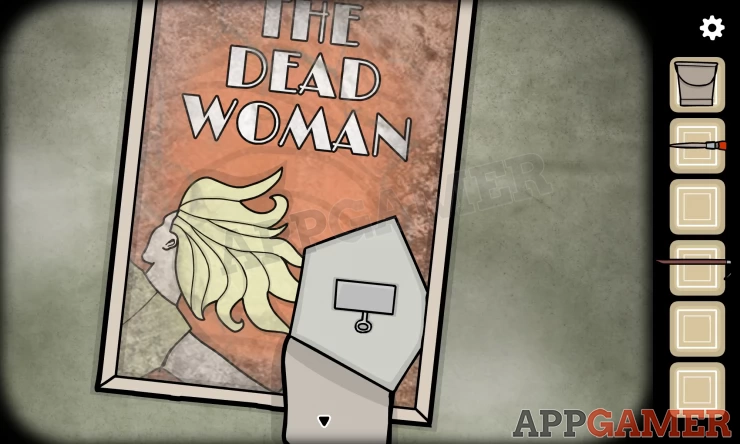
The dead woman is actually a poster on the wall, so find that and then tap on the hand to reveal a key that you can take. There is also another piece of tape, which you also need to take.
Locker 8
This key will open locker 8.
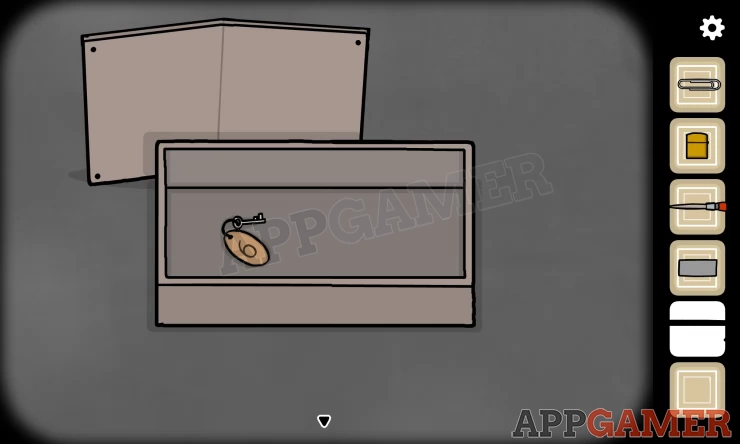
Inside the locker you'll find a case, to open it you'll need the code. To get the code you have to look at both of the arms of the thief and examine his tattoos and also the symbols on the wall which we'll get to now..
Use the piece of tape on the broken part of the cable which leads to the light above the shadowy figure.
The set the dials on the control panel as follows:
- up
- right
- up
- up
- right
This will activate the light and show you some symbols on the wall.
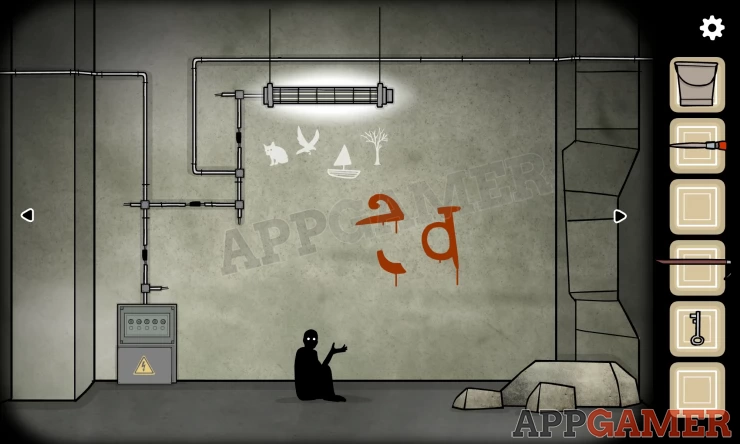
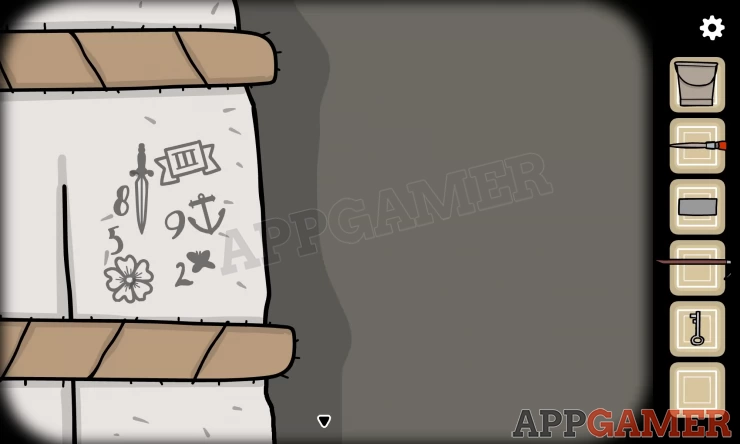
You'll see a dog, bird, boat and tree.

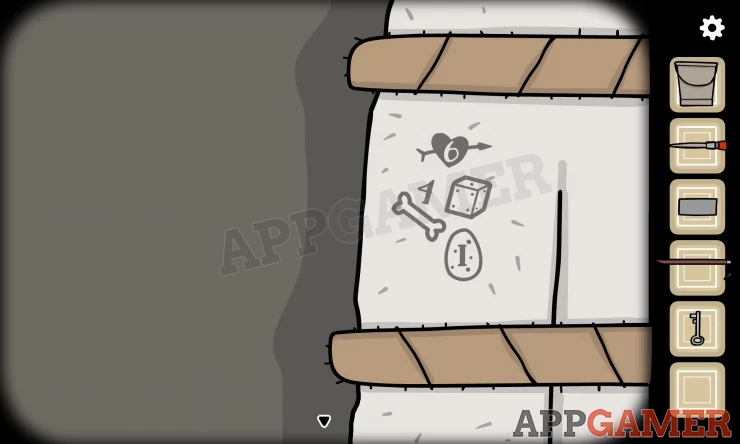
Head to the prisoner and check the tattoos on his arms, and match the symbols that are related to the tattoos
Go right and look at the tattoos on the prisoner’s arms. The symbols on the wall were a dog, bird, boat and tree. So we need to find four tattoos that are related.
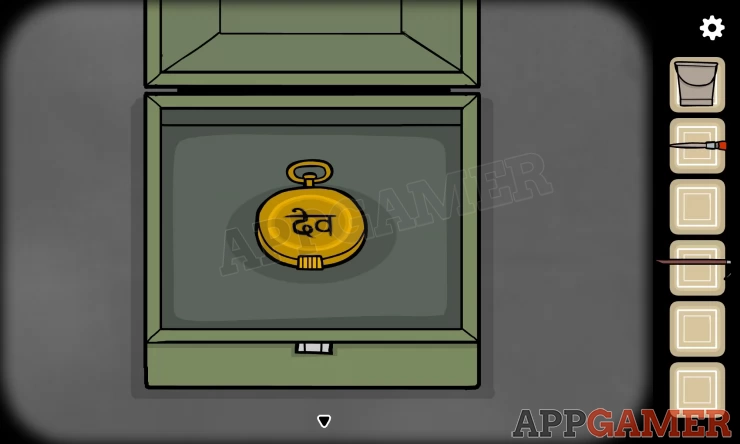
- Dog is related to Bone = 4
- Bird is related to Egg = 1
- Boat is related to Anchor = 9
- Tree is related to Flower = 5
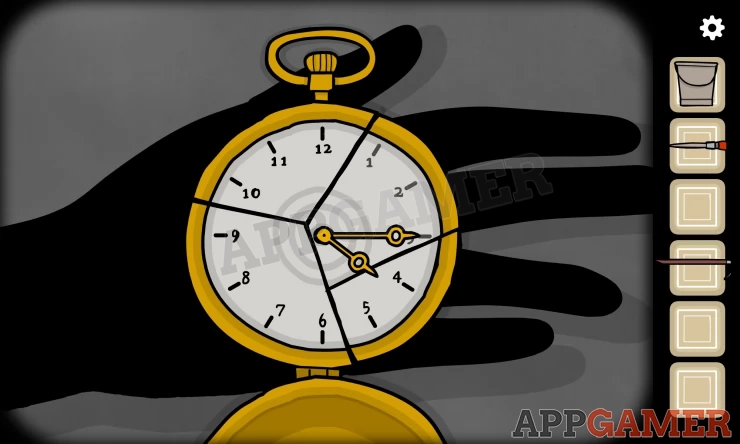
Go back to the lockers and enter the code 4195 to open it and you can take the golden timepiece.
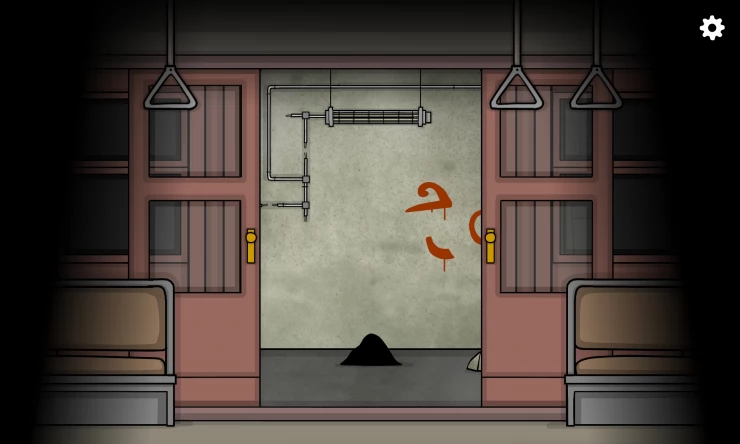
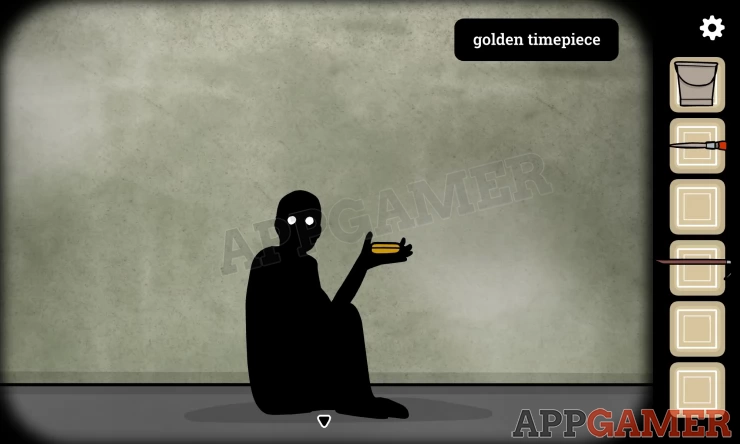
Give the golden timepiece to the shadowy figure on the floor. Then tap the parts of the symbol on the timepiece that correspond to the orange markings on the wall behind her.
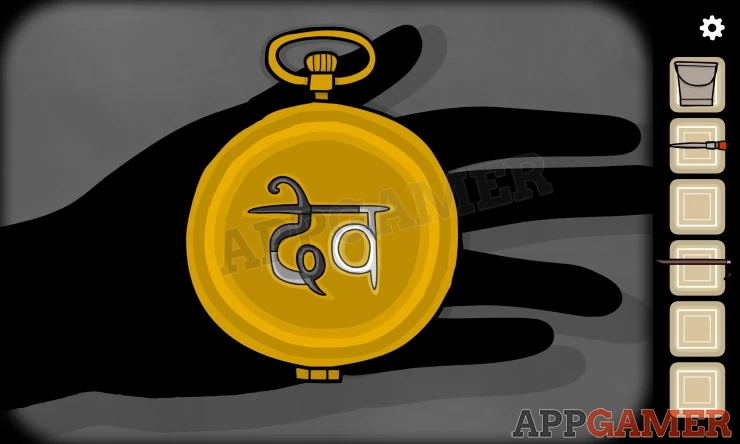
The timepiece will start to spin and eventually stop at 4:15 before breaking.
Head to the platform to the find the train. The shadowy figure will talk to you if you interact with her.
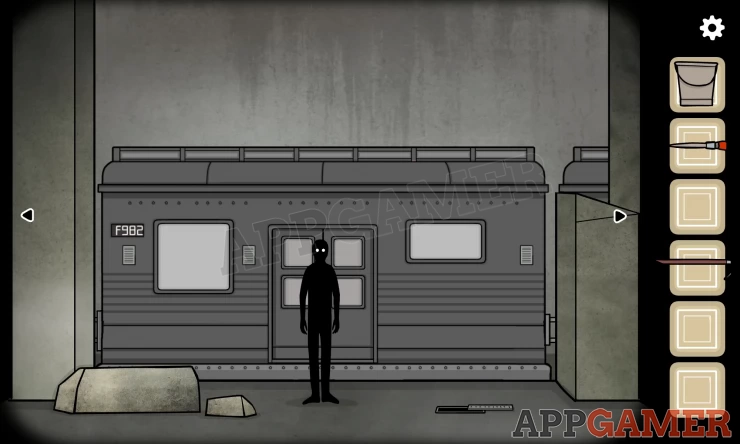
You both get on the train, and this time it looks like without a ticket!

This guide continues with our Chapter 7 The Lake walkthrough.
 With over 20 years of experience in the video games and web publishing industries, Richard is an expert in all things video gaming.