The Ghost Case Part 1
More Ghost Case
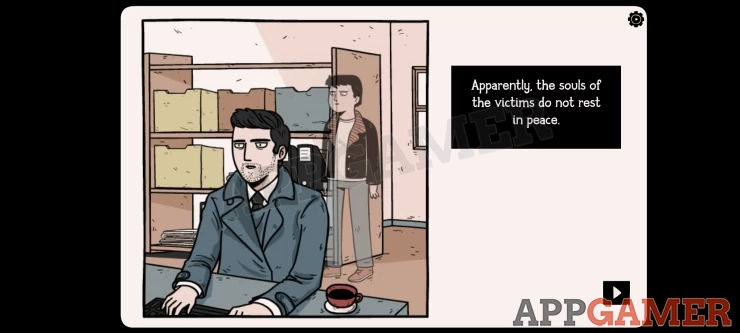
This is Part 1 of our guide to Ghost Case, another creative escape room mystery story game from Dark Dome. In part 1 we begin our investigation at the office of detective Ren Larsen who has been receiving some strange signals from the afterlife.
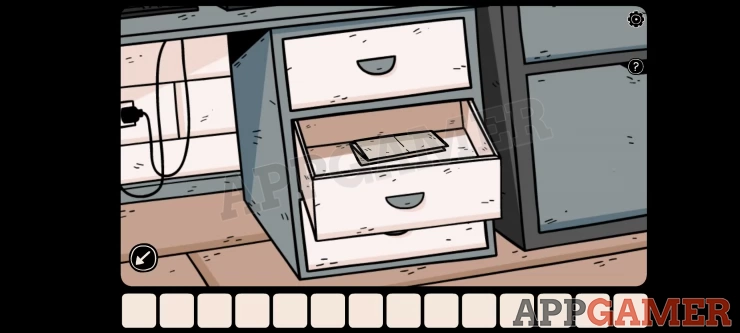
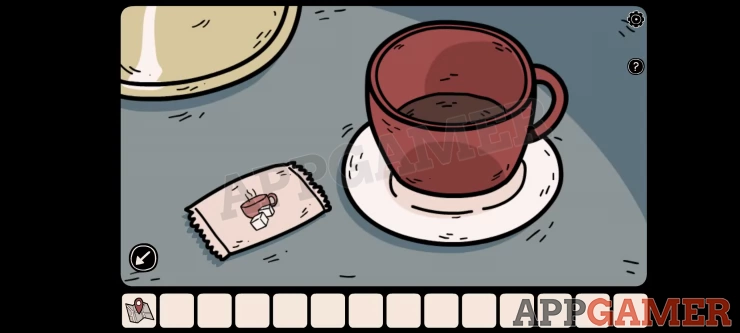
Open the the middle drawer on the right to find and collect a map. Then tap the red cup on the desk to view it and collect the packet of sugar next to it.
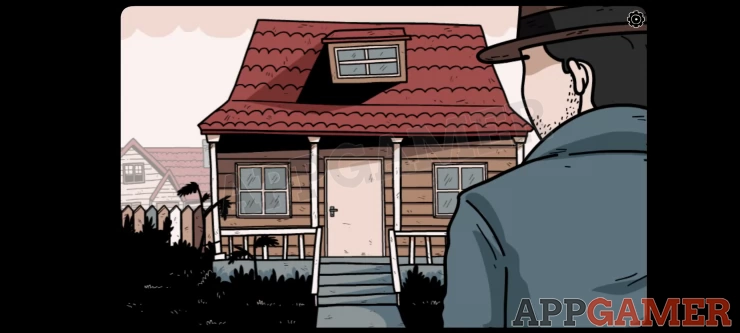
Now open the map that is in the inventory bar at the bottom, you can use this to navigate between locations. You start by tapping on the Murder House to travel there .
You can view the open box on the left to see a photo.
Then turn to the right.
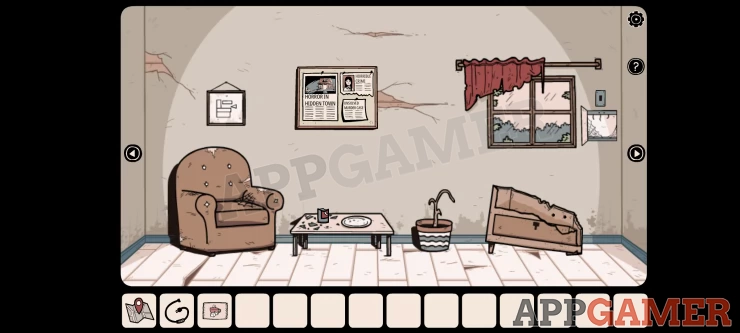
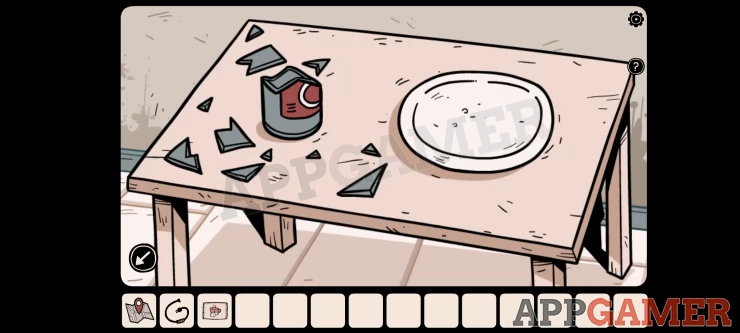
First, tap on the table to see a plate and broken glass, Tap the broken bottle to collect it.
Then view the broken furniture on the right.
Place the broken bottle inside the unit and then add the sugar packet to it.

This will attract the termites to the bottle, you can now collect this bottle of termites.
Turn to the right again.
Here you can find another photo in the middle drawer of the unit on the right.
Turn right again
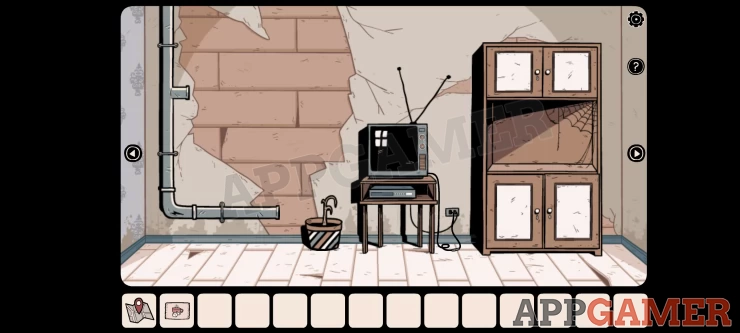
First open the top right cabinet doors to find another photo.
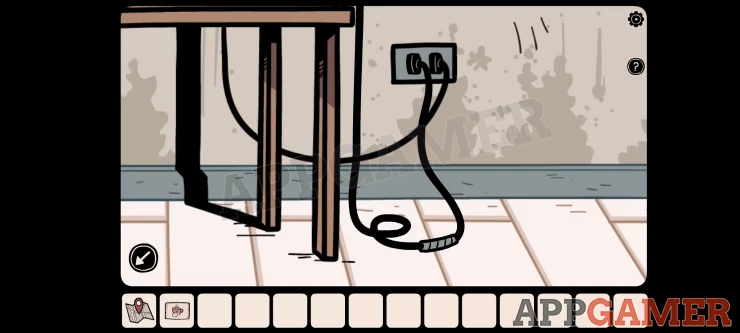
Then you should tap to view the cables under the TV. Tap on the cable with the tape repair to collect it.
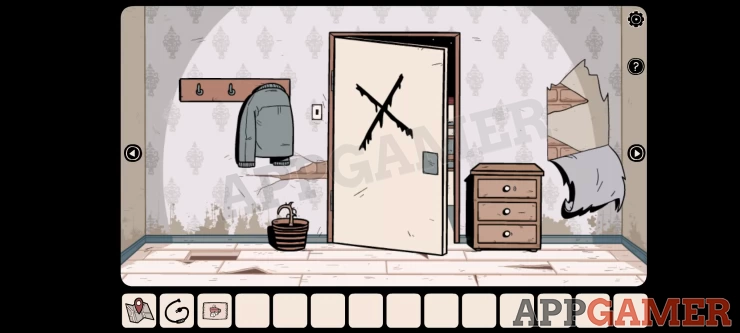
Turn right one more time to be back to the original view.
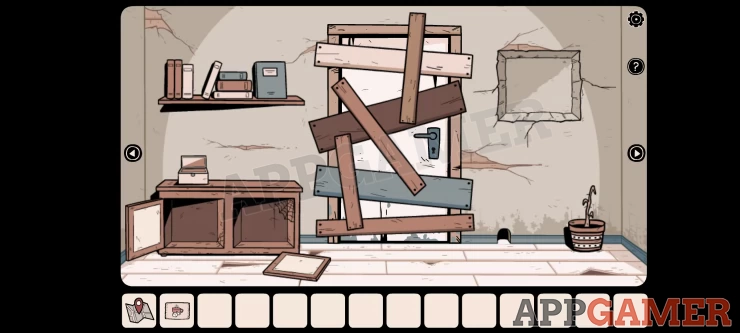
There is a boarded up door way in front of you.
Use the bottle of termites on the door and they will magically devour all of the boards. You can then open the door.
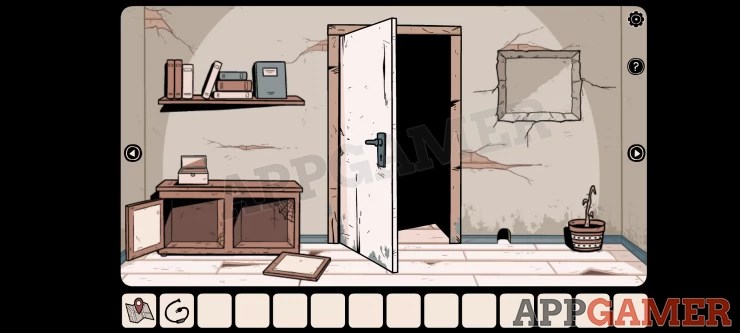
Move through to the next room.
Turn to the right. to see 2 doors.
First make a note of the picture on the wall.
Then open the left door and go into the room. You will see a fish tank on a desk.
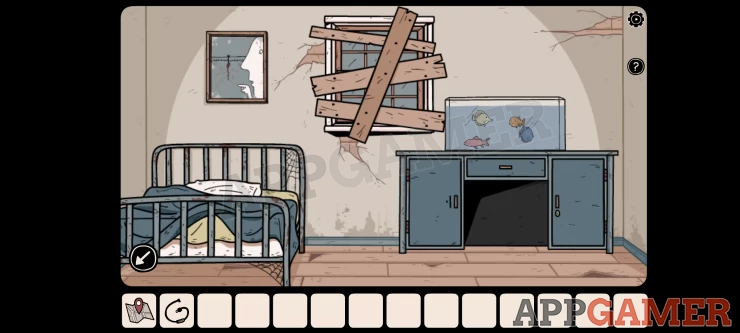
Open the middle drawer of the desk and collect some glue. Make a note of the picture on the wall above the bed.
Now back out, then open the door on the right and go in.
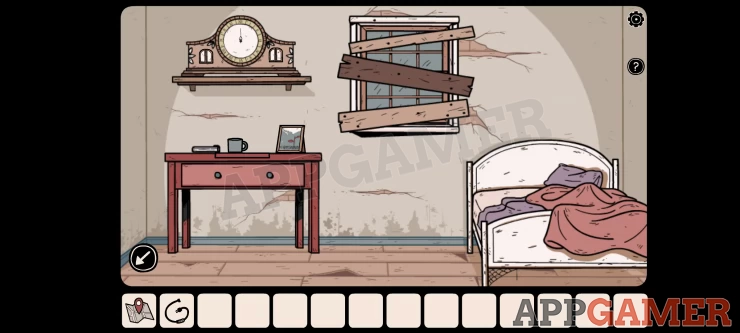
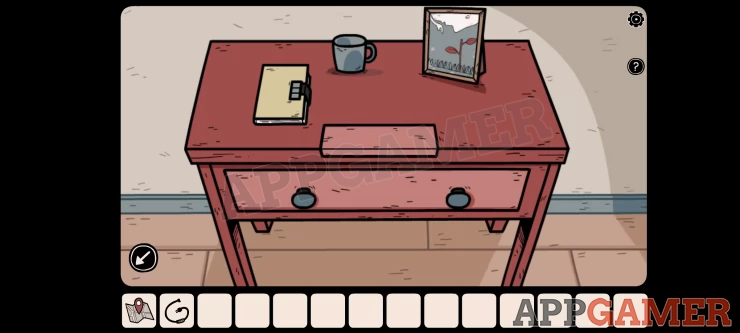
View the desk, note the picture in the frame on the desk. Then collect the yellow book.
Now back out to the previous room and turn to the right again.
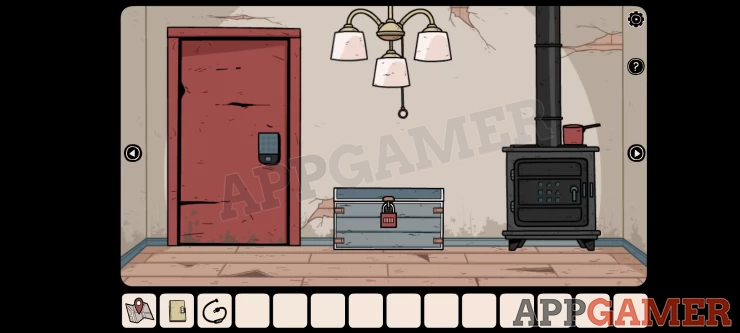
Here we see a chest in the center and a stove on the right.
Turn right one more time and note the fourth picture on the wall in the center.
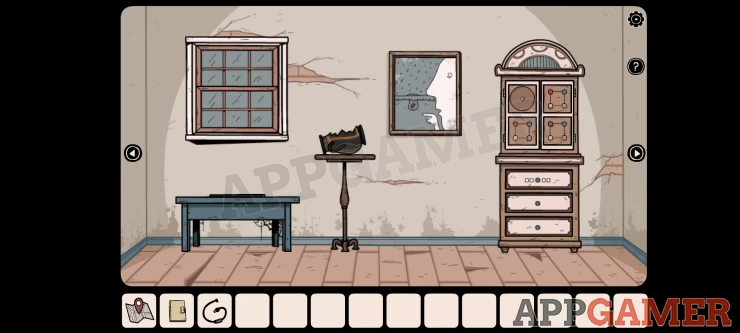
You have seen 4 pictures now, each with a person pointing at an object. Go back to the left and view the chest on the floor. You will see a padlock with 4 arrows.
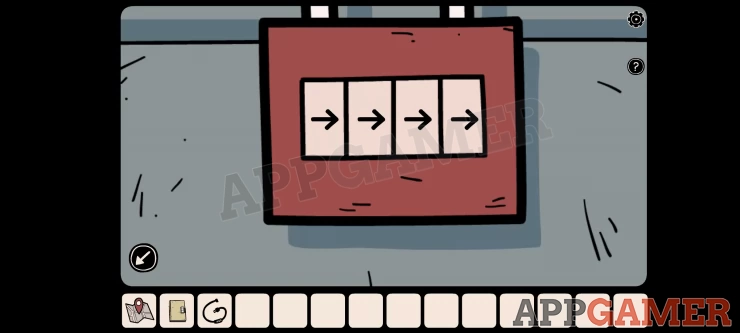
Hint: check the directions of the fingers pointing.
Solution: The solution may vary for you as the pictures can be different. Follow the order of the pictures from see in the ground, roots growing, plant growing and then tree with fruit. Check the directions. For me it was, Left, Left, Down, UpShow
View inside the chest,
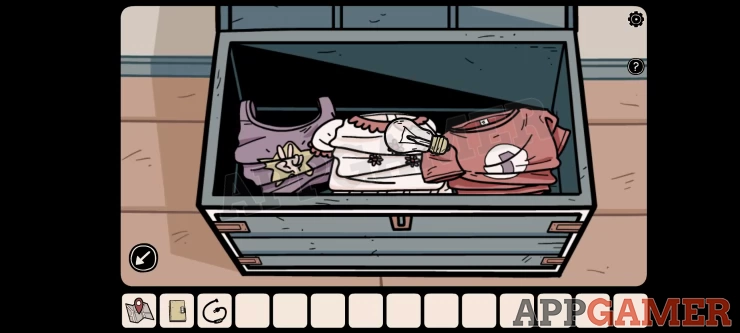
First collect the light bulb
Then you can tap and view each of the 3 clothing items. Tap each one to view it to see the design and then tap again to see the label. Each label has a symbol.
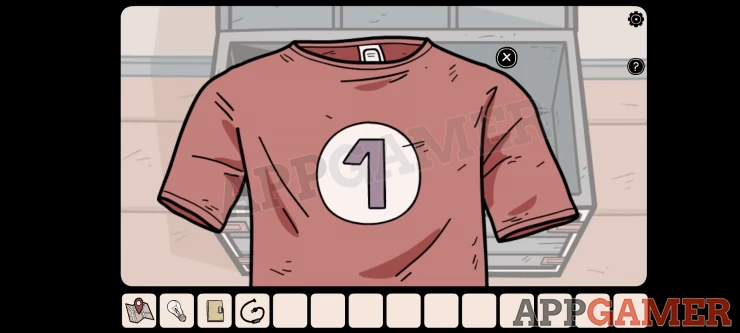
Now view the Yellow book and use the clues here to open the lock.

Solution: each clothing item has a design on the front representing 1, 2 or 3. Then check the label for each to get the 3 symbols in order to use top to bottom on the book lock. These symbols will vary for you. My solution: Show
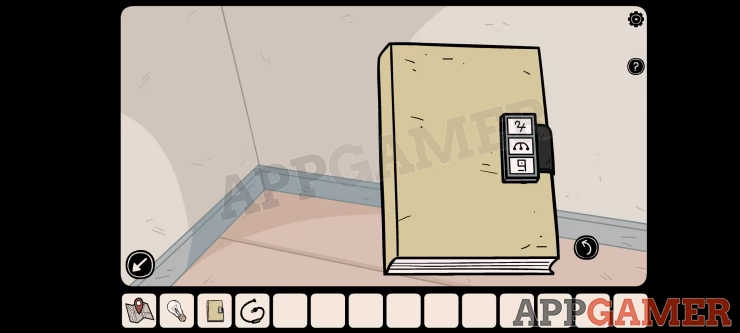
Once done you can open the book
The first page shows a Teddy, this is a clue. After that are some arrows, another clue, Boxes with ticks and crosses, a Robot with symbols, and then a torn page.
Now View the Stove on the right of the chest. This has a puzzle.
Hint: the symbols are the same as the ones on the robot in the book.
Solution: Tap to highlight the symbols that are show white in the book robot drawing. This will vary for you. Show

Once done the stove will open and you can collect a piece of a vase and a pencil from the top shelf. Then also collect a piece of coal from the bottom.
Now turn to the right. Then view the bottom of the drawer unit on the right.
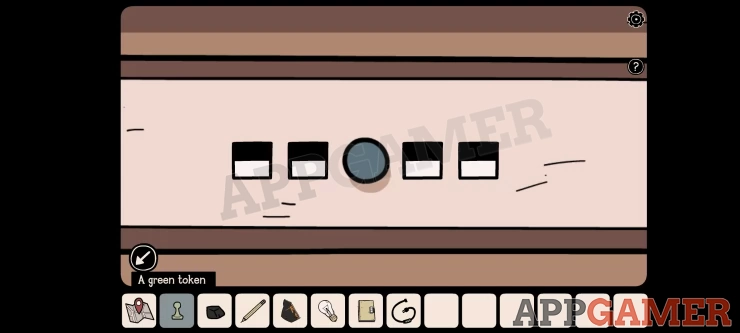
Open the bottom drawer and collect a green token.
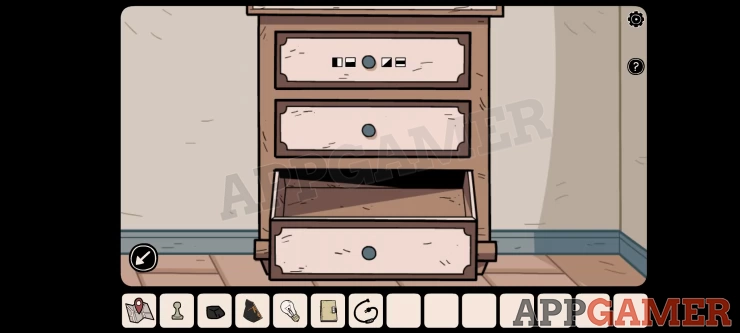
Then view the top drawer, this has a puzzle lock.
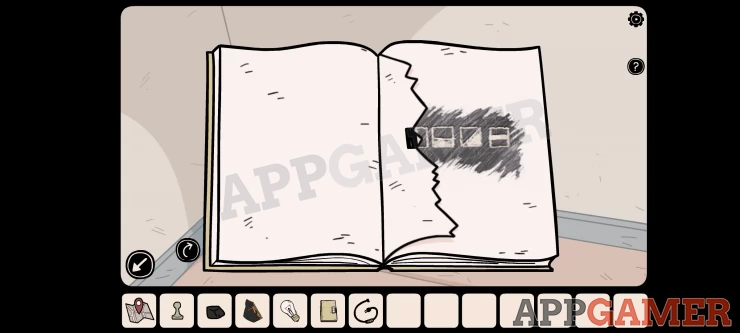
Open the yellow book again and flip to the torn page. Use the pencil on the right to shade in and reveal a hidden code.
Hint: use the code to open the drawer
Solution: The symbols will vary for you. Remember that the shading is an inverted image so white is black, black is white.Show
Open the drawer and collect a blue token, a card with a microchip, and a book.
View the book to see 2 more clues, 4 fish in number order and a page with an arrow symbol.
Next tap to view the closed window on the left. then tap to open it and again to look out.
Collectible: Tap the tree on the top left to find an Owl

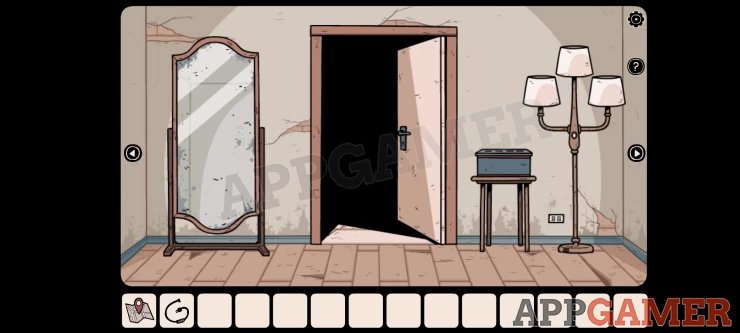
Now back out and turn right to see a mirror and a lamp on the right.
Tap to view the bottom of the lamp. Then use the plug cable here to plug it in.
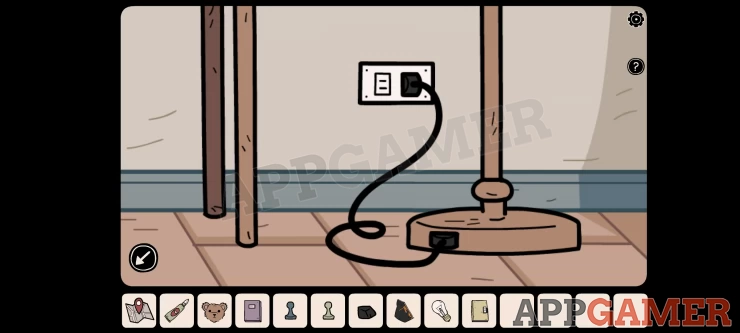
If you view the top of the lamp you you see 3 shades but that it has no bulbs.
Turn around (2 turn left or right) to see a similar ceiling light with 3 lamps. Look inside
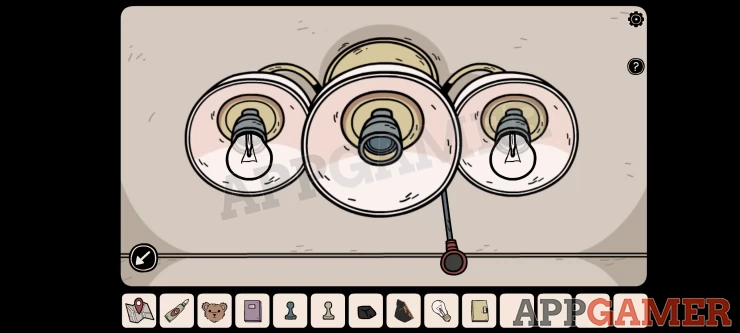
Collect the 2 bulbs from it. Now you need to place the 3 bulbs correctly
Solution: View the yellow book to see a diagram with 6 lamp shade shaped boxes. The top ones are arranged like the floor lamp and the lower ones are arranged like the ceiling lamp. Place the bulbs according to the ticks. Remember to turn on the lamps when you place the bulbs.Show
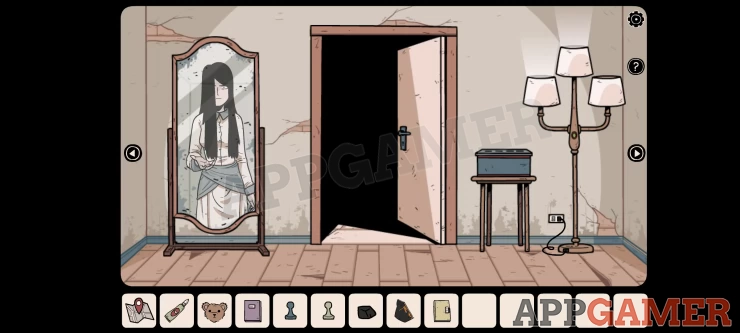
Once done a ghostly apparition appears in the mirror.
Now turn right to find the 2 open doors. Enter the room on the left again to find the fish tank.
First use the card with microchip to open the left cabinet door below the tank.
Collect the Teddy Bear.
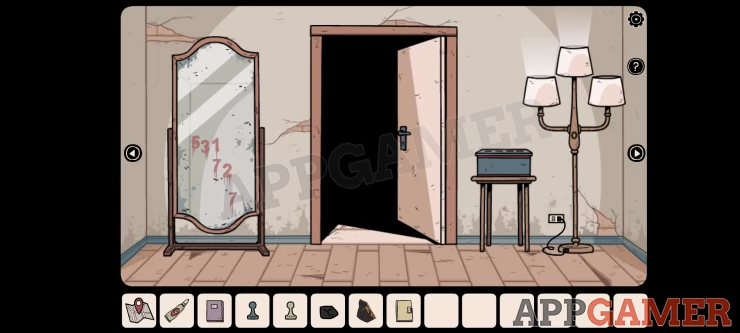
Back out and turn to the left, Give the teddy to the figure in the mirror, you will then get a clue, the number may vary for you.
Turn right to find a telephone. View it,
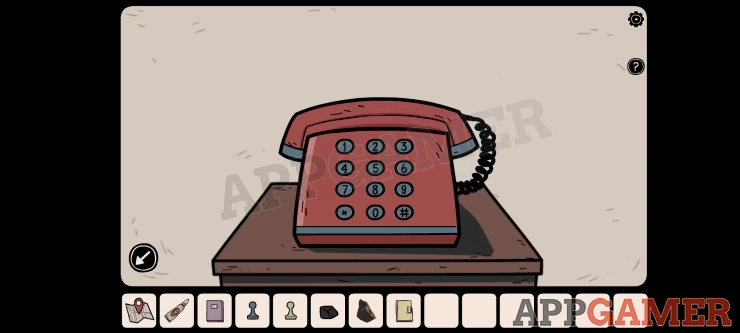
Lift the receiver and then dial the number you get.
You will need sound on for this as the clue is 4 notes of music. You need to listen to it and remember.
Back out of the phone and then tap it again to hear the notes repeated.
Now enter the door on the right to find a red desk. View it again. Ten tap the small panel at the front to open it.
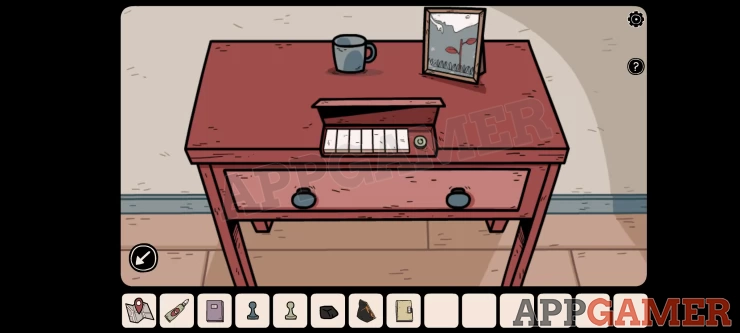
This is a keyboard where you can tap to play notes. Find the correct key to play out the 4 notes that you heard. If you are not a musician then some trial and error will be needed. The notes vary so you will need to work it out.
Once done the drawer opens and you can collect a second piece of vase and a metal clock hand.
Now back out to the previous room and turn around (2 turns left or right).
Here you will see a broken vase on a high table. View this.
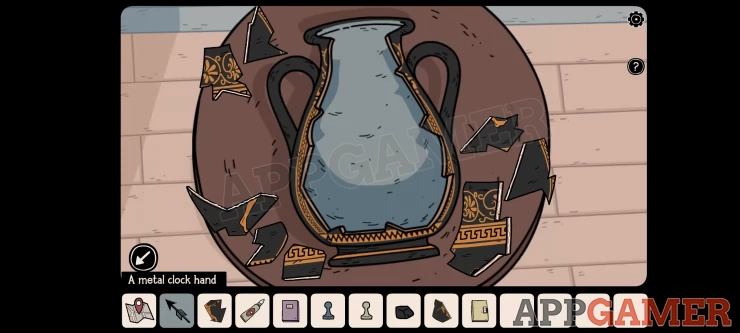
First add the 2 pieces of vase you have. Next use the glue on all of the broken pieces on the sides
Now assemble the vase like a jigsaw.
Once done you can collect 'a minute hand' from the spear of the figure on the vase. Note the direction the hand / spear is pointing.
Turn around again and go back into the room with the red desk. There is a clock above it, view this.
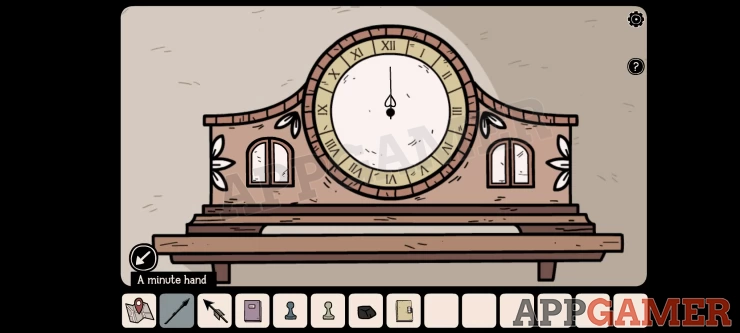
Add the 2 hands to the clock, this is now a puzzle to set the correct time.
Solution: The minute had is set as the spear was pointing (2 o'clock). The second hand is seen in the purple book (8 o'clock). the hour hand is seen in the yellow book. (also 2 o'clock). The directions can vary for you so check your clues.Show
Once done the left door opens and you can collect a red key.
Collectible: Now also open the right door and tap to look inside. Another Owl.
This completes Part 1 of the walkthrough. Move on to Part 2
We have questions and answers related to this topic which may also help you: Show all