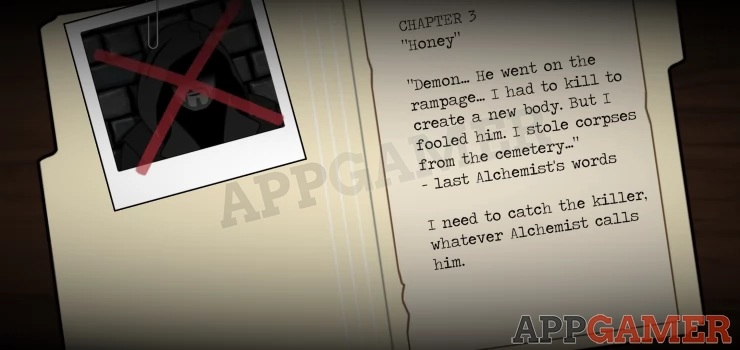
Chapter 3 - Honey
More Strange Case: The Alchemist
Strange Case: The Alchemist is an escape room style game from Labeledman.
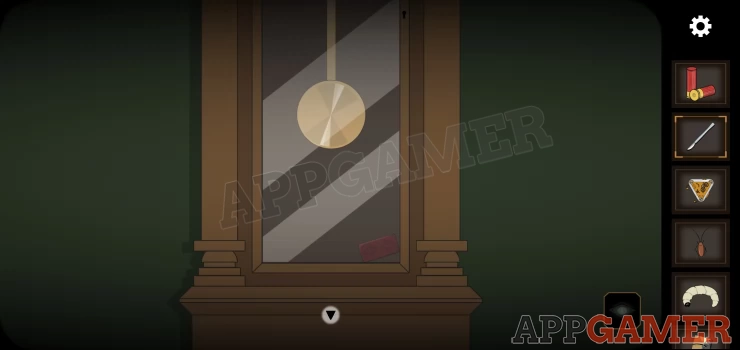
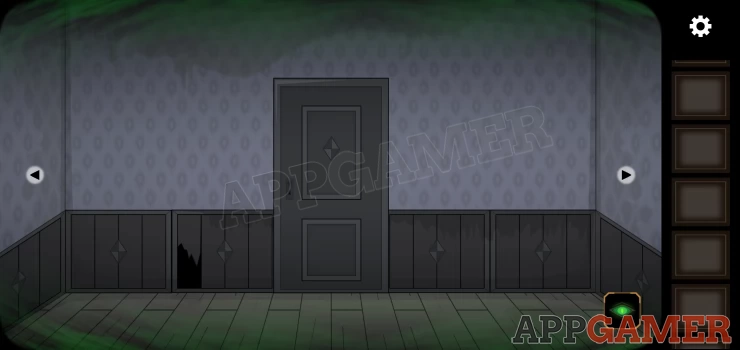
After completing Chapter 2 you are now at the bottom of a ladder in a basement. The third chapter is called 'Honey'.

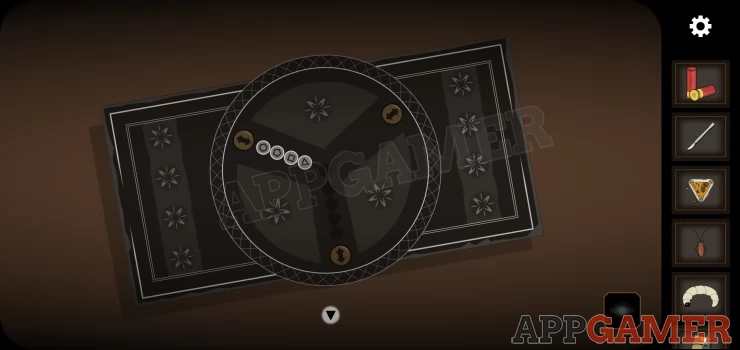
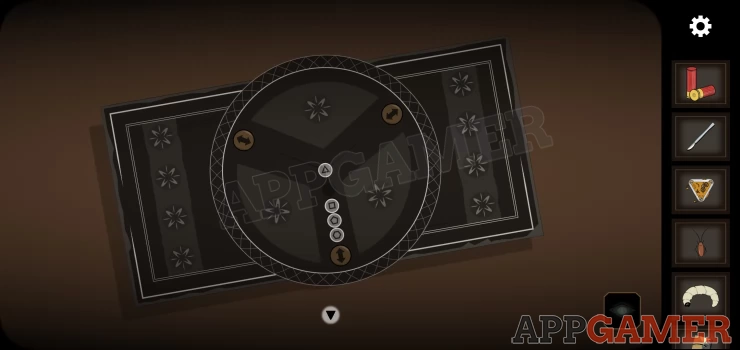
Tap the ladder to look up and find a locked trap door.
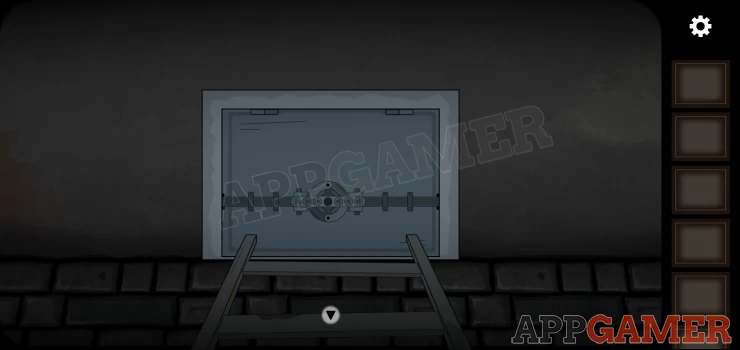
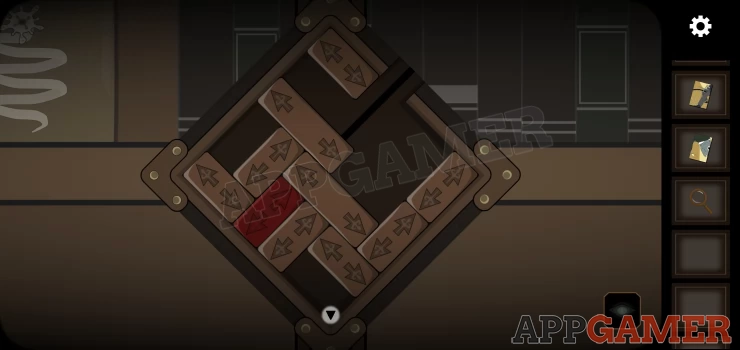
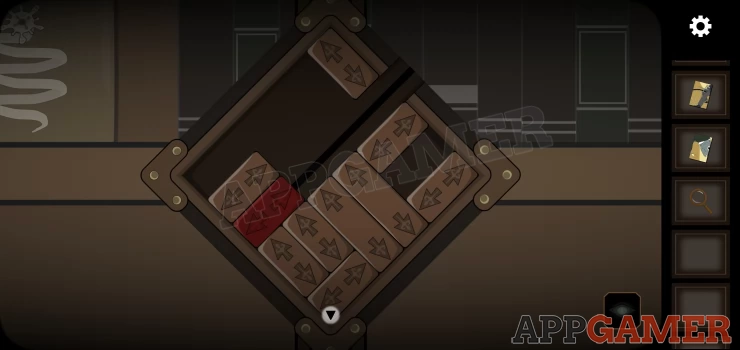
This is a puzzle, you need to move the arrows from the left to the right and from the right to the left. The arrows should end up pointing outwards. the button can only move in the direction the arrows are pointing and only jump over 1 button at a time.
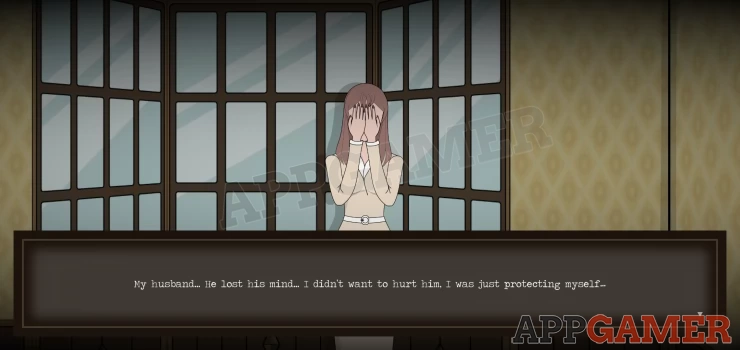
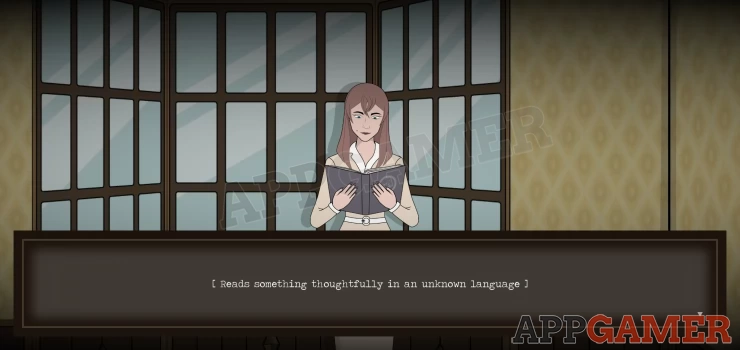
Once done you climb up to a room. You talk to a woman who has been imprisoned by her husband. She asks you to find a book.
Turn to the left to see 2 doors
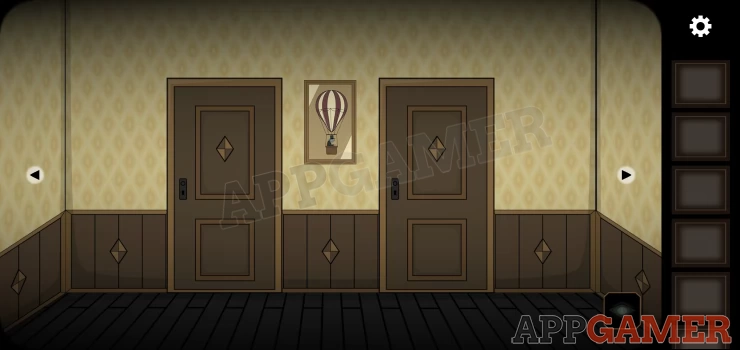
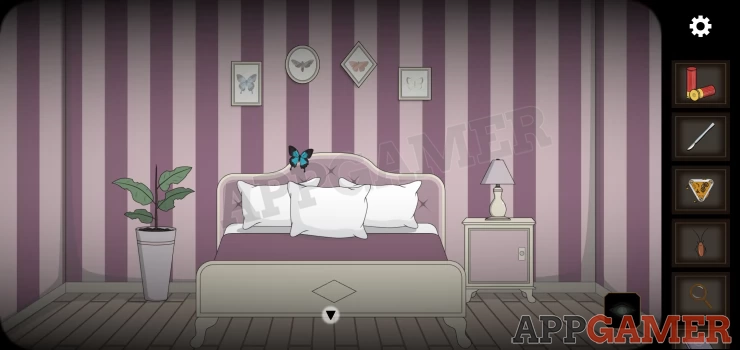
Go through the left door to a bedroom
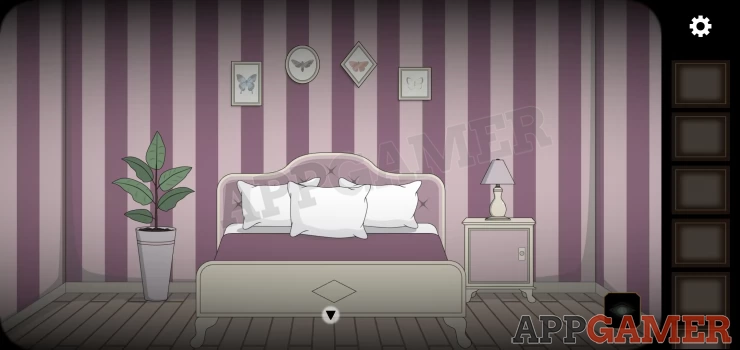
Tap the center pillow to lift it and collect a key
Next view the cabinet on the right of the bed.
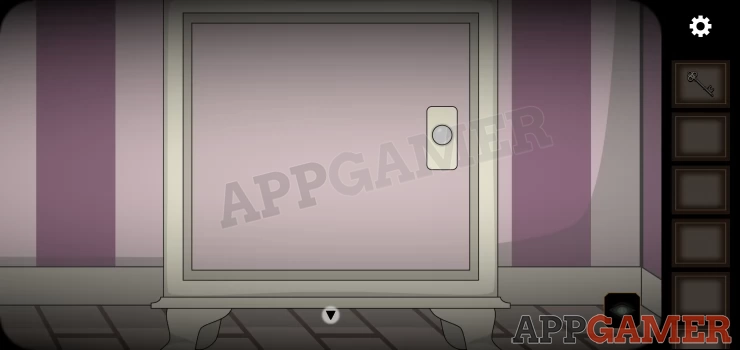
Open it and collect 'ammo'
Turn the ghost vision ON
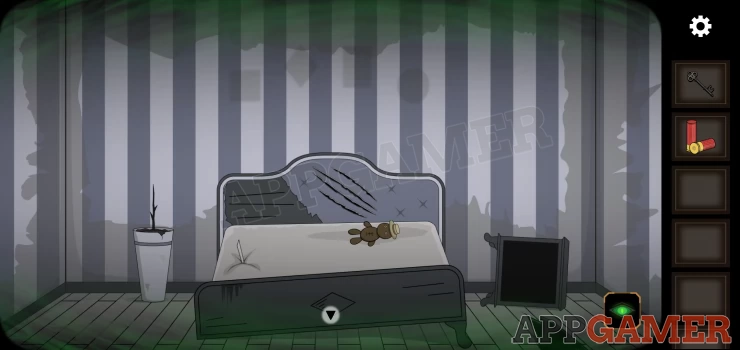
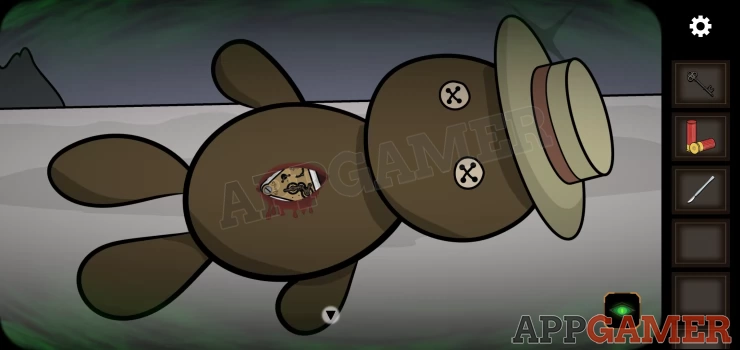
Note the picture frame shapes on the wall above the bed, then view the teddy on the bed.
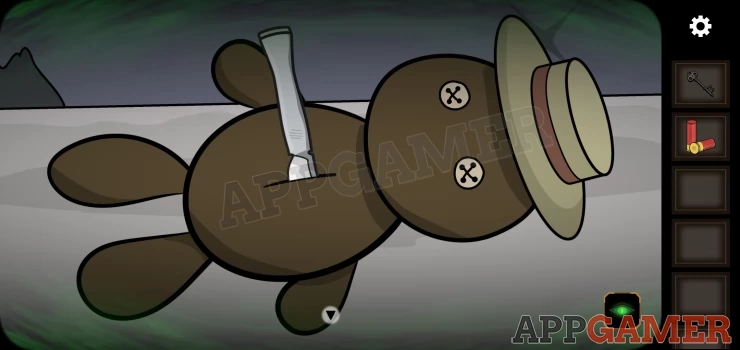
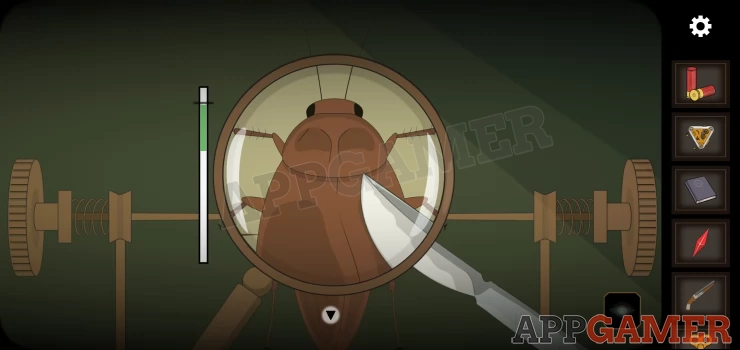
Collect the scalpel from the teddy. Then tap the cut on the teddy top open it and collect a 'mechanism'.
Next view the fallen cabinet on the right.
Tap inside to reveal a head, then tap it again to get some cockroaches to appear.
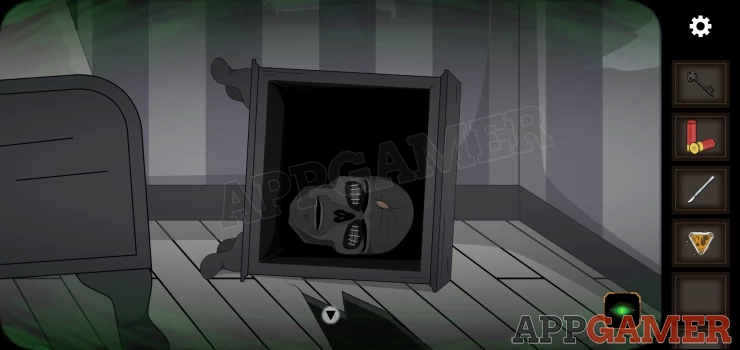
Collect the cockroach that remains.
Next view the plant pot on the left. There are 3 caterpillars.
You need to collect 1 caterpillar but you need to get rid of the other 2 first. Do this by tapping them in the correct sequence. The following will work from when they are all straight. Top, Top, Middle, Top, Top, Middle, Top, Bottom, Top.Show
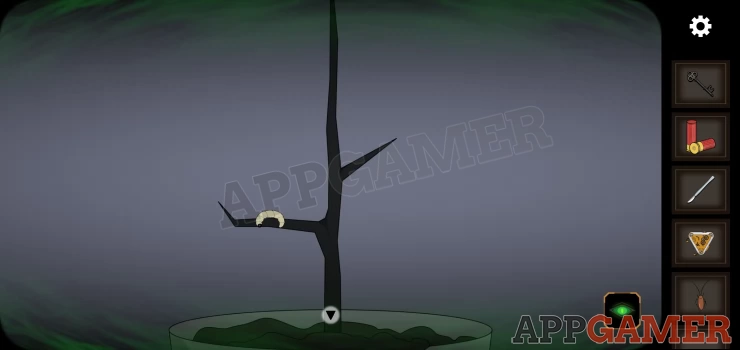
Collect the single caterpillar.
Turn OFF ghost vision.
Exit the room and now enter the room on the right, an office.
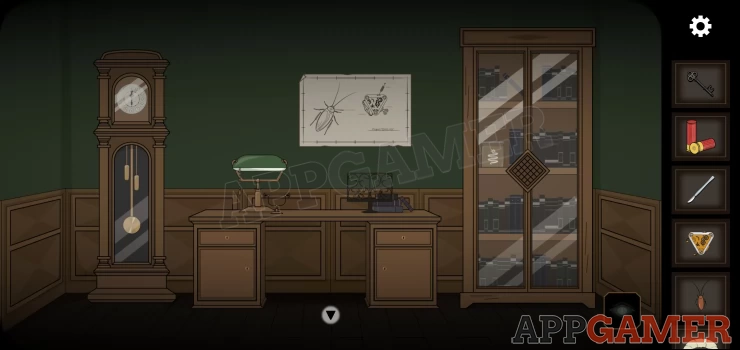
View the poster on the wall for a clue.
Also collect a red pin from the center of the cockroach drawing.

Tap the desk on the right to see a book stand, then view the papers, collect the piece of picture on the left.
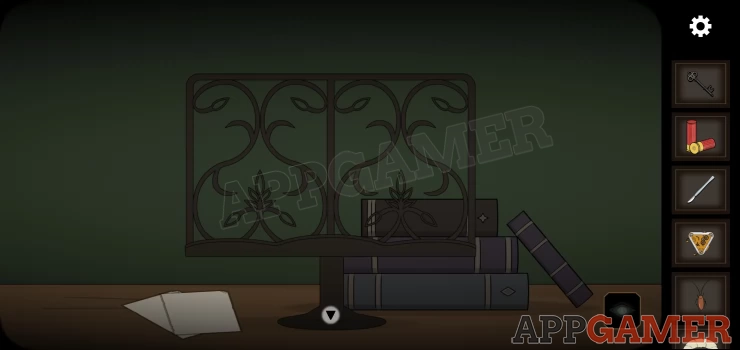
Tap to view the lower left of the desk, use the key you have to unlock the top drawer.
Look inside. Collect a second piece of picture.
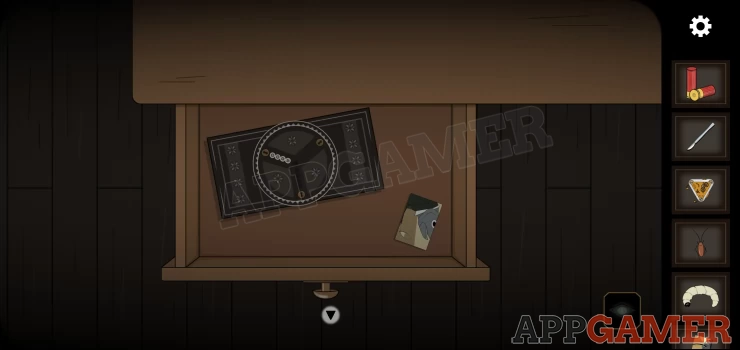
Then tap to view the puzzle box.
Hint note the order of pieces and the 4 slots on the bottom section.
Solution: use the buttons to move the pieces one at a time and arrange them in the same order on the bottom section. You can only place shapes with less sides on top of others.Show
Once done the box opens and you can collect a magnifier
Next use the scalpel on the top left corner of the red fabric in the box to cut it open and then collect a key.

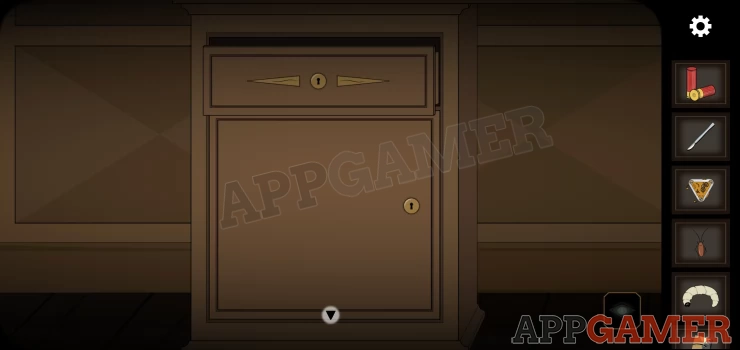
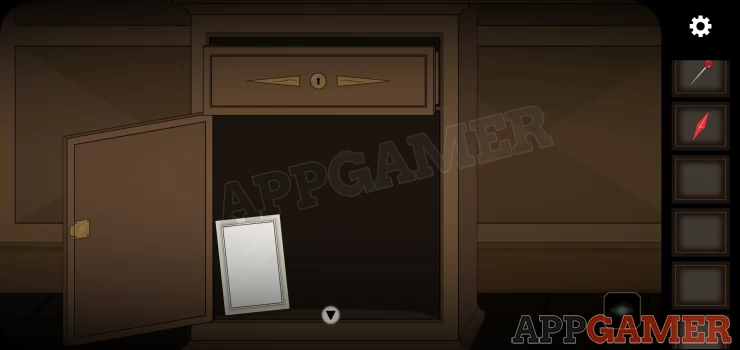
Back up and use the key to open the lower cabinet door on the left of the desk below the open drawer.
Collect a frame.
Turn ghost vision ON.
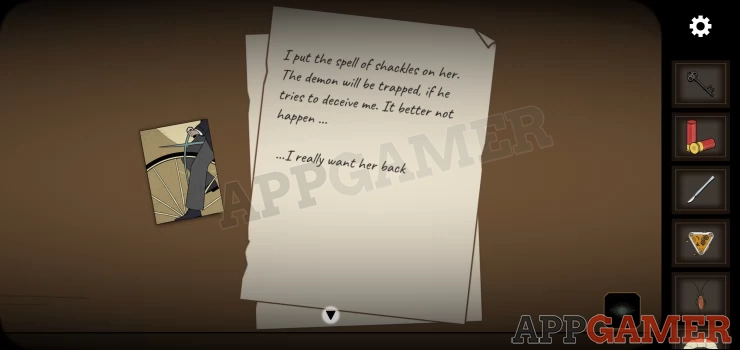
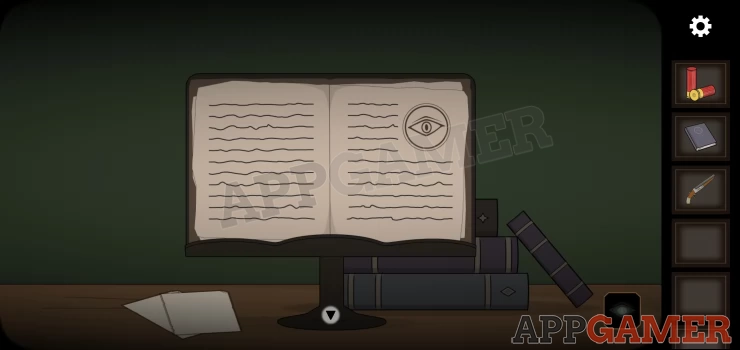
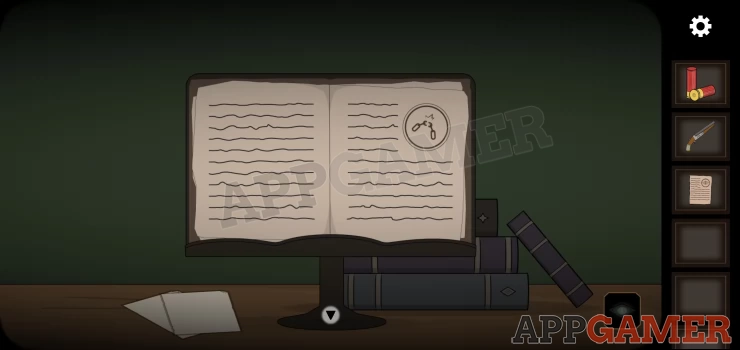
View the book on the left of the desk to see a clue.
View the bottom of the clock on the left and collect a stone from the hole.
Turn ghost vision OFF and view the bottom of the clock again.
Use the stone to break the glass and collect the red 'wooden key'
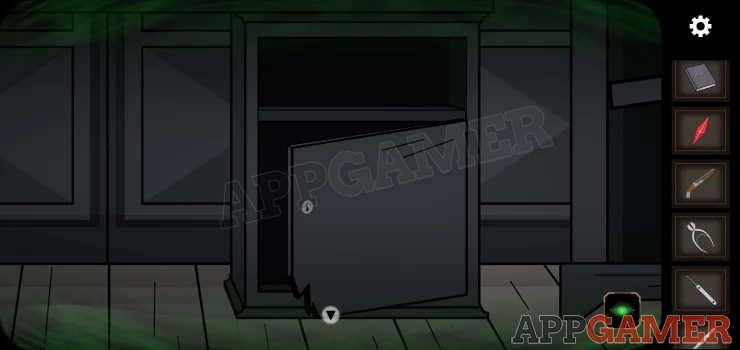
Now tap to view the glass cabinet on the right. There is a lock.
Add the wooden key to it.
Now solve the puzzle by moving the piece to release the red key.
Show
When the cabinet is open look inside. Collect the white 'book of freedom'.
Back out to the center again and turn around, turn ghost vision ON.
View the broken board to the left and collect from inside another piece of picture.
Now turn Ghost vision OFF.

View the picture on the wall.

Assemble the picture correctly by arranging the pieces.
Once done you will have a gap and a piece in your inventory that fits. Add the last piece to reveal a number clue. Fish drinking - 4Show
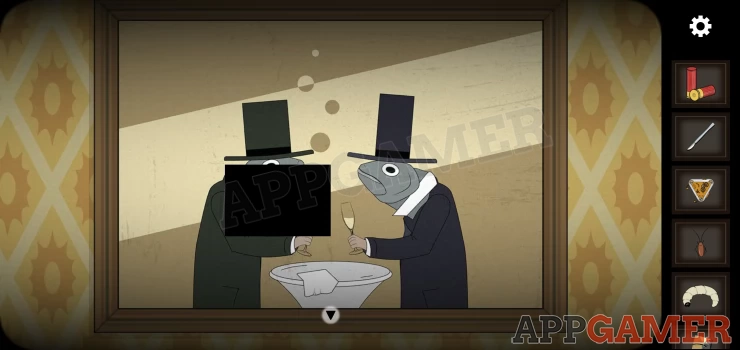
Turn to the right to see another wall picture.
Do the same here. assemble the pieces and then add the last piece from your inventory.
Bicycle - 1Show
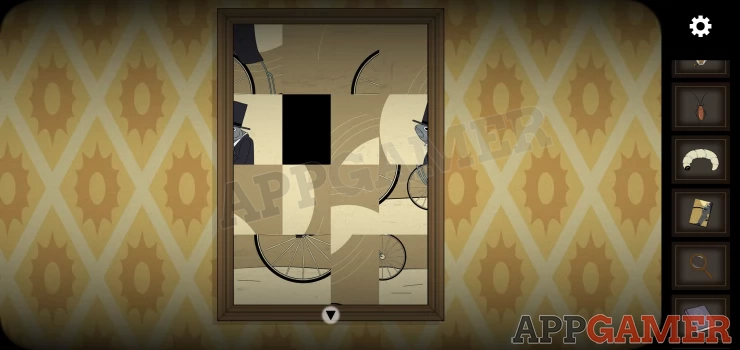
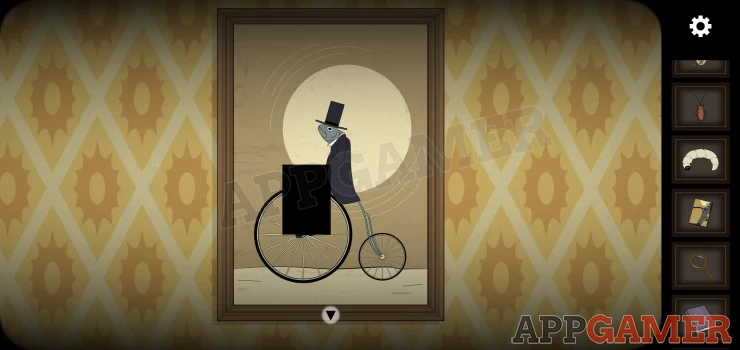
Turn right again and see a third picture. Repeat the same process.
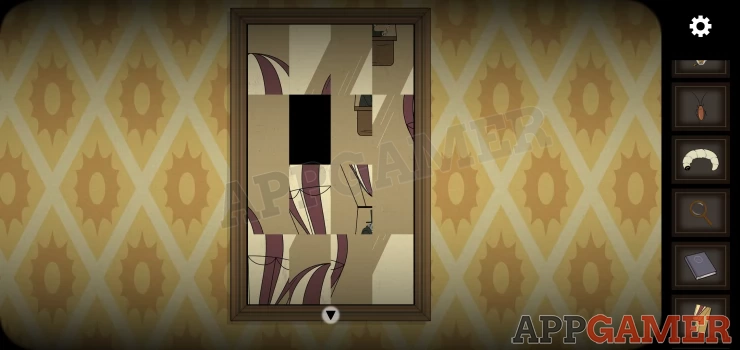
If you have any trouble finishing this one note the the bottom left 2 pieces are both identical but need to be in the right places. Swap them over.
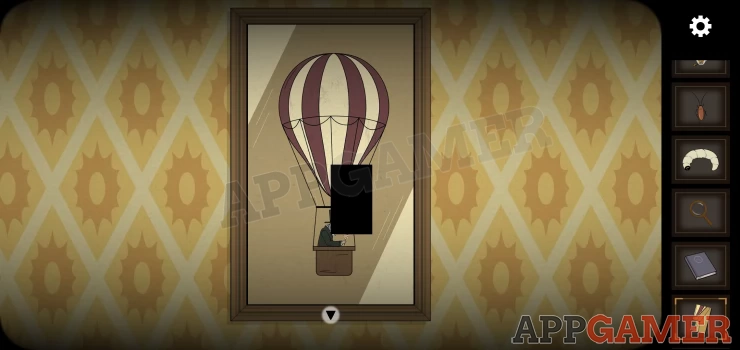
Balloon - 7Show
Return to the office room.
Turn ON ghost vision and view the top of the clock . Note the 5 symbols under the clock face.
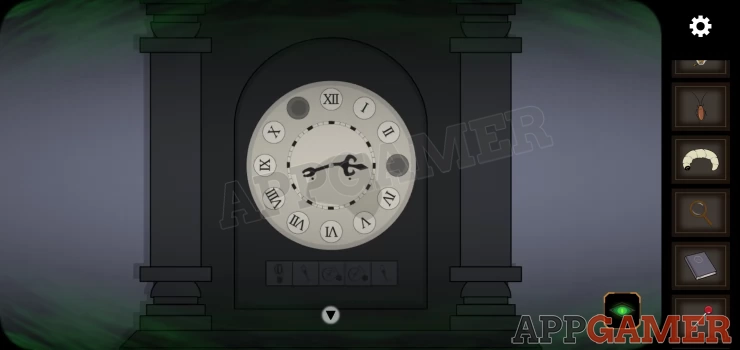
Now turn OFF ghost vision and view the clock face.
Using the 5 symbols as a clue, tap numbers on the clock in the correct sequence.
Solution: the symbols refer to the pictures on the walls, and each one has a number.Show
Code: 7 4 1 1 4Show
A panel opens and you can collect a crystal.
Now move to the bedroom.
Place the caterpillar on the plant on the left, it will eat some leaves and turn into a butterfly.
When this lands on the bed use the pin on it to collect it.
Now tap to view the picture frames above the bed. There is one missing.
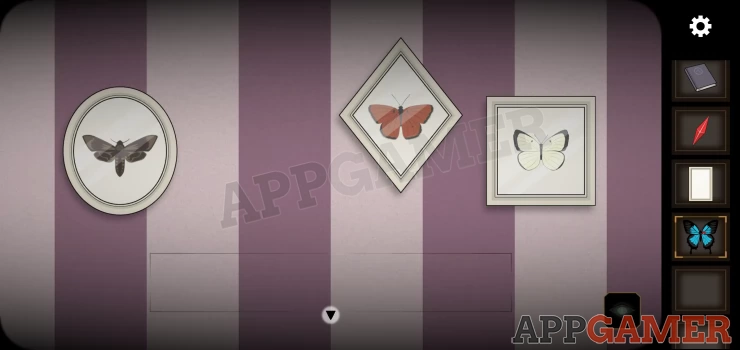
Add the frame to the wall, then add the butterfly to the frame. You now can arrange the frames to the correct positions.
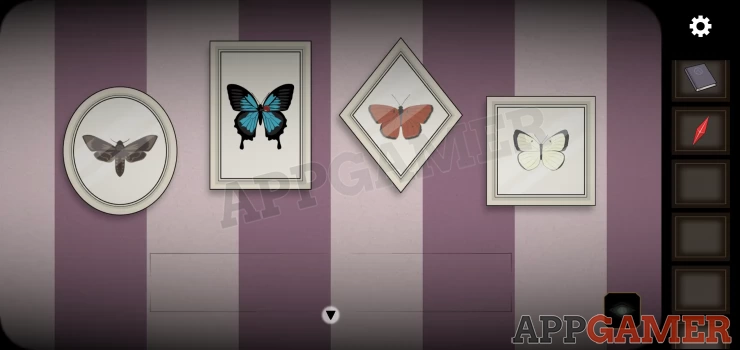
Hint: check the room with ghost vision on to get a clue.
Solution: Show
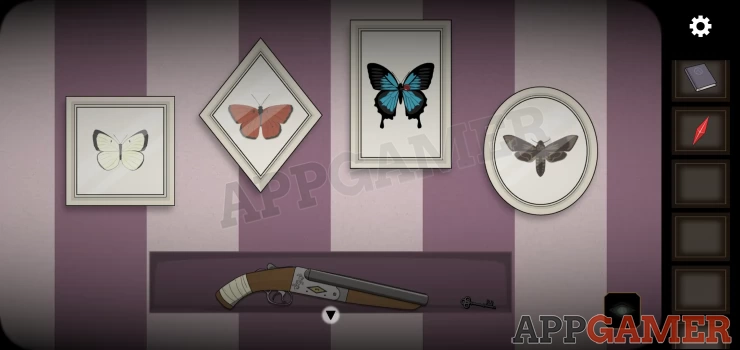
Collect from the open panel a shotgun and a key.
Go back to the office.
Use the key to open the to right drawer of the desk.
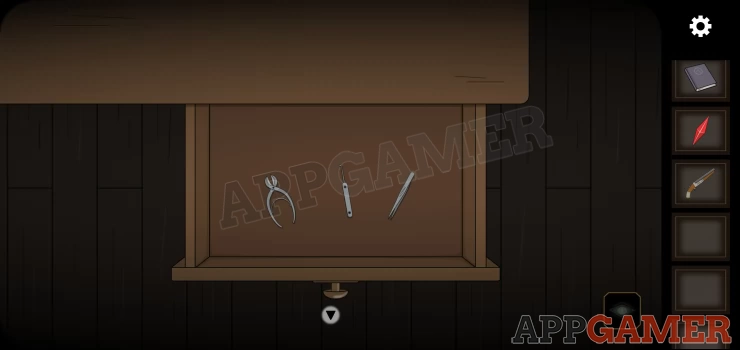
Collect wire cutters, lock pick and tweezers.
Turn ghost vision ON. Then view the lower right of the desk
Use the tweezers to collect a broken key from the lock on the open broken door.
Then view the top right of the desk to see a dead cybertronic rat.
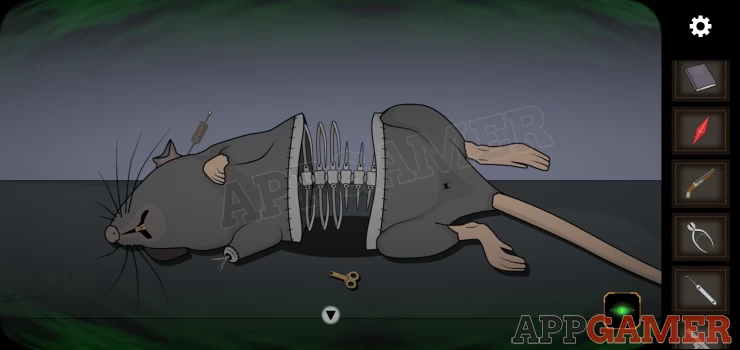
Collect the clockwork key from the table top and then use the wire cutters to take the antenna from the rats head.
Turn the ghost vision OFF and view the bottom right cabinet of the desk again.
Use the lock pick on the locked door to start a puzzle.
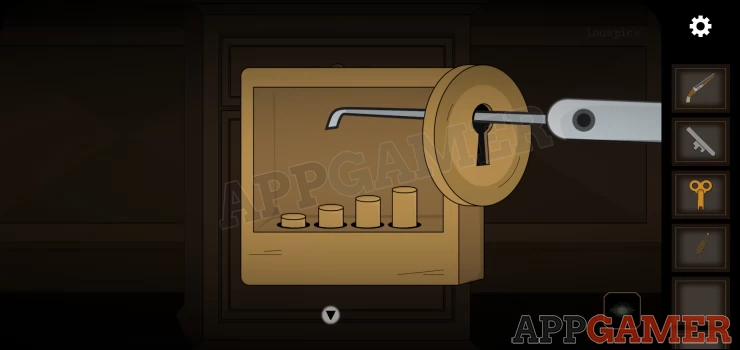
First use the broken key on the puzzle to place it for a clue.
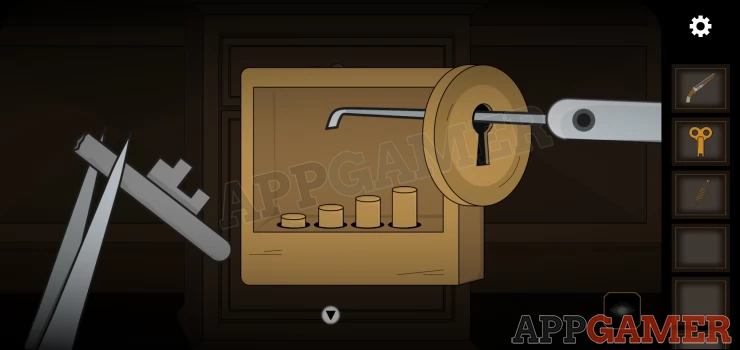
Now tap each of the 4 pins in the lock to raise or lower them to the correct heights, you need to match the key.
Solution: the pins have 4 positions, 1 the lowest up to 4 the highest. Set them left to right as 3, 4, 1, 3Show
With the door open view the box inside with a puzzle.
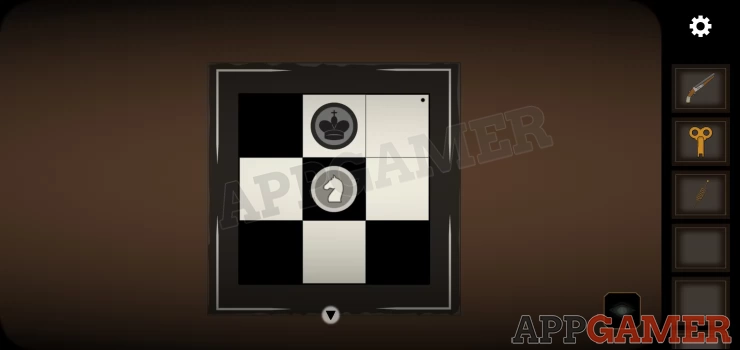
Hint: to complete this you need to take the king with the knight. But to move the knight you need to first tap the top right tile to move it.
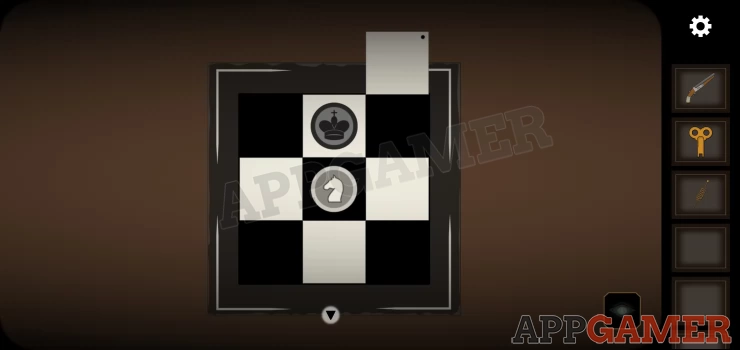
Move the knight piece until it lands on the king. You can then collect a remote control.
Now view the top left of the desk to see an apparatus.
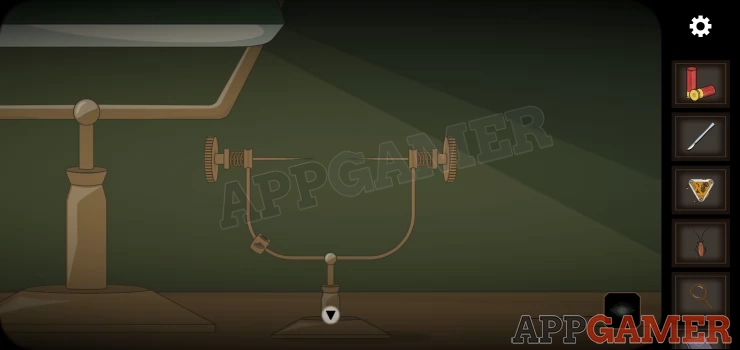
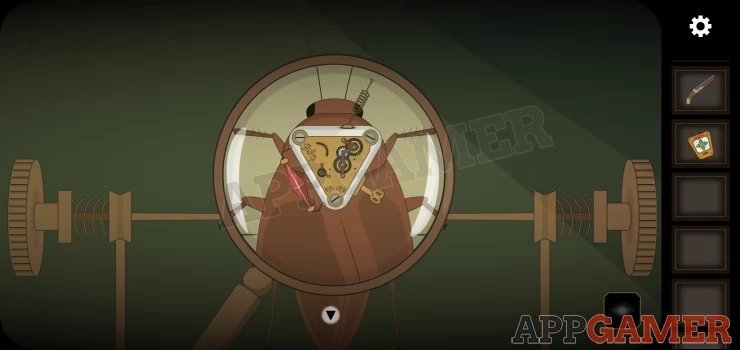
Add the cockroach to this. Then add the magnifier. Then tap to view closer.
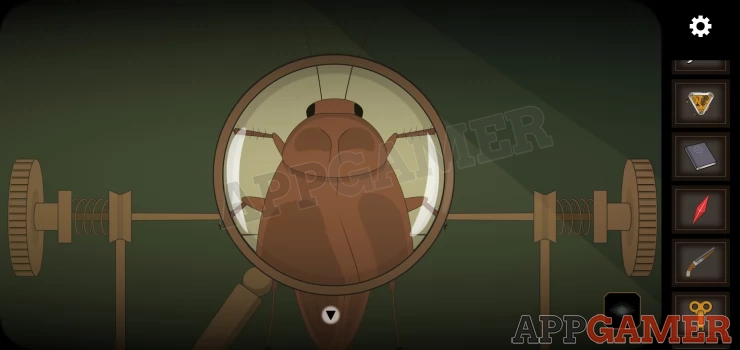
Now use the scalpel on the cockroach to start a mini game.
Tap the screen to make cuts at the right times (when the moving line is in green), do this 3 times.
Once done you can add the mechanism to the cockroach back. Then add to it the crystal, the antenna and the clockwork key.
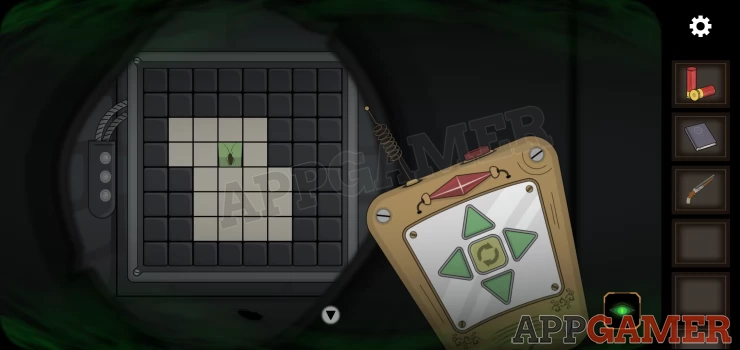
Now use the remote control to start a puzzle.
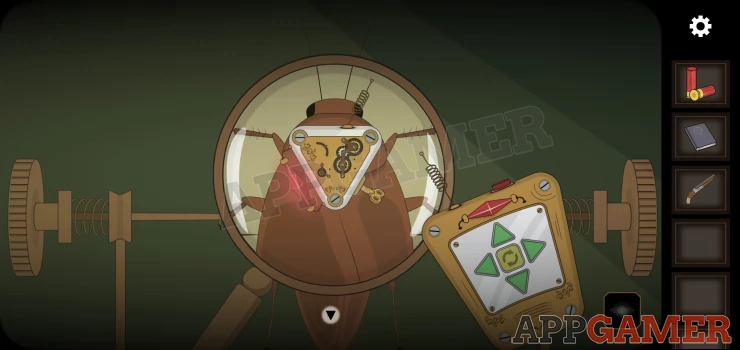
The light on the crystal will flash in a sequence. Tap the button on the remote control to match the sequence.
When you do the sequence will change. copy it again, you will need to do this 4 times.
When the crystal on the control starts flashing itself it is linked and you can tap the remote control to collect it and the remote control cockroach.
Turn ghost vision ON.
View the broken cabinet on the right of the room to see a hole in the back.
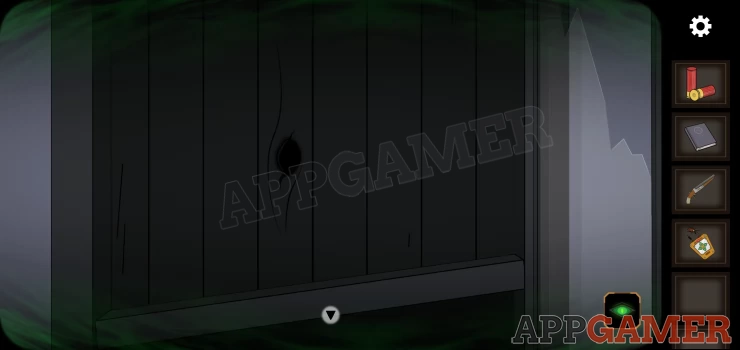
Tap the hole to look through. you will see a grid.
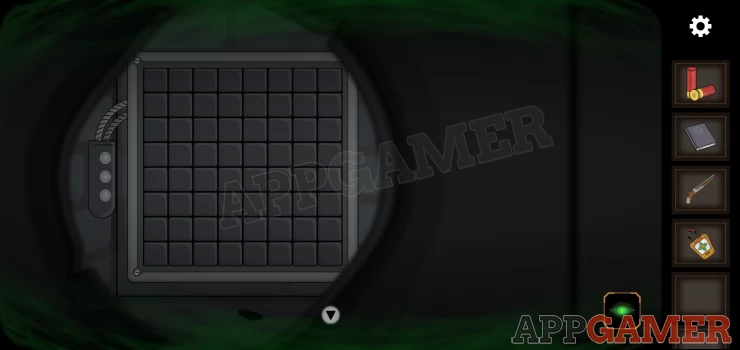
Use the remove control cockroach here to start a puzzle.
Use the controls to move the cockroach around, you need to cover all the white squares to turn them green, you cannot cross over a green square though.
There are 3 levels to the puzzle. You only turn Left or Right.
Level 1: Press buttons - R, L, L, L, L, R, L, L, L, LShow
Level 2: Press buttons - L, R, R, R, L, L, R, R, R, R, R, R, L, L, R, R.Show
Level 3: Press buttons - L, L, L, L, R, L, L, R, R, R, R, L, L, R, L, R, R, R, L, R, R, R, R.Show
Collect the Book of true form.
Now turn ghost vision OFF.
View the book stand on the desk and place the red 'Book of true form' on the stand.
Tap the page on the right to tear it out.
Now pace the blue book of freedom on the stand.
Place the torn page onto the book to replace the one with the broken chain.
Then collect the 'fake book of freedom'.
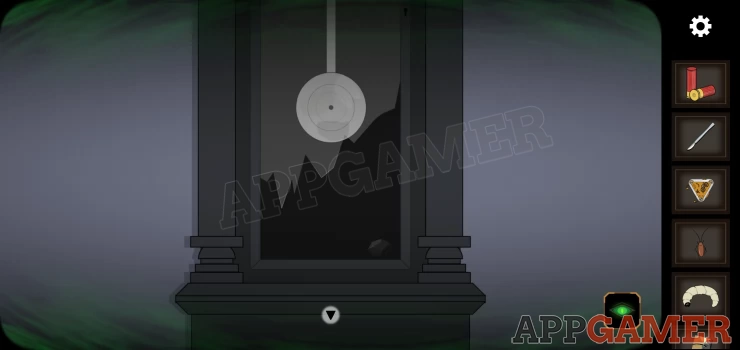
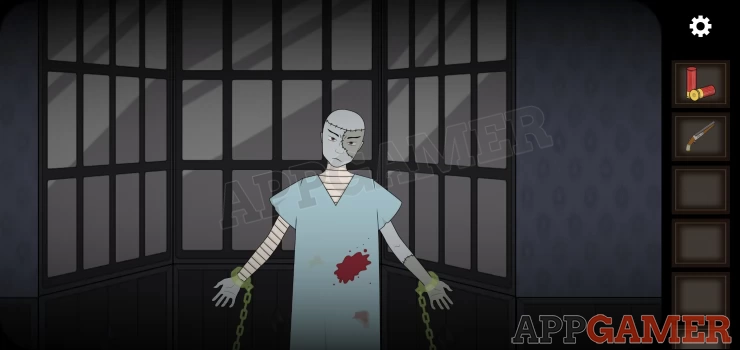
Exit to the first area and turn to find the woman who is waiting to be freed.
Give the fake book of freedom to her and she will read a passage from it.
Now instead of being freed she will be transformed to her true form.
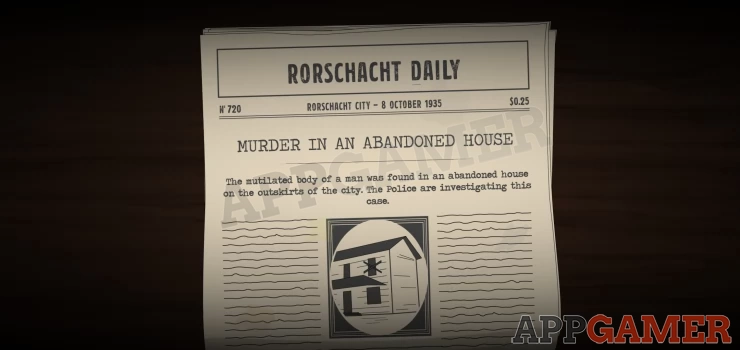
You then have a few seconds to respond, she will attack you. if you fail you die and the game ends with news of more ritual murders.
To get a good ending you need to select the shotgun, then load it with the ammo. You will have a gauge to try to shoot the killer when the bar is in the green section. You do this twice.
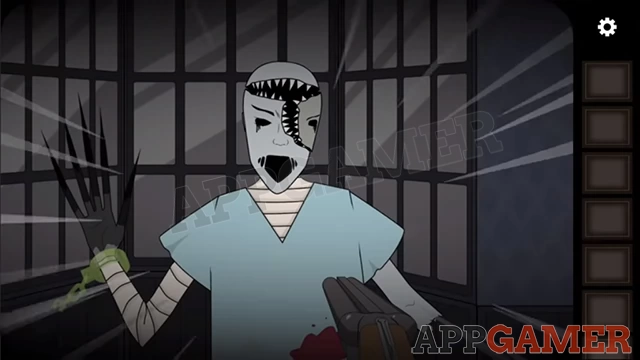
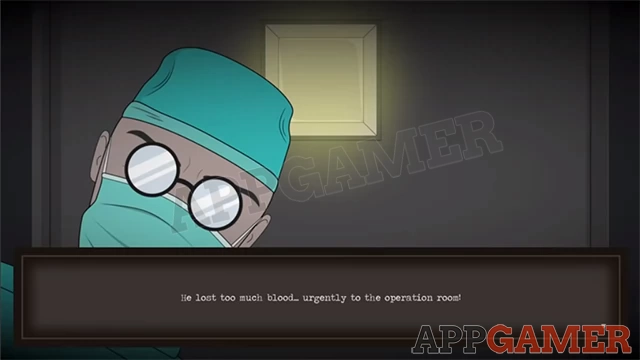
If you succeed you will wake up in the hospital, injured but alive. But is the evil killer dead?
That completes Chapter 3 and the game so far. If the developers add any more content we will update the guide here.
If you have any questions for any of the puzzles please head to the Answers Page to ask there.
We have questions and answers related to this topic which may also help you: Show all