Chapter 7 - Part 3
Tiny Room Stories: Town Mystery Guide
This is our full walkthrough of chapter 7 - part 3 in Tiny Room Stories: Town Mystery. We have every step detailed with images and codes which can be revealed if you need them.
Read below for a full description with hints and solutions, or you can also watch the video walkthrough.

Chapter 7 - Part 3 - 52 Cardon Street
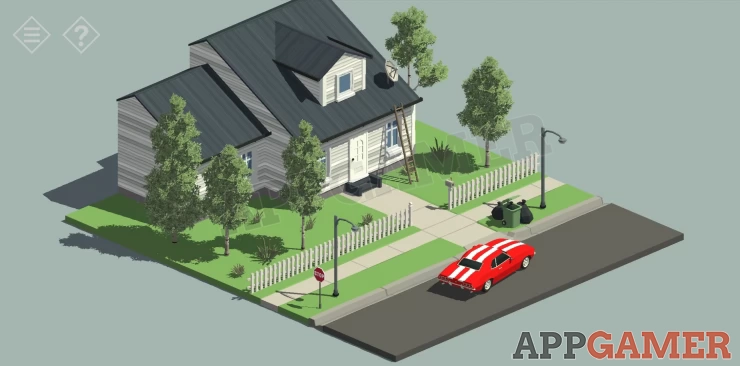
Tap on the mailbox on by the front gate to open it and collect a black key. Use the key on the front door to open it and then go inside. In the first room collect a red book from the table in the center.
Rotate the view to see 2 draw units on the back wall. Collect a brown book from on top.
Find the sofa on the wall and tap to move it. Collect a brown book from underneath.
Move into the kitchen.
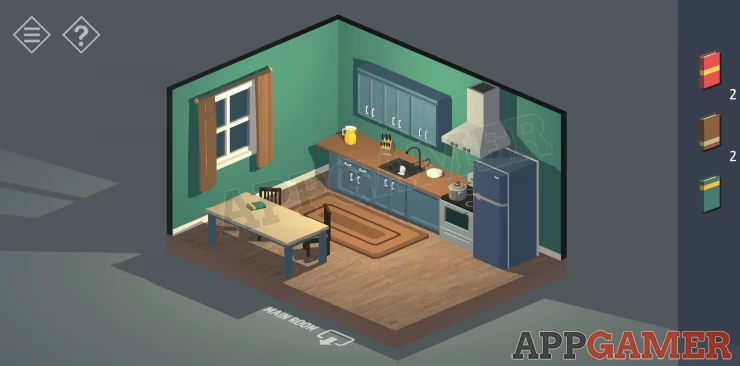
Collect a Green book from the table.
Open the drawer on the lower left to find a Flashlight.
Move into the corridor at the back.
Tap the small table at the end to view it and then open the drawer to collect a screwdriver.
Then tap the ladder to go up into the attic.
Collect the picture that is leaning against a side wall, then tap to collect the radio next to the blueprints.
View the Radio and tap it to turn it around to see the back.

Use the screwdriver to open the battery case. Then collect the Battery.
Open the Flashlight and use the battery on it. The flash light now works.
Move to the bedroom.
Rotate to view the TV screen. Tap the unit below the TV and check inside the unit to find a second red book and a green book. Then tap the TV control on top of the unit to collect it.
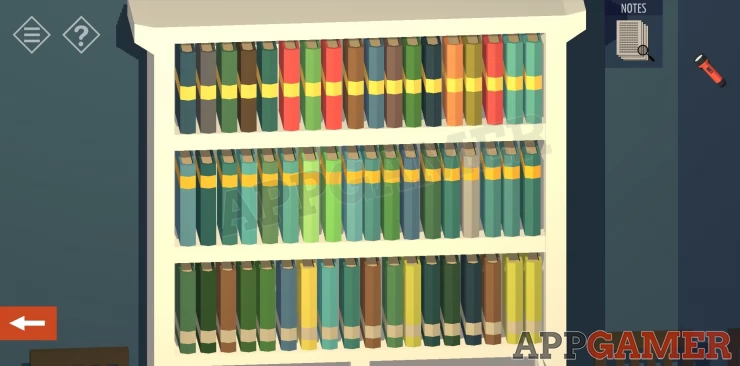
Go back to the main room again and tap on the book case. This case is missing some books. Use the books you have found to place on the book case.
Hint: The books have coloured stripes on the at either the top, middle or bottom. make sure to place the books so that they match the others on the shelf.Show
Show
This opens the bottom cupboard on the unit and you can now collect some Notes with numbers.
Show
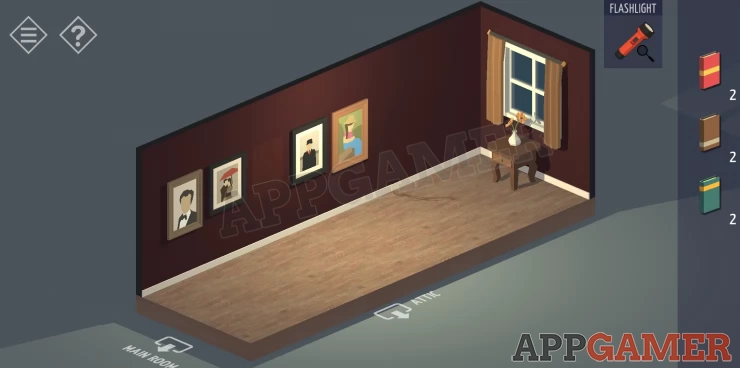
In the main room, view the wall with the painting on.
Tap the painting and notice a small lump on the left, tap this to open the painting and reveal a keypad lock with a 5 digit code.
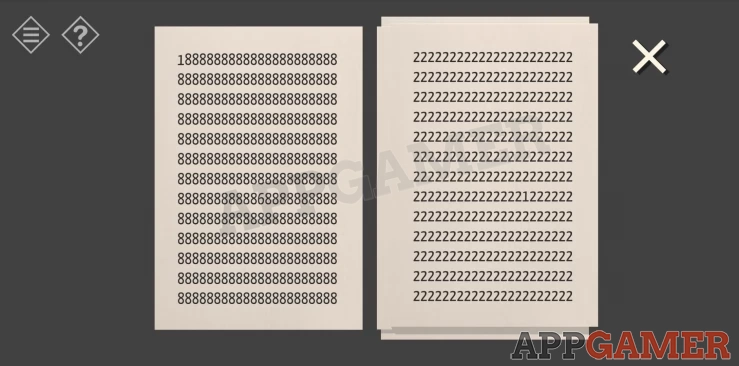
Hint: Check the papers you found with numbers printed on them.Show
Another Hint: There are 5 papers, the first number printed on each sheet tell you the order (2 are out of order).Show
Solution: The number you need for each entry is on each sheet of paper. But you need to check carefully to find it. It may not be the one that is printed many times.Show
Code: 61394Show
Once you have entered the code you will be able to tap a control to open locks.
Go back into the corridor and there is now a secret door open at the end. Tap to go down to the basement.
The basement is dark and you cannot turn on the lights. Use the flashlight to check around the room.
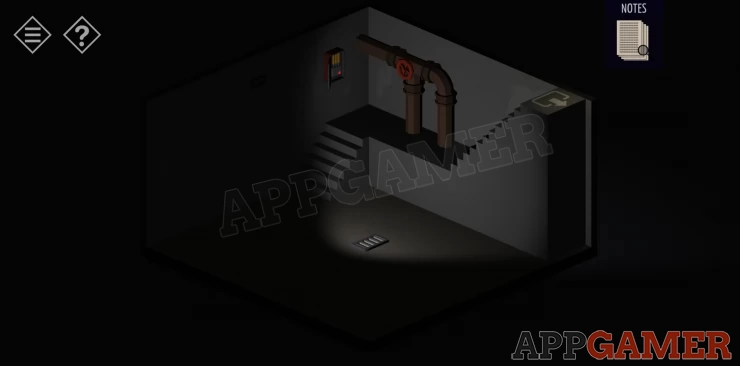
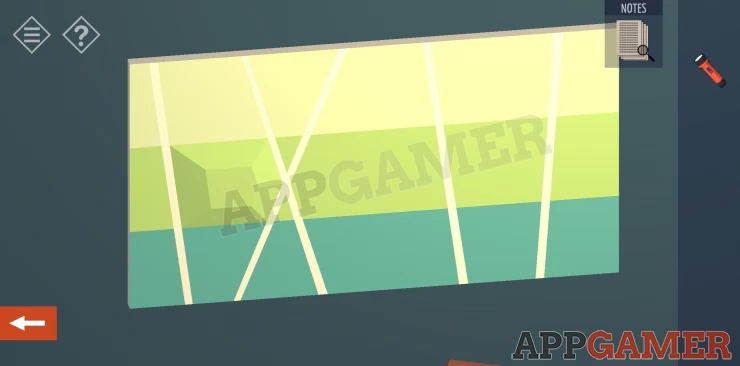
Rotate the view and find the workbench on the back wall. Tap this to view it and see a note about driving your father crazy when you were a child. This then gives you a prompt about turning lights off in the bedroom.
On the wall above the workbench is a safe that you need the combination for.
Hint: Follow the directions about lights in the bedroom.Show
Solution: Go back up to the bedroom and use the light switch to turn the lights on and off. As you do, once in a while when you turn them on the room will not light up as normal but have a different appearance to it. When this happens check the roomShow
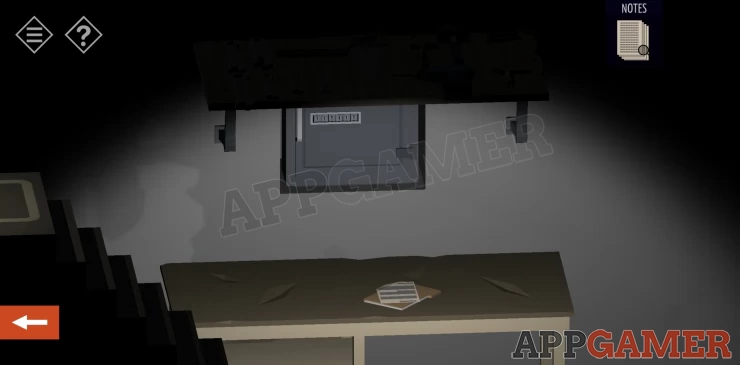
Code: 882255Show
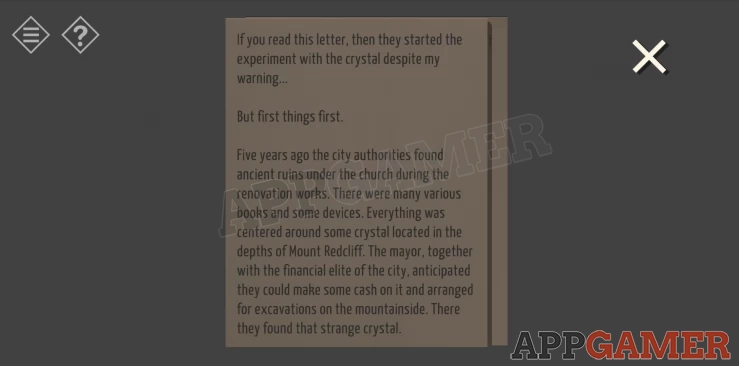
Open the safe to find a paper with details of the device and crystal. And then the location of your next destination. The NEXT lab.
You have completed Chapter 7 and can now move on to Chapter 8. If you have any questions for this game please check the Answers Page to ask it there.
We have questions and answers related to this topic which may also help you: Show all